3 Built-In Ovens with Pizza Function: Review 2026
How easily crispy-crust pizza turns out:
Masterful quality from your home oven!
April 23, 2026

Hardly any other appliance can shape the character of a kitchen as fundamentally as the oven – and not merely in terms of design, but even more so functionally. After all, it is one of the appliances on which the comfort and efficiency of baking a wide variety of foods at home largely depend. Whether buttery golden-brown French croissants, fruity juicy Austrian apricot cake, or airy Italian focaccia – given this tremendous culinary variety, the oven is part of the basic equipment that many consumers simply do not want to do without. Yet expectations placed on modern ovens have also risen noticeably over the past few years. They are expected not only to master the fundamental tasks associated with cooking meat, fish, vegetables & more, but also to impress through convenience, efficiency, and intelligent cooking programs that make even more demanding dishes much easier to succeed with. What is truly intriguing, however, are those ovens whose functions do not stop at the standard essentials, but which are capable of fully catering to specific culinary preferences with the help of modern technology. A particularly vivid example of this is the pizza functions found on some ovens: after all, truly great pizza requires a perfectly coordinated combination of very high temperature, even temperature distribution throughout the oven cavity, and a uniform baking process that leaves the base crisp and crunchy without drying out the toppings above it. This is exactly where the pizza functions mentioned above come in: they are intended not only to make baking pizza much easier, but ultimately to enable pizzas of truly masterful quality that should fully satisfy even the most discerning gourmets.
For precisely this reason, over the past few weeks we carefully tested three built-in ovens with pizza functions: the AEG TX7PB63FSB, the Bauknecht BBI4S8HM1SK, and the Gorenje GO66E PIZZA350C. In our oven test, however, we did not focus solely on the convenience each model offers, but also on its baking performance – with particular emphasis on the respective pizza function. We therefore tested extensively whether these three built-in ovens can truly deliver a powerful pizza function promising excellent results – using pizzas of very different kinds. At the same time, we naturally also examined all the other properties of the models that typically play a role in the purchase decision for a built-in oven: for example, we looked very closely at the electrical power draw during use in different cooking programs, the sound pressure level emitted during each cooking process, the safety associated with use, and much more. So if you are planning to buy a built-in oven with a pizza function in the near future, the following test report should be well worth reading.
Key points
Who is it for?
For all consumers who would like to buy a powerful oven with a pizza function in the near future. This time, we focused primarily on the pizza functions of the AEG TX7PB63FSB, the Bauknecht BBI4S8HM1SK, and the Gorenje GO66E PIZZA350C, but we also illustrate everything else that is likely to influence the purchase decision for such an oven (that is, basic ease of use, noise emissions, power consumption, and much more).
What is interesting?
The AEG TX7PB63FSB and the Gorenje GO66E PIZZA350C already come with special accessories from the factory that make baking pizza easier and greatly improve pizza quality: for example, special metal plates are included here that make the pizza base crisp and crunchy. The Bauknecht BBI4S8HM1SK, by contrast, has to do without such an accessory bundle.
What else should be mentioned?
The ovens we tested this time each offer very different degrees of ease of use: for example, only the AEG TX7PB63FSB features a touch-sensitive screen on which you can scroll, swipe, and so on. In addition, it includes a special assistant that can not only adjust all cooking parameters specifically to the food in question, but can also guide the user through the relevant cooking process; the assistant can do this for 97 different dishes.
What do I need to know?
Which oven bakes the best pizza?
The AEG TX7PB63FSB bakes the best pizza – thanks in part to the accessories already included from the factory, namely the heavy cast-iron pizza plate, and the special pizza program in which we measured temperature peaks of ≈ 334.6 °C. In the AEG TX7PB63FSB, the pizza gets a crisp, crunchy base, the rim develops a superb leopard pattern, and the cheese & other toppings acquire an excellent flavor. But the Gorenje GO66E PIZZA350C can also bake pizza of quite attractive quality: after all, it too comes with a special pizza plate, thanks to which the pizza base becomes very crisp. The Bauknecht BBI4S8HM1SK, finally, can bake a pizza that is largely appealing overall, but which may remain somewhat paler by the end of the baking process: for example, the base tends to become rather brittle, partly because no pizza plate is included from the factory. But what about baking speed? Well, the baking time always depends on the level of browning you want to achieve in the end. Yet the AEG TX7PB63FSB regularly needs ≈ 2:30 – 3:30 min, the Gorenje GO66E PIZZA350C ≈ 3:30 – 7:00 min, and the Bauknecht BBI4S8HM1SK ≈ 7:00 – 10:00 min, each after the preheating phase has ended. So when it comes to baking pizza, the AEG TX7PB63FSB is also the fastest oven we tested this time.
Which oven is easiest to operate?
The AEG TX7PB63FSB is the most convenient to operate: the reason lies in the excellent quality of its touch-sensitive screen, the intuitive design of the menus available here, and the extremely valuable assistant that makes cooking meat, fish, vegetables & more much easier. The AEG TX7PB63FSB also provides helpful information linked to the respective cooking process: for example, after selecting the pizza program it clearly indicates when you need to place the pizza on the pizza plate, whether you may want to extend the baking process by about ≈ 15 s beyond the original baking time, and much more. We miss this level of convenience in the Bauknecht BBI4S8HM1SK and the Gorenje GO66E PIZZA350C. Their operation is also largely problem-free, but unfortunately there are a few shortcomings here that make an occasional look into the ovens’ instruction manuals necessary.
Which oven offers the widest variety of cooking programs, cooking modes, etc.?
Here, the AEG TX7PB63FSB is ahead of the other ovens: with 18 basic cooking programs and 97 different dishes that can be selected via the assistant, the range of preparation options the AEG TX7PB63FSB opens up is truly very broad. But the Gorenje GO66E PIZZA350C is also certainly respectable: it offers 16 basic cooking programs and 22 more specialized programs linked to individual dishes, covering the majority of the foods people want to prepare in an oven (such as cakes, soufflés, gateaux, and much more). The selection in the Bauknecht BBI4S8HM1SK is much more limited: in addition to its 8 basic cooking programs, it offers only 6 more specialized programs, most of which merely refer to broadly defined categories of food (such as casseroles, baked goods, or meat), meaning that the cooking parameters usually still have to be adjusted manually. So the AEG TX7PB63FSB not only offers the widest range of cooking programs, but also makes cooking much more convenient than the ovens from Bauknecht and Gorenje thanks to its assistant.
Which oven is the quietest?
The AEG TX7PB63FSB is largely very quiet during cooking, although the respective sound pressure level always depends on the cooking program and the associated cooking parameters. If, however, we refer to the pizza program that was our primary focus in this test, the Gorenje GO66E PIZZA350C proves to be much louder: here, the fan that regularly switches on at the end of the preheating phase can cause the sound pressure level to rise sharply (max. ≈ 47.4 dB); the Bauknecht BBI4S8HM1SK emits a similar sound pressure level, although we found it much more pleasant during the test.
Which oven is the most economical?
The ovens’ power consumption is likewise always dependent on the respective cooking program and cooking parameters. But here too we can once again refer to the pizza program: including the preheating phase and the subsequent baking time recommended by the manufacturer, baking one pizza in the AEG TX7PB63FSB is associated with electricity consumption of ≈ 0.54 – 0.57 kWh (≈ €0.15), whereas the figure is ≈ 0.81 – 0.89 kWh (≈ €0.22 – 0.24) for the Bauknecht BBI4S8HM1SK and ≈ 1.13 – 1.24 kWh (≈ €0.31 – 0.33) for the Gorenje GO66E PIZZA350C. Electricity consumption can vary with baking time – depending above all on the degree of browning you want to achieve by the end of the baking process; that is why we have given ranges here, with the endpoints corresponding to light and strong browning. Incidentally, electricity consumption per pizza decreases after the first pizza because the consumption associated with preheating can then be distributed across the total number of pizzas. All things considered, the AEG TX7PB63FSB is therefore more economical when baking pizza than the ovens from Bauknecht and Gorenje. If you would like to calculate, based on your own eating habits, what electricity costs you need to budget for baking pizza in these models, you can use the power-consumption and electricity-cost calculators we programmed specifically for each model: Here (AEG TX7PB63FSB), here (Bauknecht BBI4S8HM1SK), and here (Gorenje GO66E PIZZA350C).
Test overview
1st place: TX7PB63FSB from AEG – “excellent” (95.4%)
The AEG TX7PB63FSB is completely hassle-free to use from the moment it is unpacked, comes from the factory with very attractively finished materials, serves meat, fish, and vegetable dishes in exemplary quality, and unlocks the enjoyment of masterful pizza: the special PIZZAEXPERT ensemble, which includes an impressive cast-iron pizza plate and an elegant pizza peel, makes baking exquisite pizzas exceptionally easy. The pizza programs of the TX7PB63FSB were just as impressive: in the PIZZAEXPERT pizza program, the screen displays everything essential. It is also wonderful that you can extend the pizza program by ≈ 15 s at a time once the original timer has elapsed, if, for example, you want to give the pizza an even more pronounced aroma. Anyone who wants to delve fully into the subject can enjoy valuable tips & tricks via the app, for example on dough preparation. The assistant accessible via the touchscreen is also magnificent, making the cooking of all kinds of dishes much faster and simpler. Because the user experience is far more pleasant than with the other models, and because the AEG TX7PB63FSB also excels in terms of speed, temperature stability, and much more, it takes the overall test victory this time; and in view of its comparatively low power consumption per pizza, it also secures the energy-saving win.

Click here for the detailed test report on the TX7PB63FSB from AEG.
2nd place: GO66E PIZZA350C from Gorenje – “excellent” (94.0%)
The GO66E PIZZA350C from Gorenje also stands out from the crowd of other models thanks to its truly solid user experience: particularly pleasing is the rotary knob, which allows the cooking parameters of a cooking program (temperature & more) to be set much faster and more simply than on the other models. The exterior and interior materials of the Gorenje GO66E PIZZA350C are also thoroughly appealing in quality. Finally, the model proved very reliable when cooking food, not least because the temperatures are distributed evenly throughout the oven cavity. The model is just as appealing when baking pizzas: only occasionally can it happen here that the upper parts of the pizza (salami, ham, etc.) burn, but this can easily be avoided by adjusting the timer. One point of criticism, however, is that the model illustrates the cooking programs only by means of graphics that are quite difficult to interpret. Another surprising point is that the GO66E PIZZA350C from Gorenje can become very loud during use, especially in the pizza program at maximum temperature.

Click here for the detailed test report on the GO66E PIZZA350C from Gorenje.
3rd place: BBI4S8HM1SK from Bauknecht – “excellent” (92.3%)
The Bauknecht BBI4S8HM1SK is an all-rounder that is appealing in quality in basically every respect, though it cannot stand out significantly over the models from AEG and Gorenje in any one area. Use is largely problem-free, although, for example, the cooking parameters cannot be adjusted as smoothly as on the other two models; the user experience could also be improved if the model displayed not only graphics on its screens, but also, for example, the name of the relevant cooking program, etc. The temperatures in the pizza program are entirely acceptable, but fluctuate much more during the baking process than in the models from AEG and Gorenje. This is of secondary importance in the final analysis; a much more significant problem is the fact that the Bauknecht BBI4S8HM1SK does not come with special pizza accessories from the factory, meaning that, for example, no pizza plate that improves the quality of the base is included: this is the reason why the pizza base in this model is much more likely to become brittle. The pizzas – and especially their rims – also regularly fail to develop a leopard pattern in this model, unlike, for example, in the model from AEG. Very pleasing, on the other hand, is the quality of the materials used here: even after extensive use, they showed no significant signs of wear. In view of its comparatively low price, this model takes the value-for-money award.

Click here for the detailed test report on the BBI4S8HM1SK from Bauknecht.
AEG
TX7PB63FSB
Key features
- Size of the oven cavity (Hmax × Wmax × Dmax): ≈ 35.4 × 47.8 × 42.5 cm
- Volume of the oven cavity (Vmax): ≈ 72.0 l
- Temperatures (tmin – tmax): 50–340 °C (depending on cooking program & more)
- Cooking programs: 18 (see the table)
- Automatic programs: 97 (see the table)
- Accessories: Baking tray (1 ×); combination rack (1 ×); pizza tray (1 ×, cast iron); pizza peel (1 ×); telescopic rails (2 ×, FlexiRunnersTM); drip tray (1 ×)
Pros
- intuitive operating process
- excellent baking performance for pizza (also thanks to the very valuable pizza bundle)
- evenly distributed temperatures in all cooking programs
- excellent cooking performance for vegetables, meat, and fish in all cooking programs
- very easy cleaning (highly effective pyrolytic cleaning in three levels)
- comparatively low sound pressure level
- comparatively low power draw
- valuable cooking assistant that makes preparing many dishes effortless
Cons
- the style of the black-and-white menus could be modernized in some respects
Size, weight & more
At ≈ 59.4 × 59.6 × 56.9 cm (Hmax × Wmax × Dmax of the model), the AEG TX7PB63FSB is of entirely standard size. This is why it can be installed very easily in an existing niche. Another great point is its low weight of only ≈ 38.0 kg (mmax of the model). This means transporting it into the home can be done without any effort at all: the model can, for example, also be carried up or down several flights of stairs without being excessively strenuous.
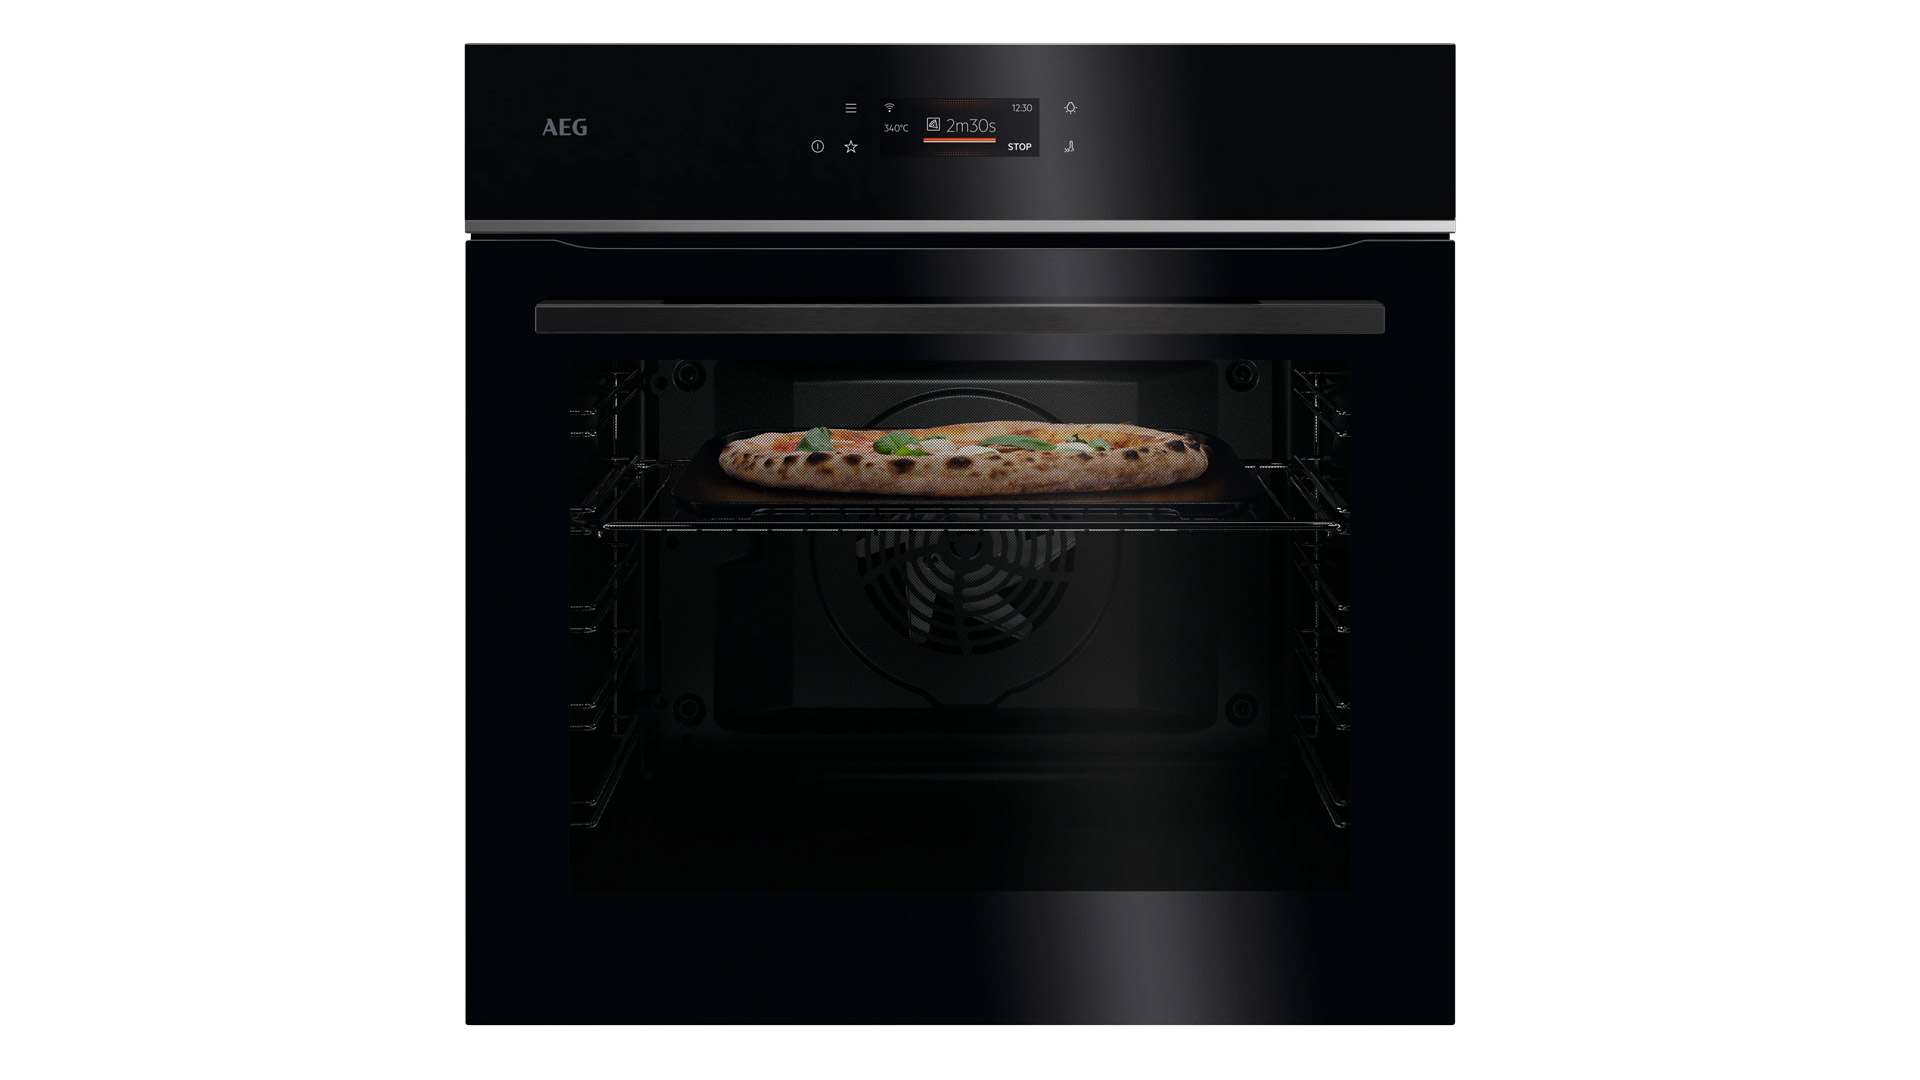
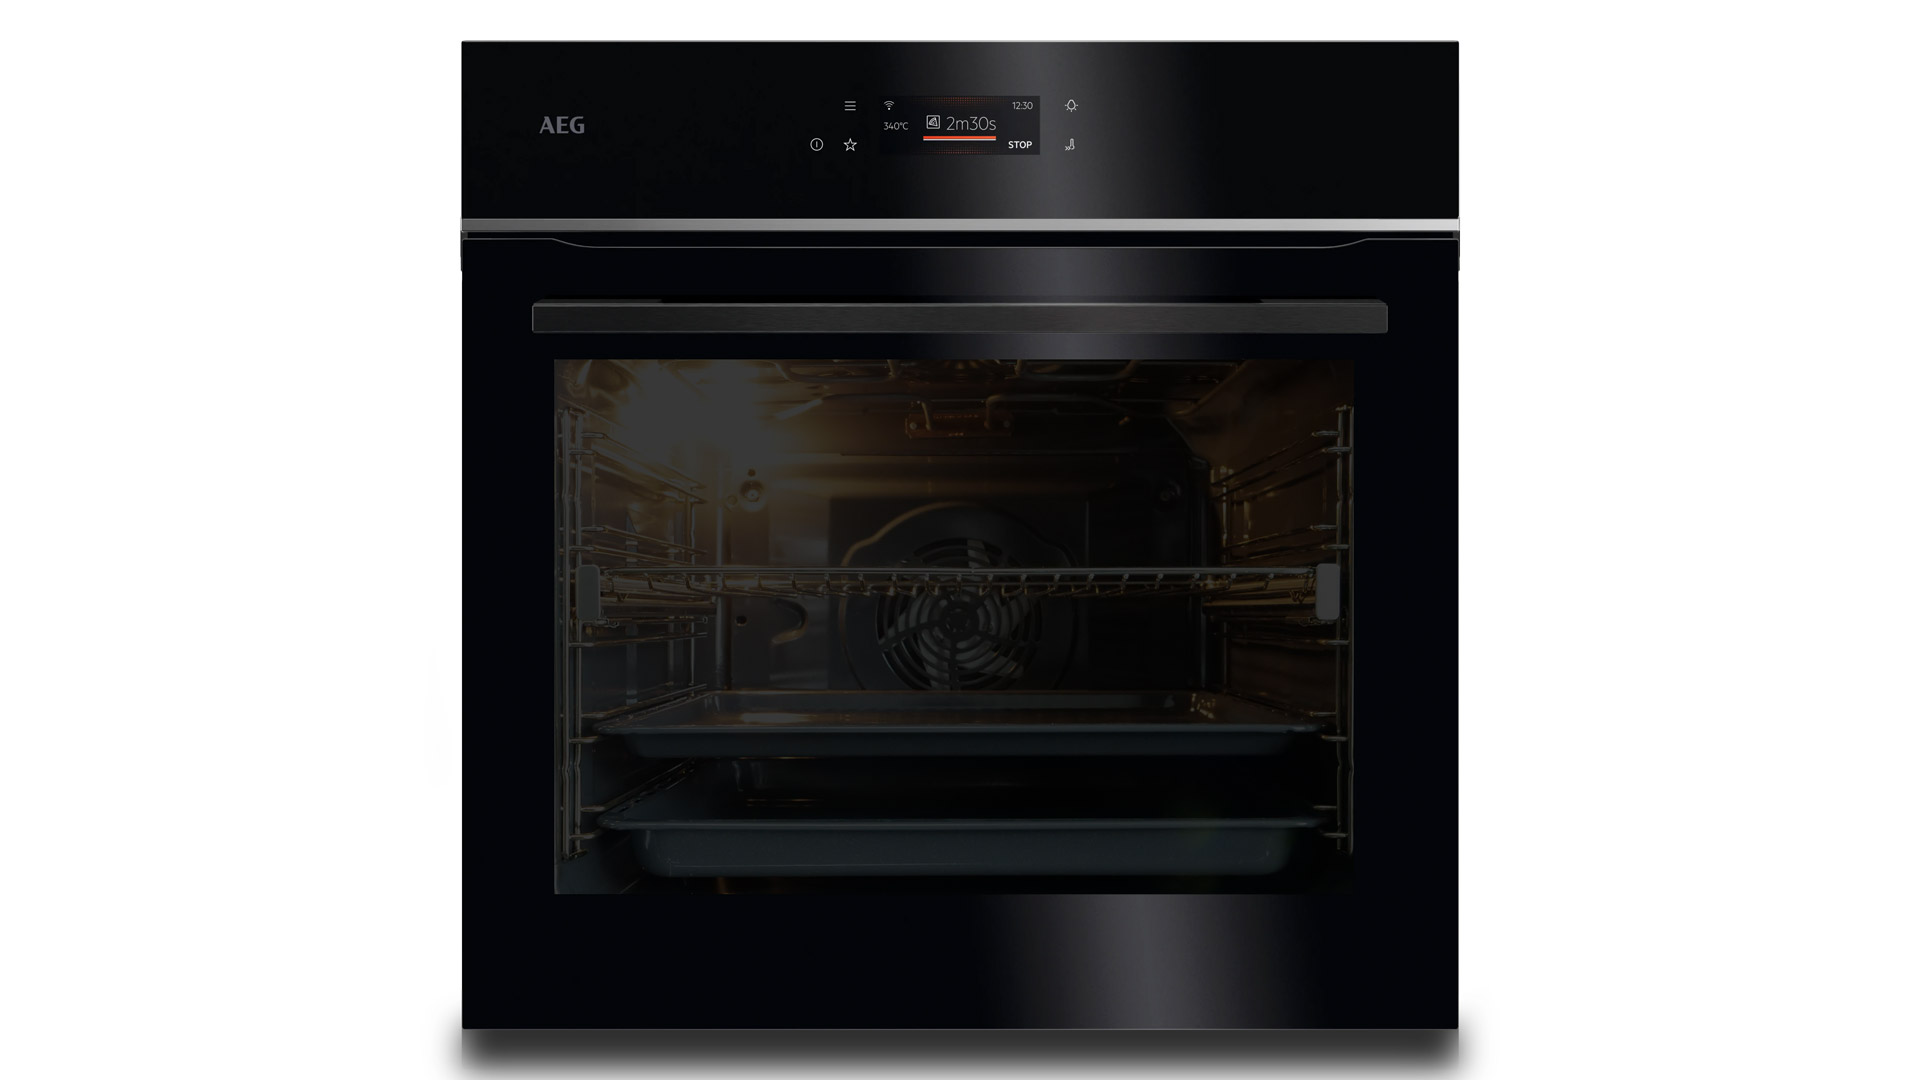 The model from the front
A large part of the front is taken up by the door visible here: it is almost entirely glazed, so that during a cooking process you can look into the oven cavity at any time and inspect the food placed inside more closely. At ≈ 46.2 × 31.4 cm (Wmax × Hmax of the glass), it is so large that really every corner of the oven cavity can be seen from the front. The lamp provided here illuminates everything very evenly and brightly, making it easy to assess the exterior of the food in question without having to open the door. Only when several trays are used at the same time does the situation change, because the upper tray can block a good portion of the light shining down from the top left. The lamp regularly switches on or off automatically: for example, it always illuminates the oven cavity in bright yellow during a cooking program. Of course, it can also be switched on or off manually via the relevant menu.
The oven cavity is generously sized (≈ 35.4 × 47.8 × 42.5 cm, Hmax × Wmax × Dmax of the oven cavity), providing a spacious usable volume of ≈ 72.0 l. This is not gigantic, but still more than sufficient even if you want to prepare several dishes at the same time: for example, it is perfectly possible to place a whole corn-fed chicken inside and then let it become nicely crisp under the grill. Especially in multi-person households (for example, families), the usable volume available here is a significant advantage.
 The shelf levels
A handful of shelf levels are provided in the oven cavity from the factory, as with many other models. In practice, we also found this sufficient: the height at which cooking should take place can be set quite precisely, thus adapting not only to the requirements of the respective food, but also to the cooking mode.
The levels are marked on the sides with the relevant numbers (1, 2, 3, etc.), so you always know which level is being referred to when, for example, the instruction manual refers to a specific level; the same applies to the cooking assistant, which we will discuss in more detail elsewhere.
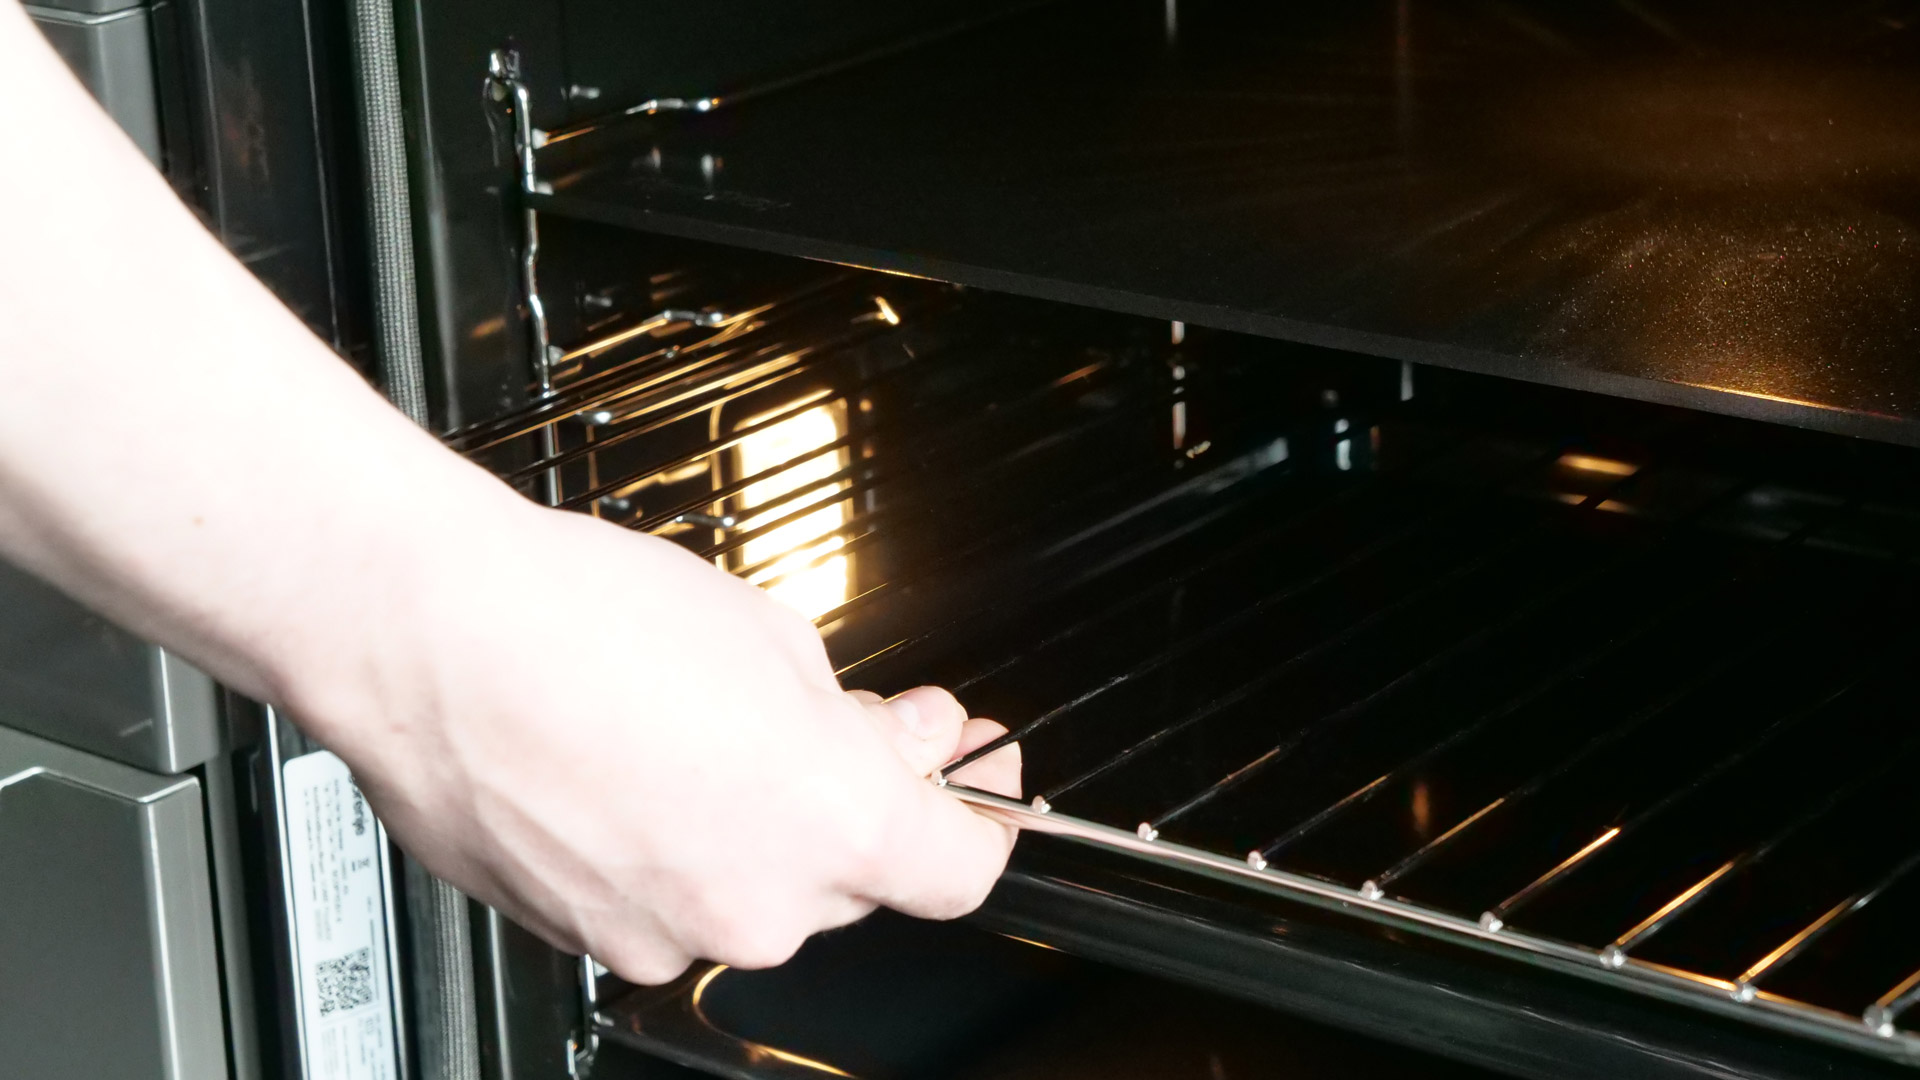
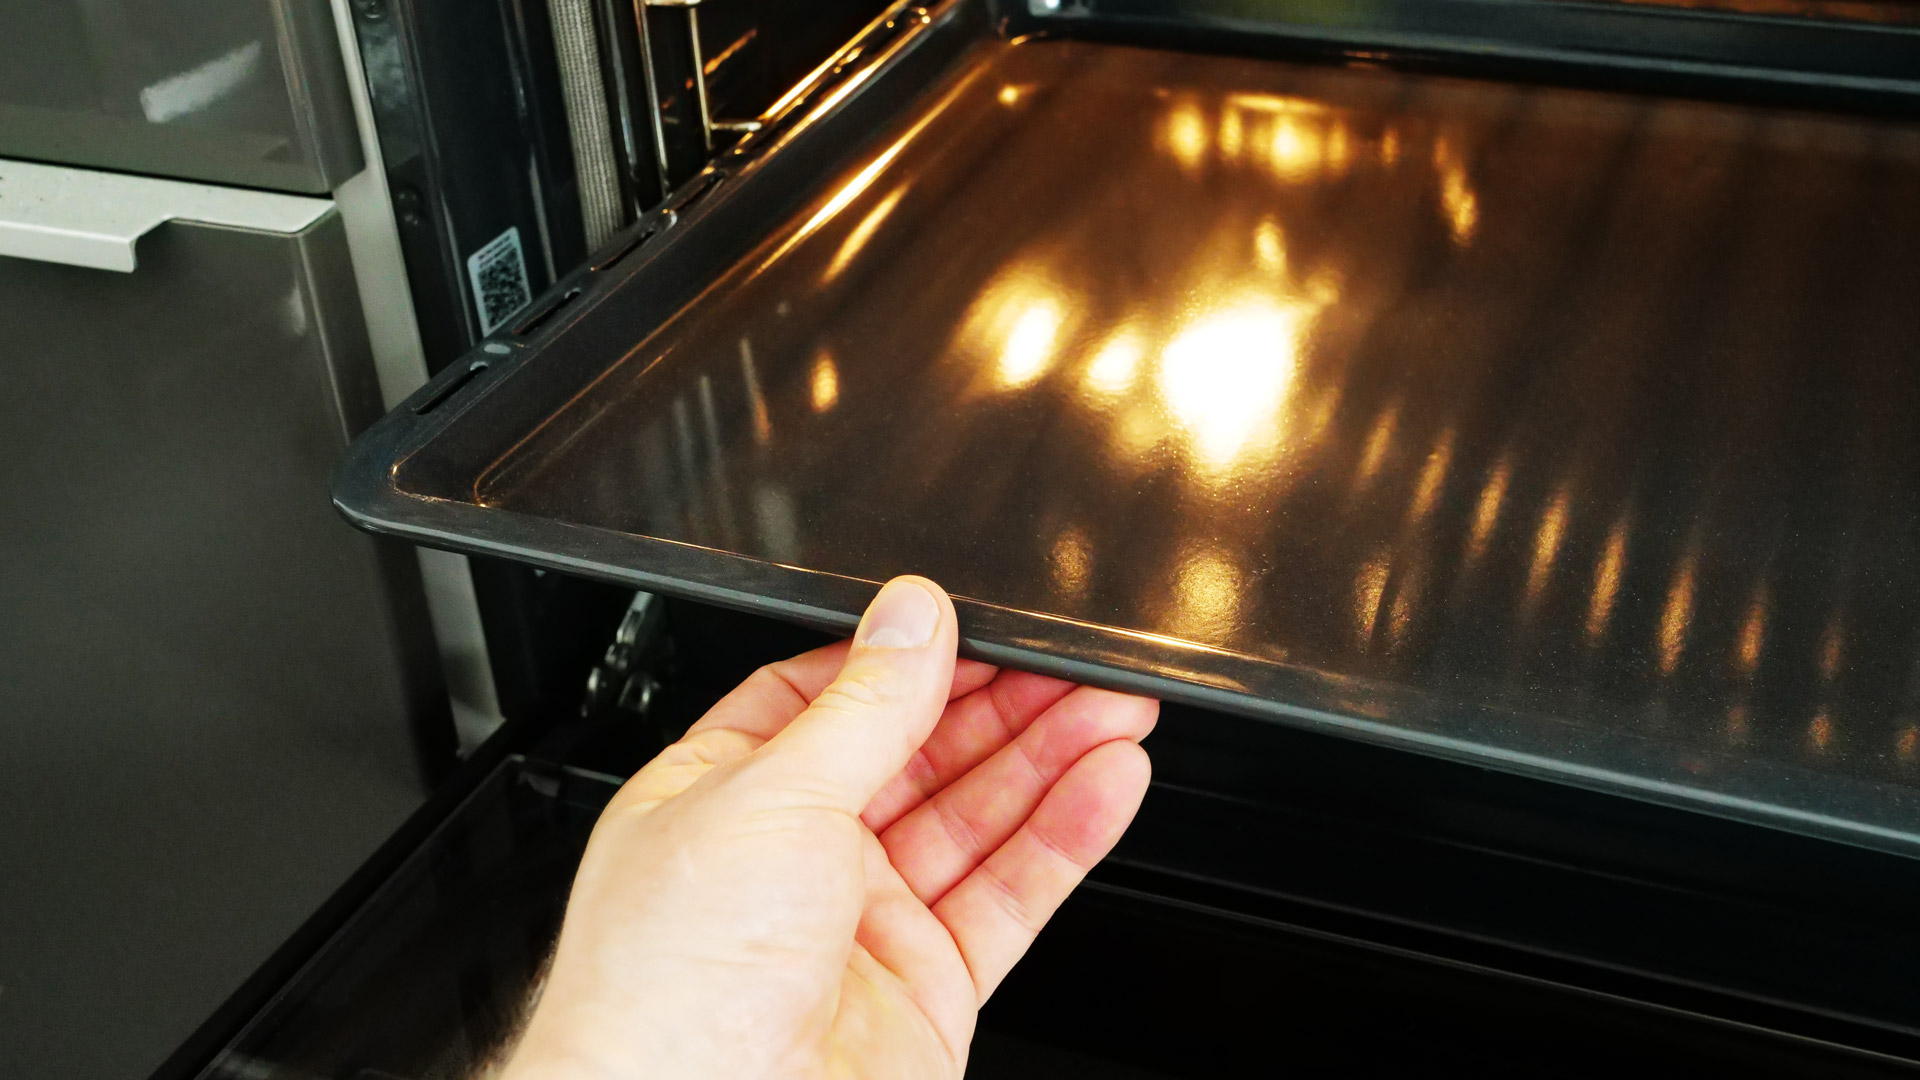 How trays & more slide
The quality of the mechanism on the sides is exceptionally solid: for example, the baking tray provided here can be pushed in and pulled out without any effort at all, without catching during the sliding movement.
The same also applies to all the other accessories, such as the wire rack provided here. Their use is consistently smooth.
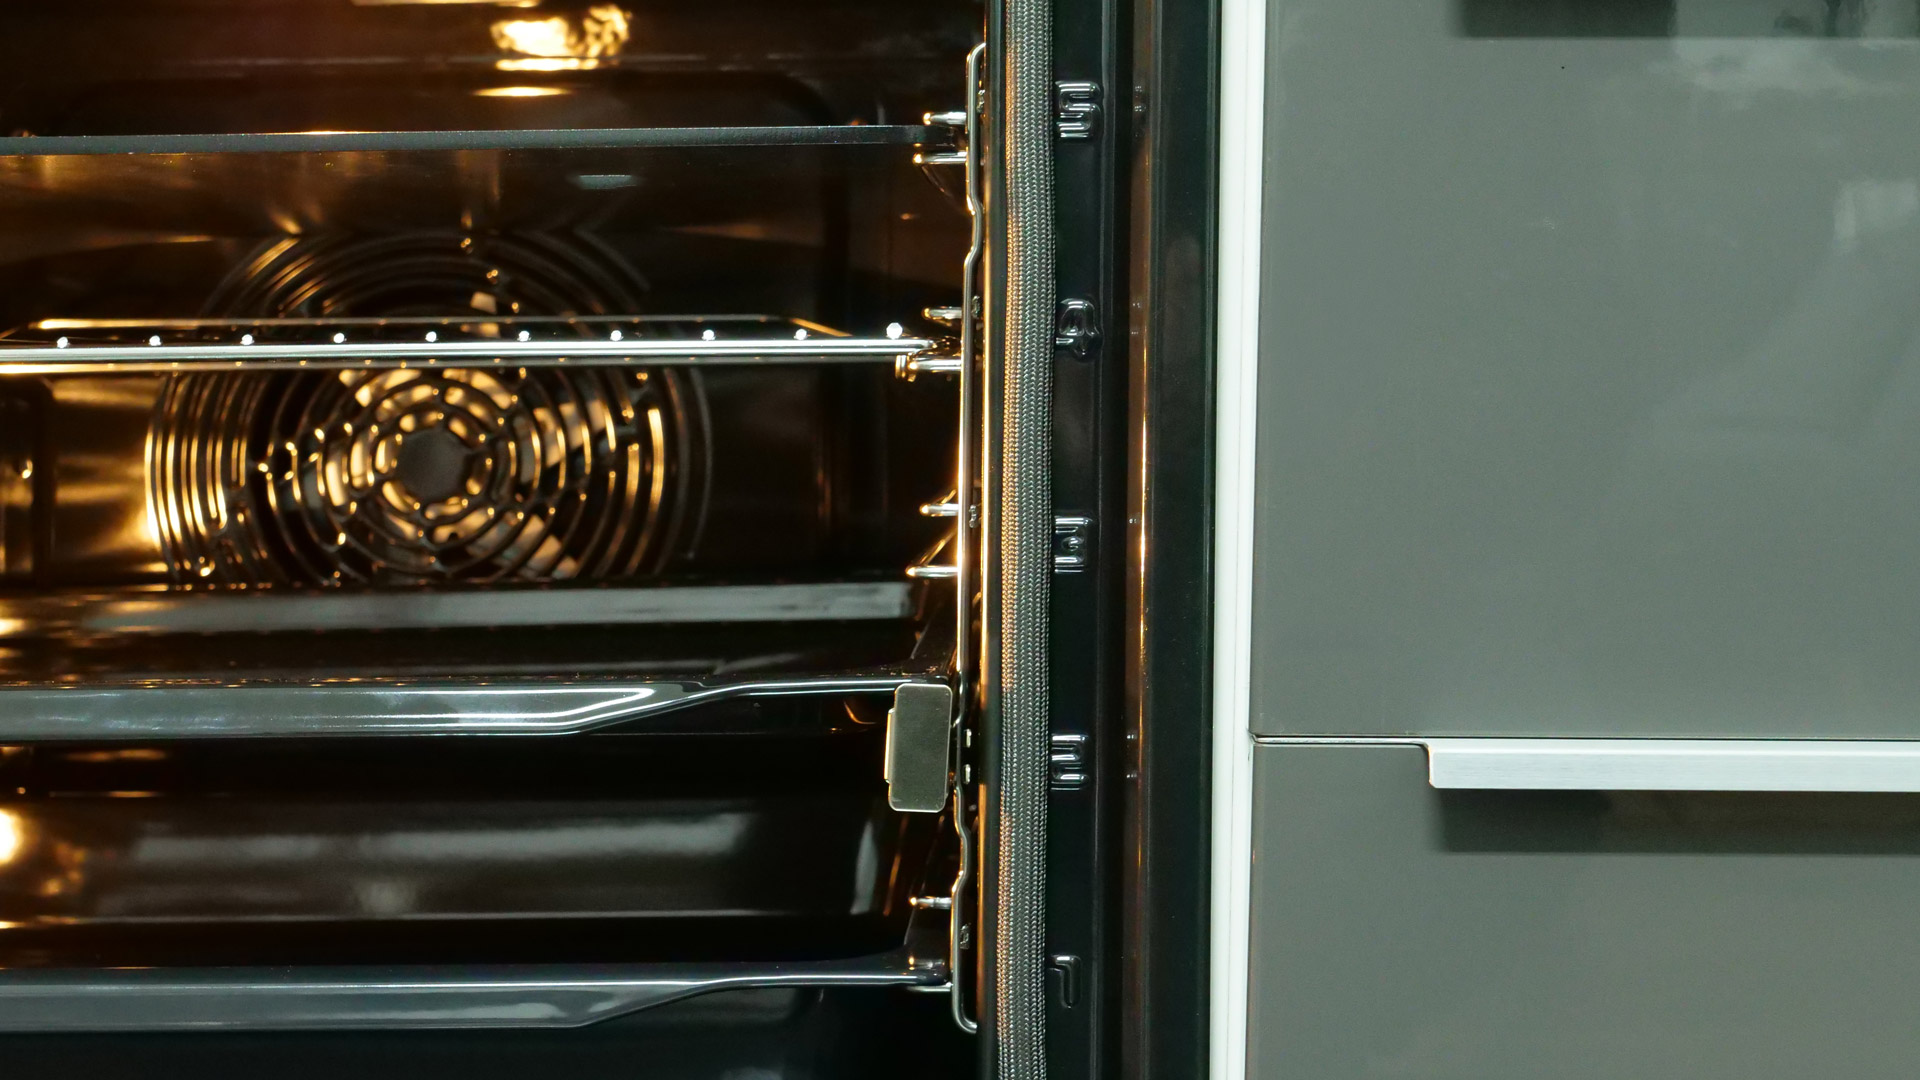
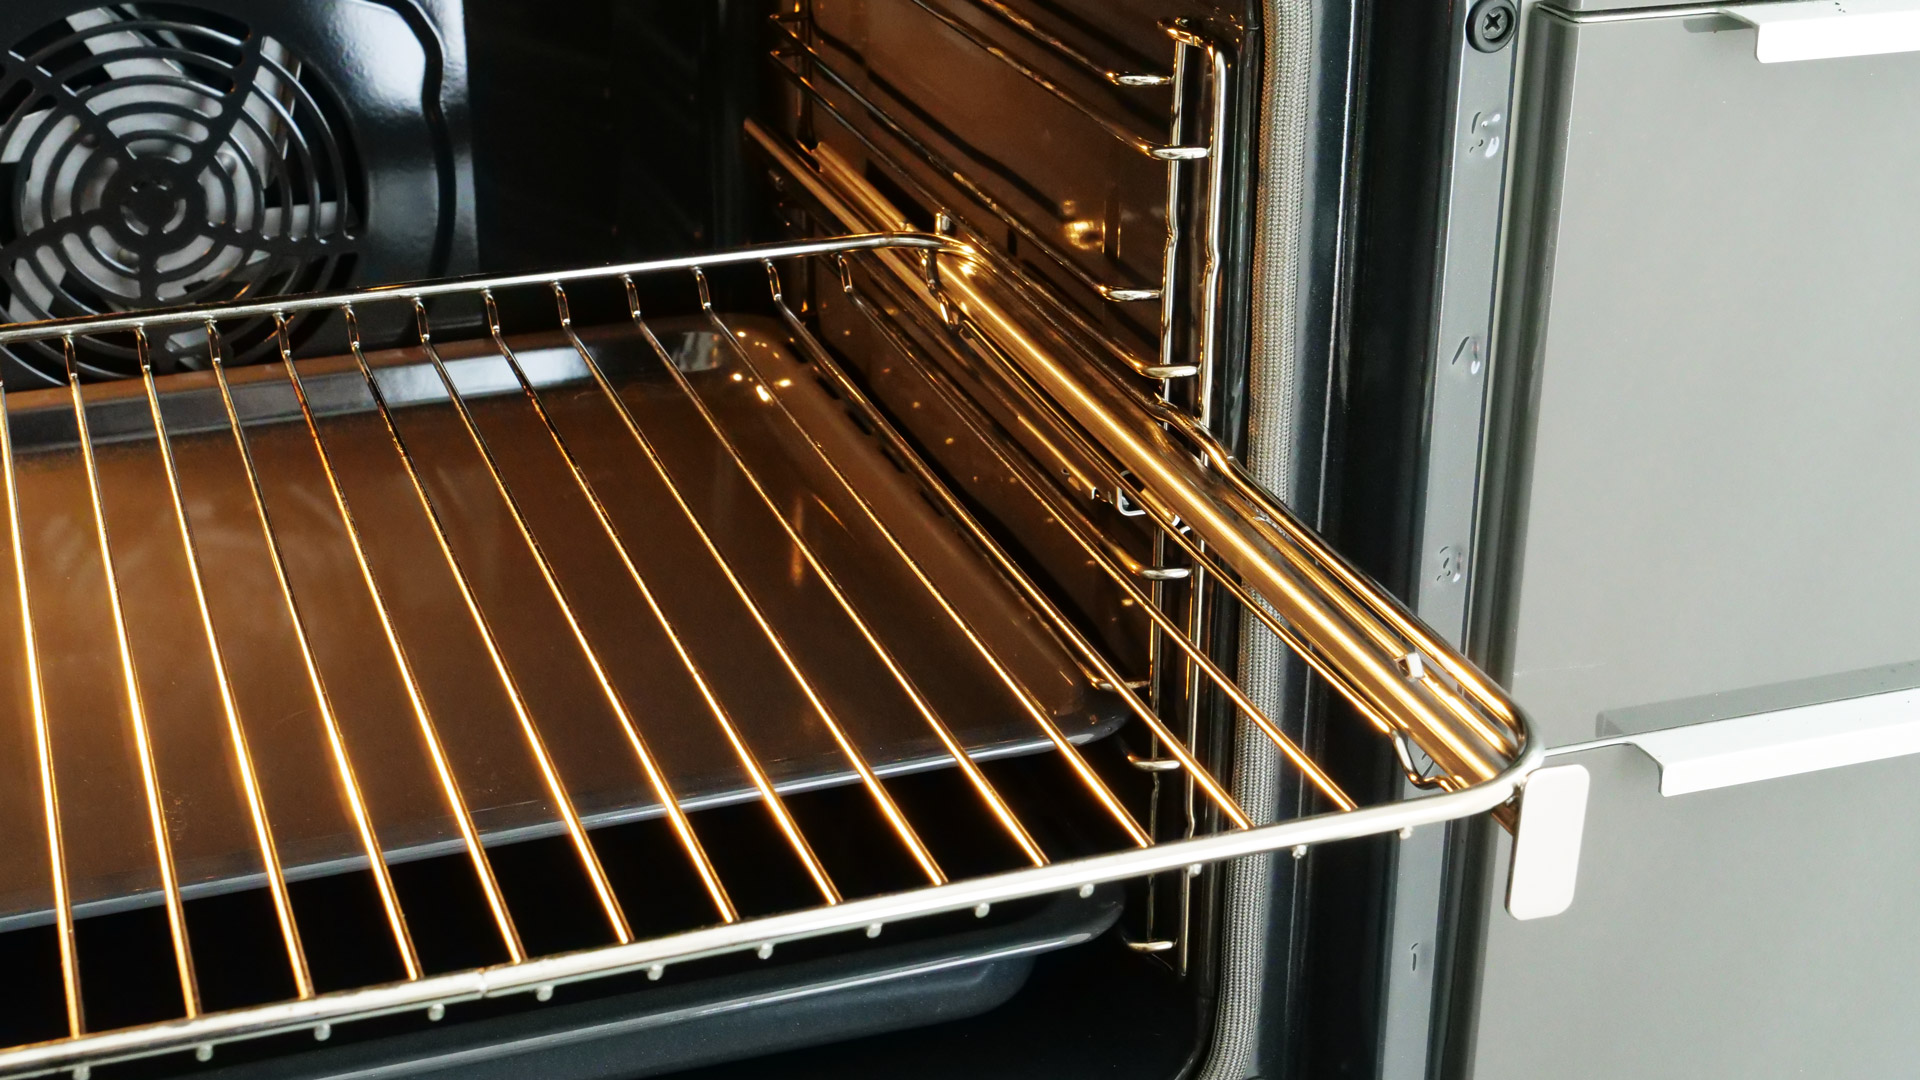 The telescopic rails
The TX7PB63FSB already comes from the factory with a pair of telescopic rails (FlexiRunnersTM) that can be anchored effortlessly to the rails of the oven cavity. The telescopic rails are of impressive quality, which is evident, for example, in their stability: the tray, rack, etc. carried by them can be loaded with heavy foods without this impairing usability. The rails are easy to use, and the gliding behavior is smooth all around.
In addition to the telescopic rails, the standard accessories also include a pair of baking trays and a versatile rack. One of the baking trays is a classic conventional tray with a modest height of ≈ 2.5 cm; you can place virtually any imaginable food on it. The other baking tray, by contrast, is much deeper (≈ 4.2 cm), so that, for example, it can be slid beneath the rack during grilling: juices, marinades, etc. can then drip down and collect in this tray, keeping the floor of the oven cavity clean. The rack, finally, is very sturdy and can be used completely flexibly regardless of which cooking program is selected. Lastly, there is also a special cast-iron pizza tray, which we will, however, examine more closely elsewhere – when we turn to baking pizza in the TX7PB63FSB.
Operation
 The door handle
Thanks to the excellent quality of the hinges provided here, the door can be handled smoothly at all times. One reason is the handle located at the front, which can be gripped securely from all angles without, for example, its edges digging into the hand. Only slight resistance can be felt when lowering the door; the door hinges allow a very smooth opening movement and never catch.
What is also very nice when closing it is a special mechanism that ensures that the door does not close too quickly while being swung upward, which could potentially cause damage (SOFTCLOSING).
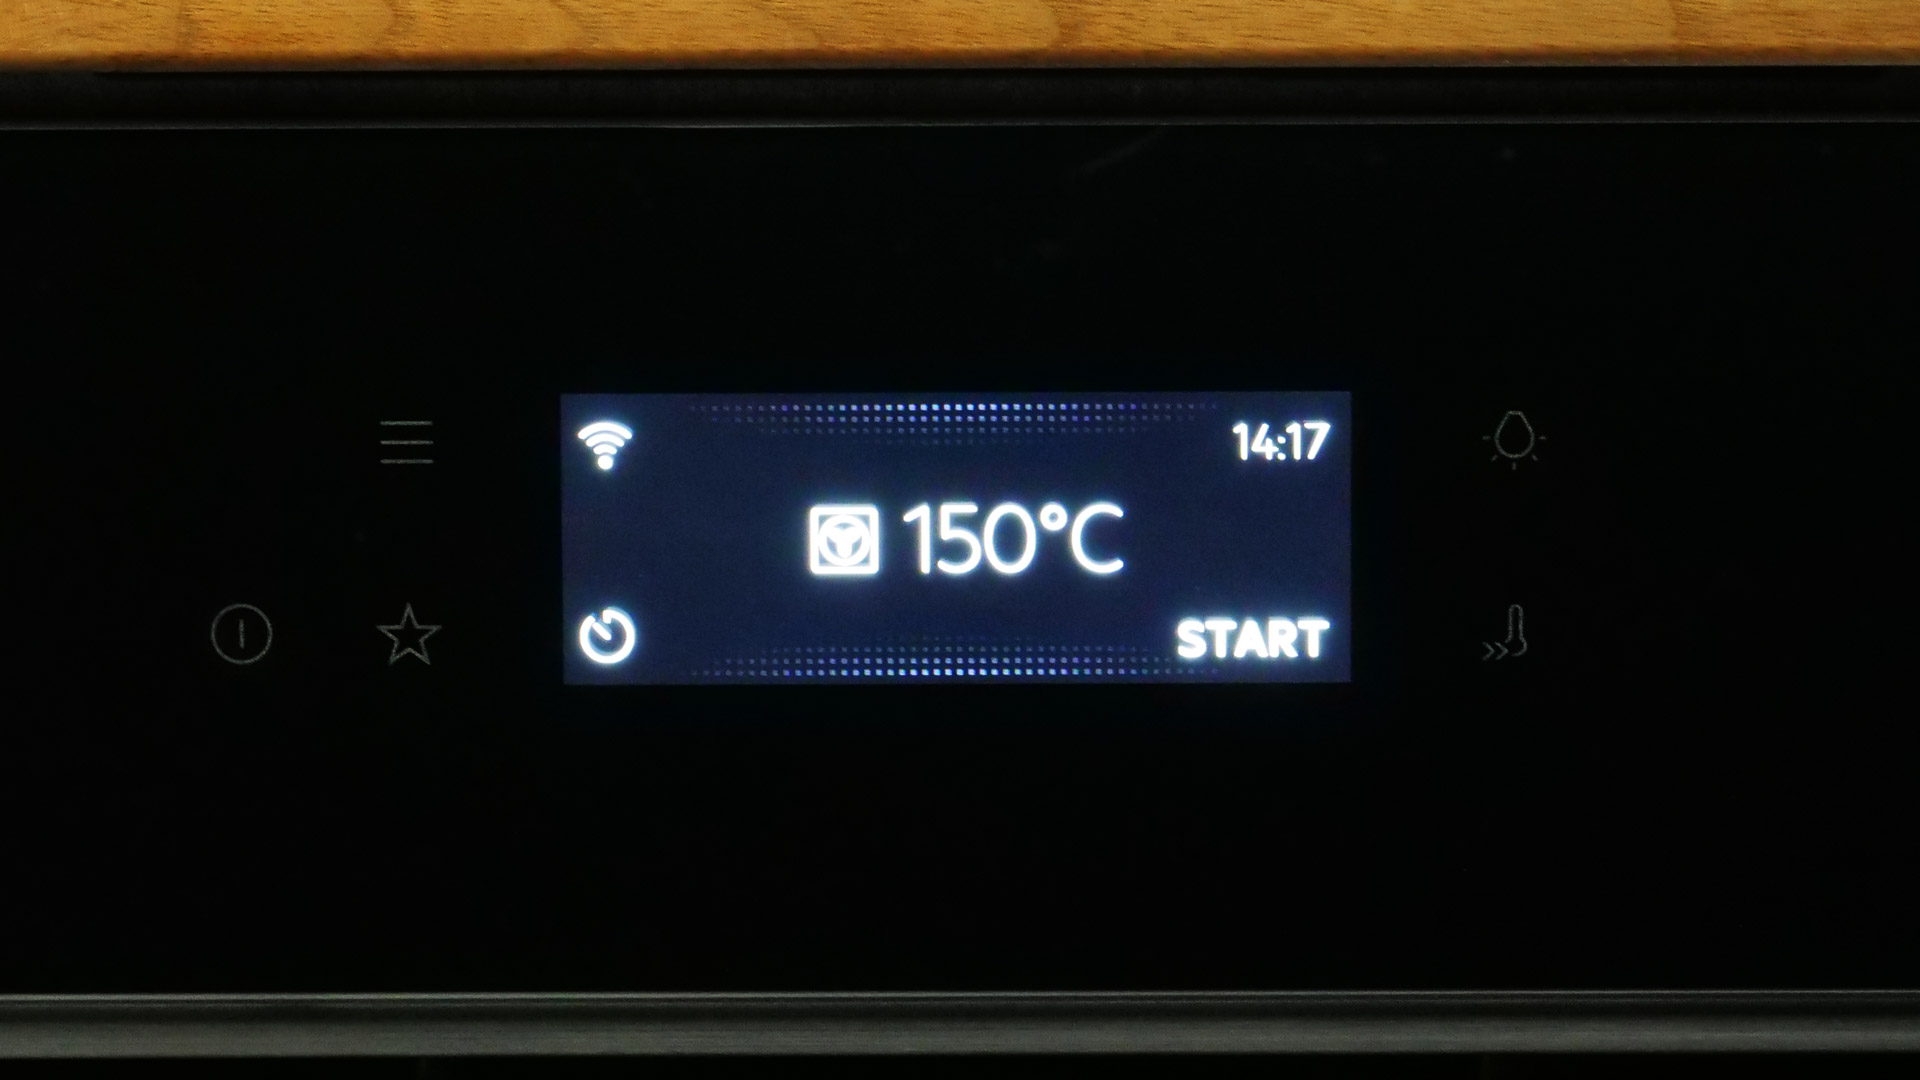 The touch panel
The touch panel is located above the door. In addition to the touch controls, there is also a touchscreen from which all the essentials (cooking programs, cooking parameters, etc.) can be read. The touch controls can be reached easily from the front.
At ≈ 9.3 × 3.5 cm (Wmax × Hmax of the touchscreen), the touchscreen is of a proper size. Precisely because the touchscreen is so bright, everything can be read from it even from more than ≈ 1 m away, for example in the evening as well; only in direct sunlight must reflections be expected. Another essential point is the very solid size in which the touchscreen displays everything. For this reason, cooking-program names & more can be read effortlessly.
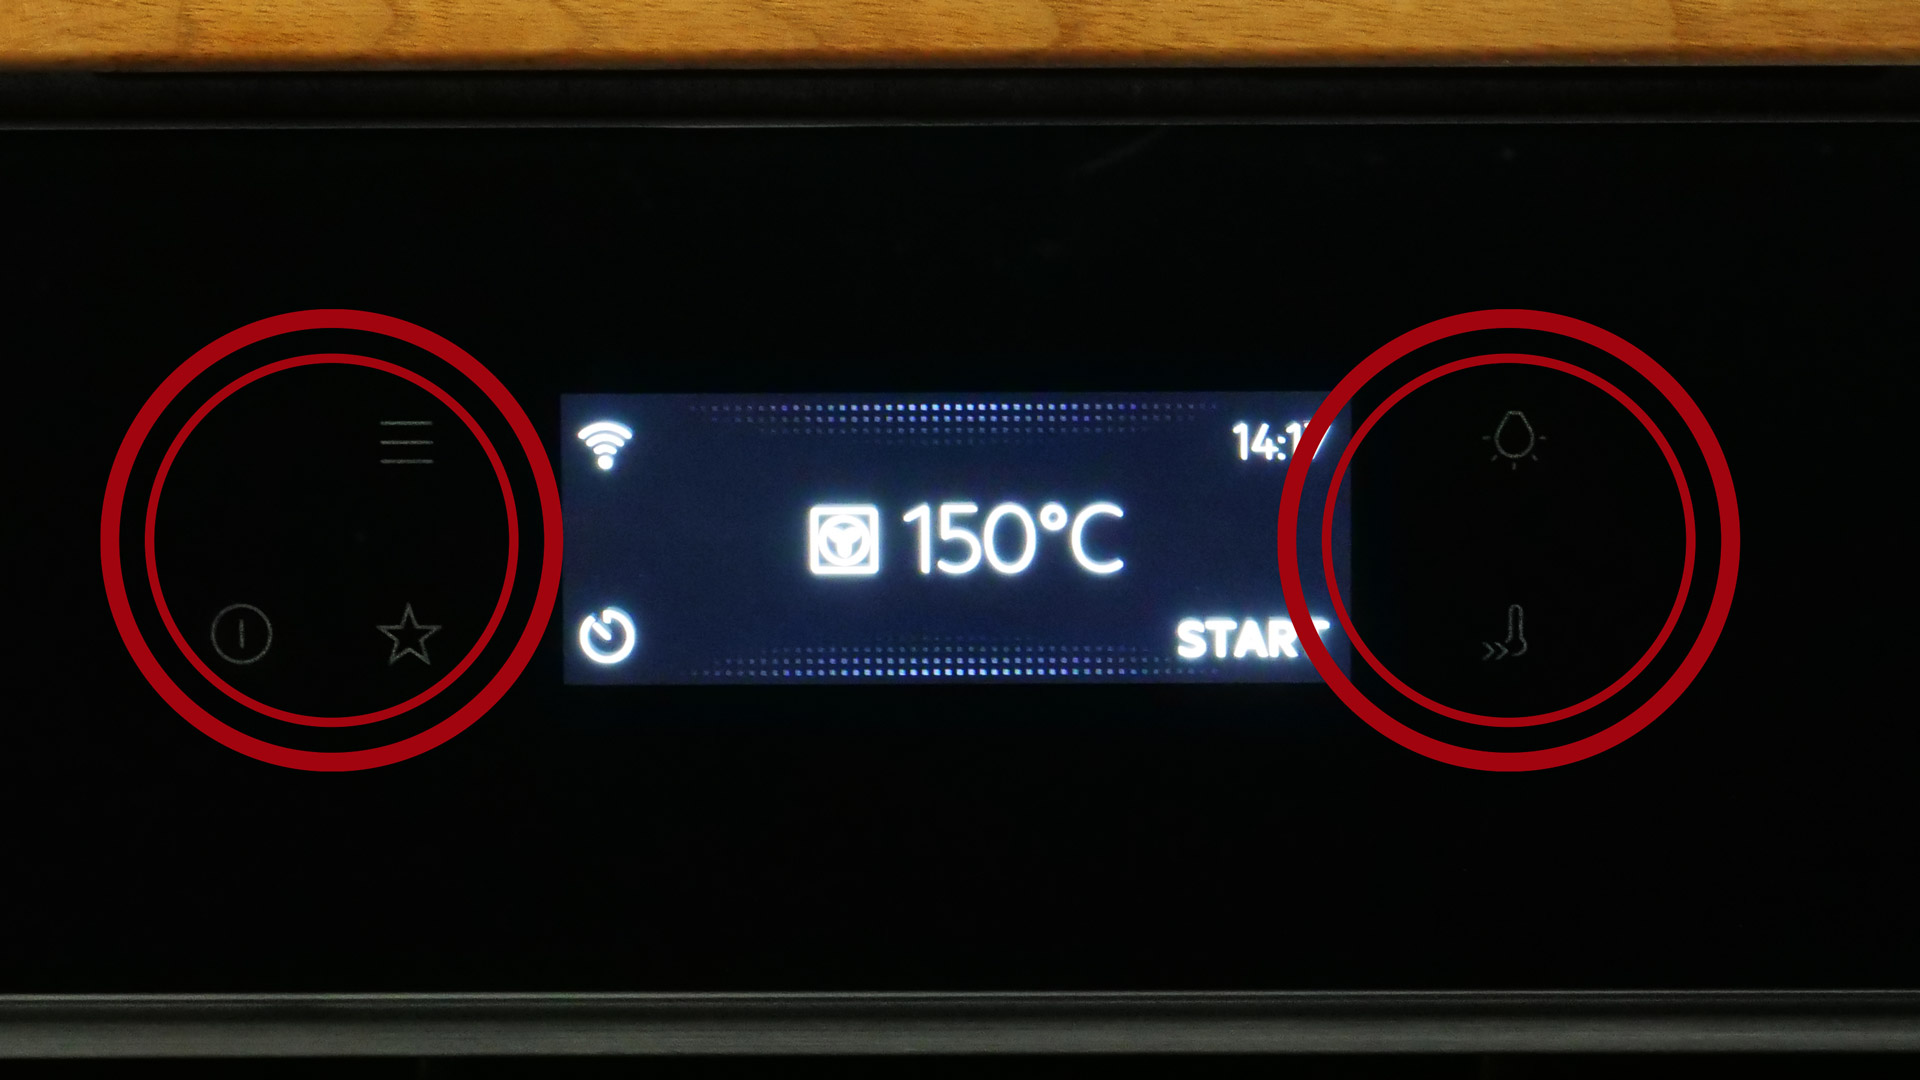 The side sections of the touch panel
The touchscreen is flanked by several touch controls: they respond very reliably to every gesture, usually within ≈ 0.5 s; only occasionally did we have to repeat gestures. The white graphics indicate which functions can be accessed by means of the touch controls. This is also why operation feels very intuitive; consulting the instruction manual is only very rarely necessary.
Thanks to the touch controls around the touchscreen, you can switch the TX7PB63FSB on and off completely, view the model’s various menus, access cooking programs previously saved as favorites, place a much faster preheating process before the respective cooking program, and switch the oven light on and off.
 The cooking programs
A choice of 18 different cooking programs is available: besides basics such as GRILL, HOT AIR, TOP & BOTTOM HEAT, etc., there are also very specialized cooking programs such as PIZZAEXPERT (see the table). After selecting such a cooking program, all essential cooking parameters can be set, above all the temperature the oven cavity should reach: these cooking parameters always depend on the respective program. Thus, in the PIZZAEXPERT program, for example, much higher temperatures of up to 340 °C can be selected than in other programs.
The touchscreen displays the essential cooking parameters throughout the entire cooking process, above all the cooking temperature in °C. Much is shown by means of graphics, in some cases simultaneously: for example, it is always visible which cooking program is currently being carried out. But the model also indicates other parameters using graphics, for example whether the start of the cooking process has been preplanned, meaning the model should set to work on its own in up to ≈ 23:59 h. These graphics are very valuable in everyday use, although many of them can only be classified with certainty after consulting the instruction manual.
 Selecting temperature & more
Thanks to the reliable response behavior of the touchscreen, the cooking parameters, such as the temperature shown here, can be adjusted without difficulty: with a simple swipe, you can scroll through all temperatures available for the respective cooking program. The animations the touchscreen shows, for example while swiping, are also exceptionally smooth. The temperature range depends on the current cooking program; however, the temperatures themselves can usually be changed very precisely (in increments of ± 5 °C).
The temperature range is enormous, so that you can in principle prepare all imaginable foods with the TX7PB63FSB: in the GRILL program, for example, a peak temperature of up to 300 °C can be selected and is then actually reached. Even demanding meat dishes (such as flank, rump, or sirloin steaks) can thus be given a wonderful grilled aroma without requiring much effort when searing the meat. Thanks to such temperatures, meat and fish become beautifully crisp on the outside while remaining perfectly juicy on the inside. This is also very valuable, for example, for sea bream, trout, and salmon. At the same time, much gentler temperatures are equally available with the TX7PB63FSB, for example in the DEHYDRATE program, in which vegetables & more can be dehydrated at a programmed minimum of 50 °C.
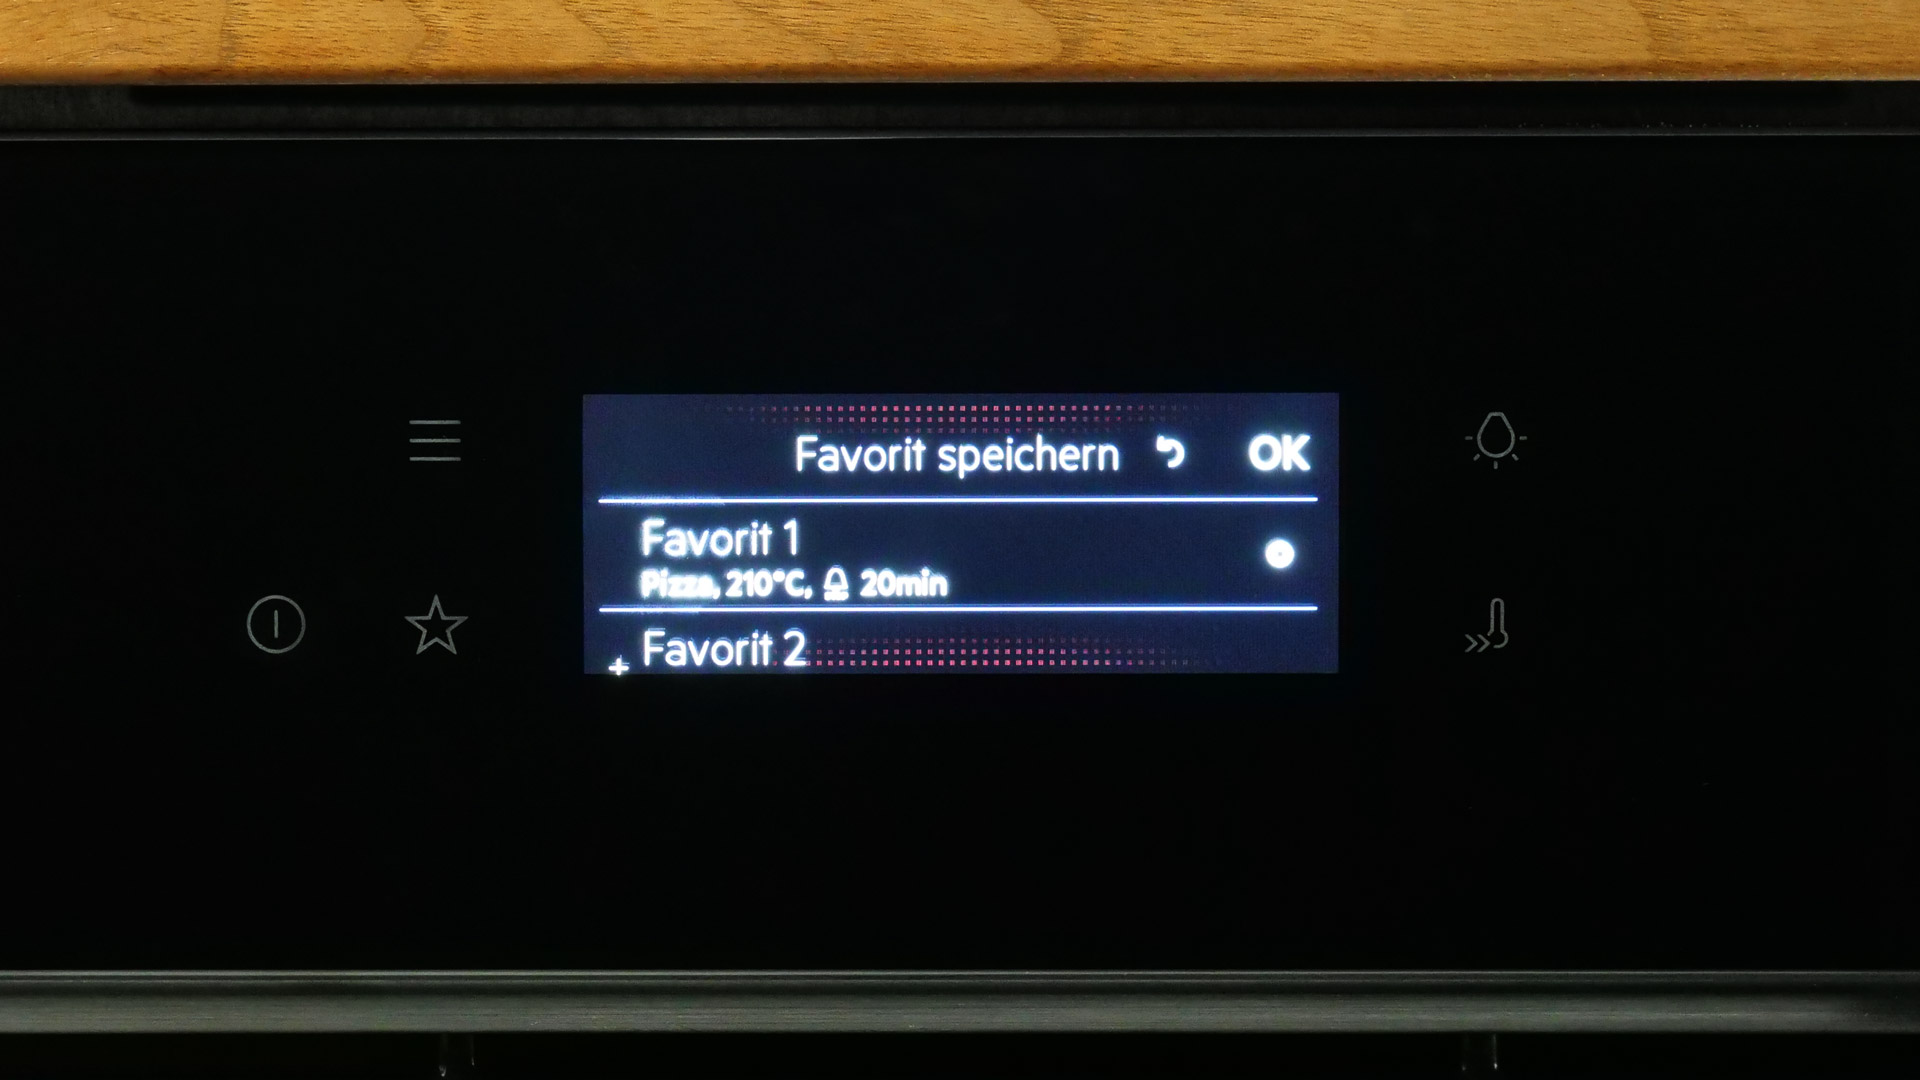 Selecting favorites
Another very clever feature is this: if you regularly want to prepare foods using the same cooking program with the same cooking parameters, you can save all of this as one of up to three favorites. These favorites can be accessed at any time, in just ≈ 1 s, via the relevant part of the touch panel and make cooking much faster and simpler.
The TX7PB63FSB can entice with many different conveniences that make using the model as a whole so intuitive that, in the end, truly anyone can enjoy excellent dishes. Another reason that has not yet been discussed in detail is the more specialized automatic programs that can be accessed via the COOKING ASSISTANT: they take away a large share of the effort associated with cooking meat, fish, vegetables, etc., because within them the model can set all essential cooking parameters on its own and adapt them to the dish in question. Speaking of dishes: 97 different ones can be selected in the menus available here, distributed across many groups. Throughout the cooking process, the TX7PB63FSB provides valuable information via the touchscreen, including, for example, the choice of grill-rack position in the oven cavity. Since we already looked at the COOKING ASSISTANT from AEG a few months ago (see here), we will confine ourselves now to a short judgment: the automatic programs of the TX7PB63FSB make cooking much easier and should be very welcome to anyone who enjoys trying out new, possibly demanding dishes – the respective cooking parameters also proved reliable on a regular basis.
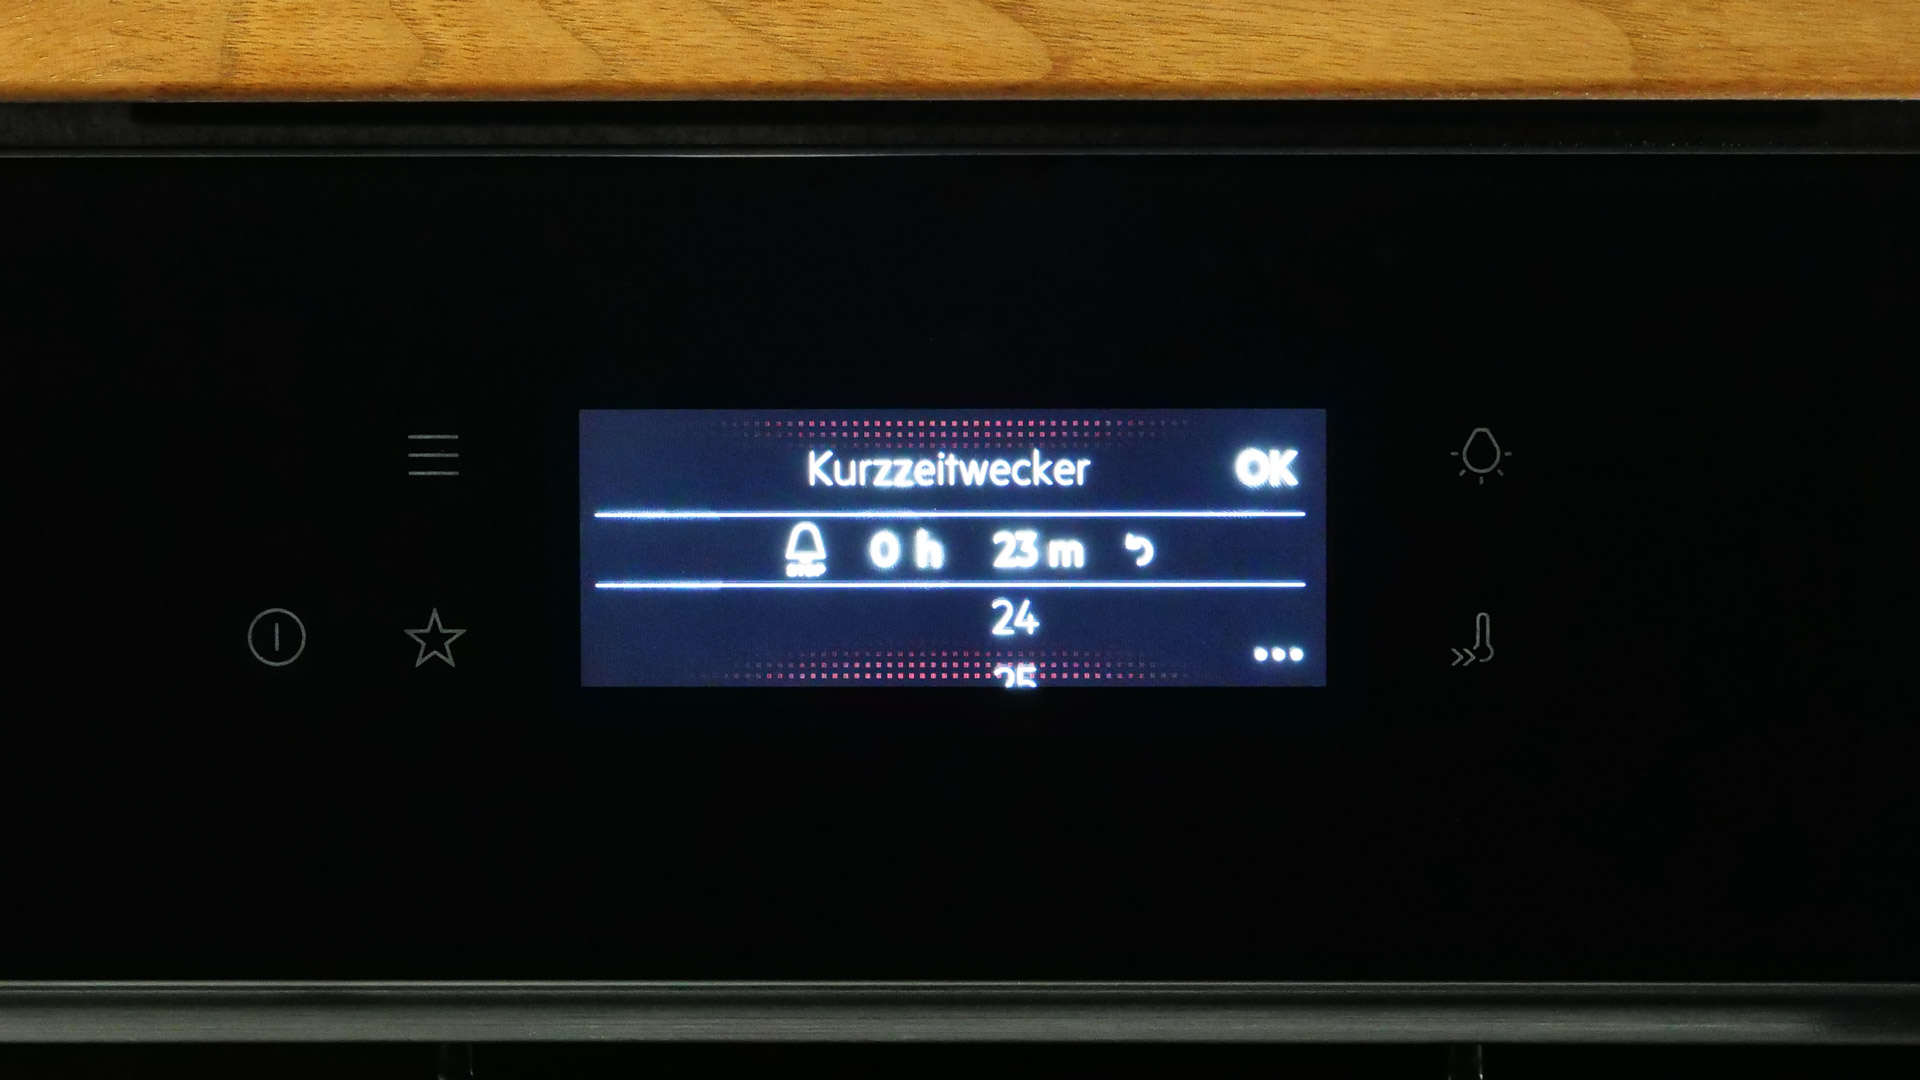 The timer
The timer of the TX7PB63FSB can be used sensibly in various situations. You can program what should happen after 00:01 – 23:59 h: at the end of the timer, the model can emit a sound as an alarm (max. ≈ 52.5 dB from ≈ 1 m), display a notice on the touchscreen, or end the cooking process. While this timer is active, the touchscreen continuously shows a suitable graphic.
However, use of the TX7PB63FSB can be made even more convenient by another timer: it is possible to preset when the model should start a cooking process if it is supposed to finish at a preprogrammable point in time (within 00:01 – 23:59 h). This is very valuable, for example, if you want to ensure that a dish can be served at a specific important time without having to give it any further thought – you only need to place the dish in the oven cavity before the planned start of the cooking process.
 The acoustic signals
During use, the TX7PB63FSB regularly emits sounds, for example at the end of the respective cooking program. The volume of these sounds can be adjusted as desired: they reach a sound pressure level of ≈ 38.4 – 52.5 dB from ≈ 1 m in front of the model. That is wonderful, because it allows you to ensure that the end of a cooking process can also be heard from other parts of the household if necessary.
Safety
 The model’s thermal insulation
Use of the TX7PB63FSB is consistently safe: as a rule, you do not need to worry about burning yourself on the model during normal use. Even if, for example, you use the maximum temperature when baking pizza and leave the model on for a full ≈ 30 min, the outer surfaces of the door & more become only moderately warm: for example, we measured a temperature peak of ≈ 40.2 °C on the door, so that essentially nobody should burn themselves here. The same applies, for example, to the touch panel, which has to be touched now and then during use (max. ≈ 32.8 °C.)
 The temperature of the handle
The same is true of the handle on the door: temperature peaks of ≈ 25.3 °C are anything but significant, so the handle can be grasped immediately after a cooking process at very high temperatures has ended without causing burns.
 The lock for the touch panel & touchscreen
The model can also be secured very easily against young children: after starting a cooking program, for example, the touch panel can be locked so that nobody can change the cooking parameters & more. In addition, the entire model can be locked: without the code that can be programmed beforehand as desired, nobody can use it anymore; the door is also securely locked by the mechanism provided here.
Cleaning
 Pyrolytic cleaning
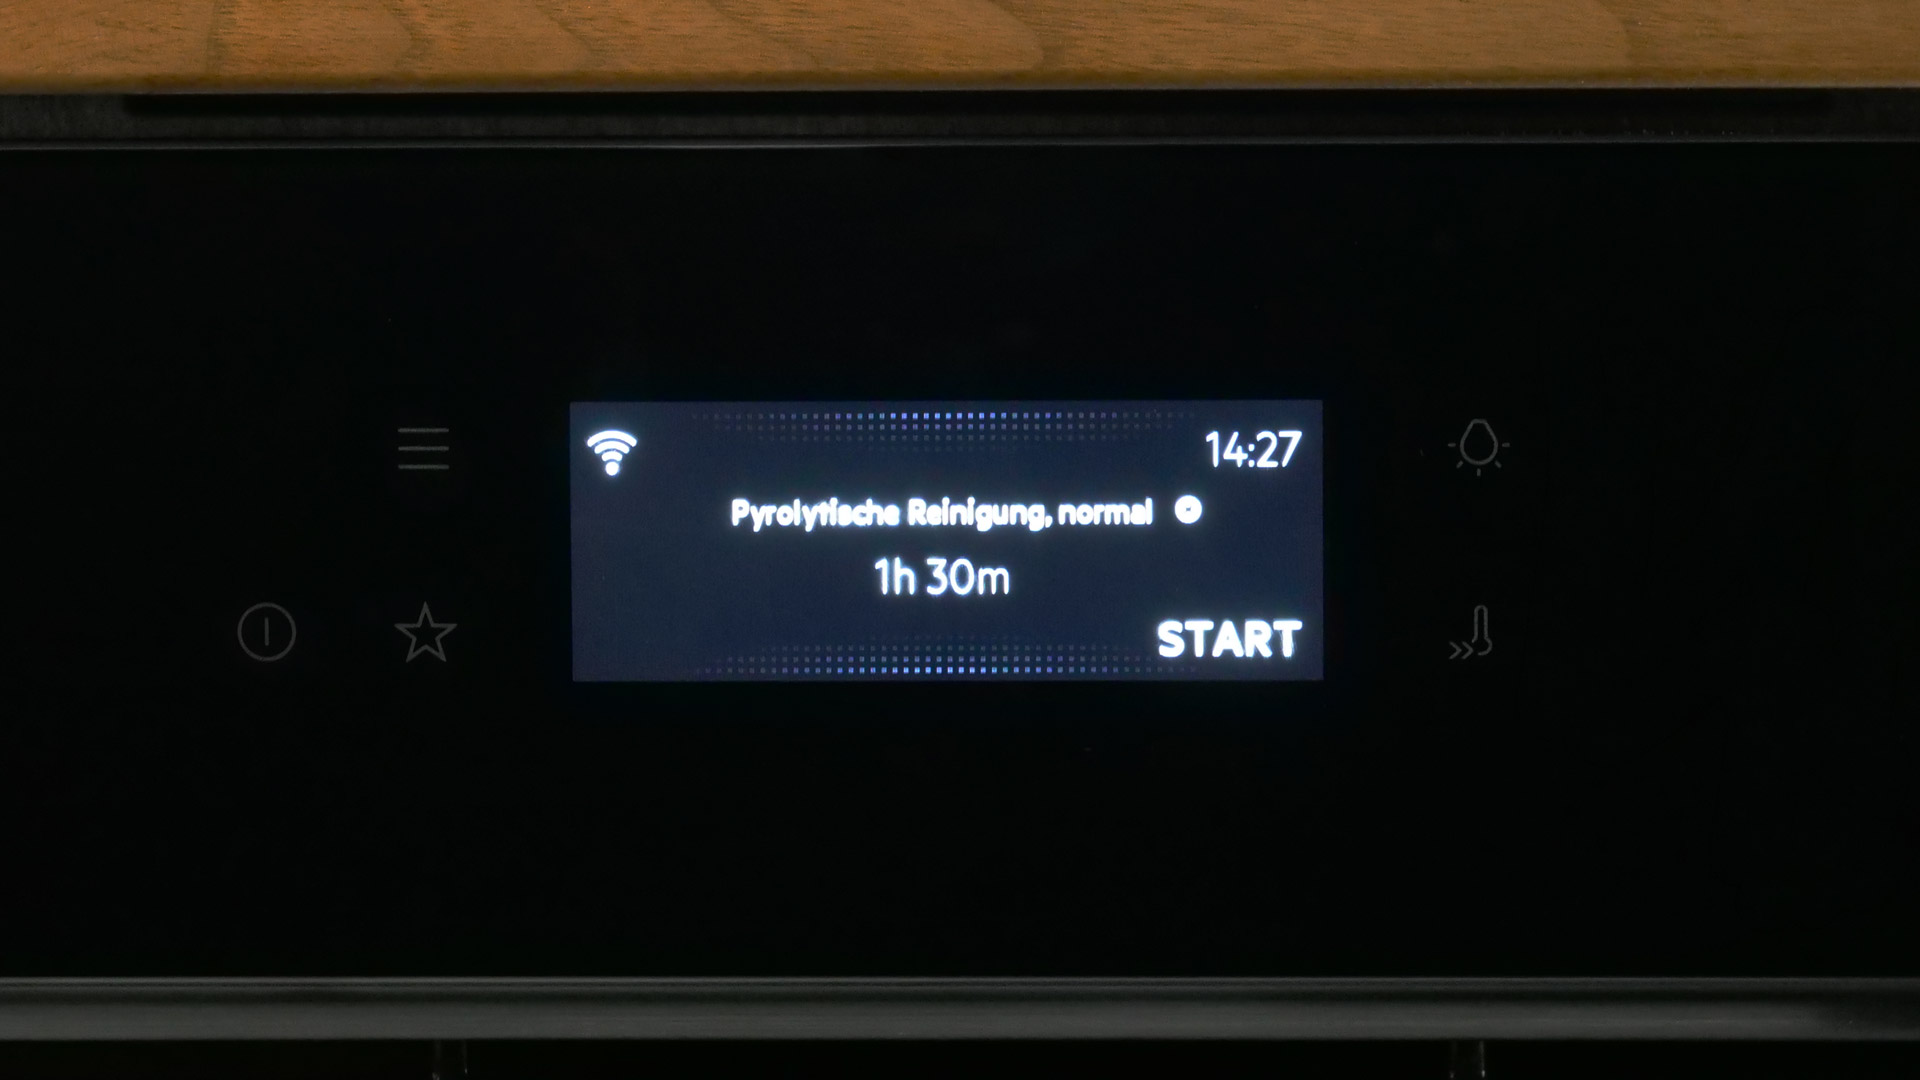
All parts of the TX7PB63FSB can be cleaned effortlessly after a cooking process has ended. Not only is the entire oven cavity easy to access from the front: a large part of the traces of use remaining in the oven cavity can also be burnt away using the special pyrolytic cleaning program. Enormous temperatures are reached here, so that such traces are turned into ash within ≈ 60 min (1st level of the cleaning program), ≈ 90 min (2nd level), or ≈ 150 min (3rd level). After a cooling phase during which the door remains locked, the ash residues can be wiped away effectively. As valuable as the presence of such a cleaning program may be, for a large share of all cooking projects it is really sufficient simply to clean the oven cavity with a soft cloth, warm water, and perhaps a few milliliters of dishwashing liquid – we are talking about max. ≈ 5 min here.
 Preparing the pyrolytic cleaning program
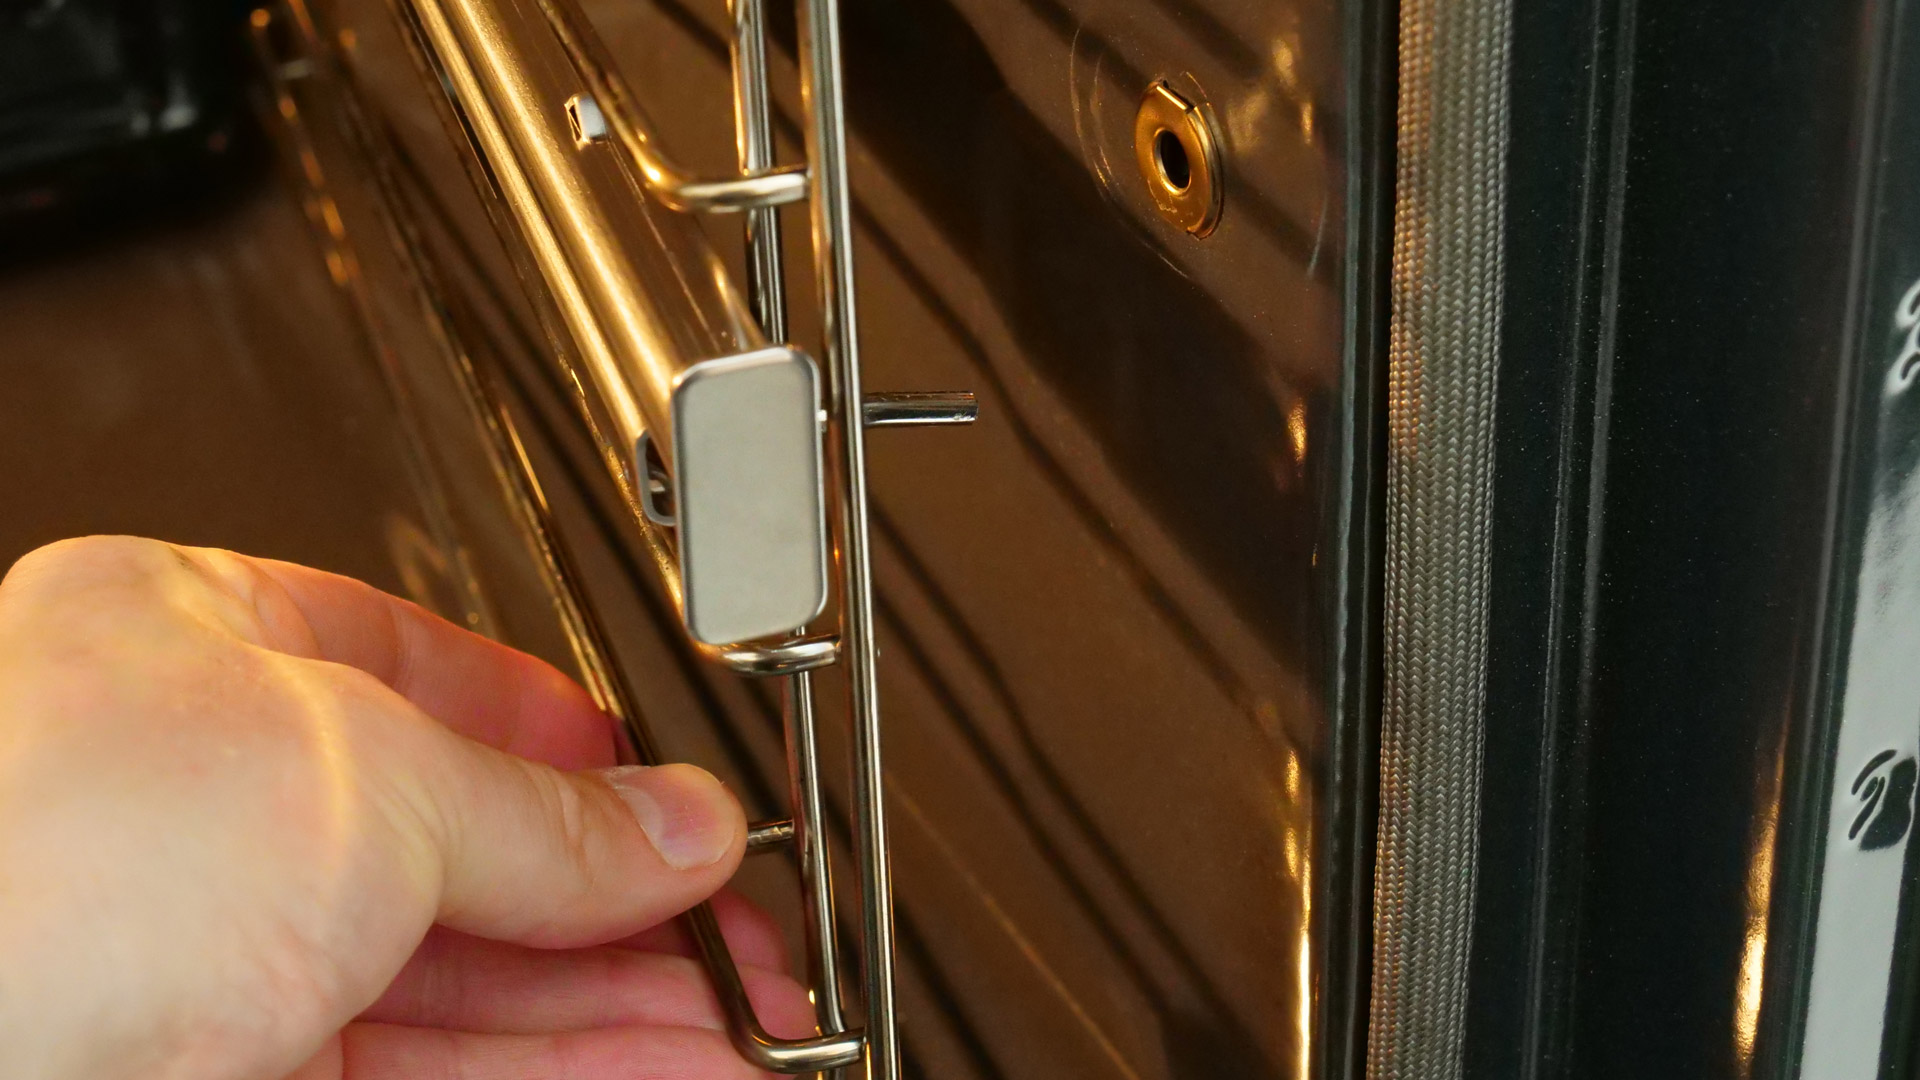
Before starting this cleaning program, all accessories must be removed from the oven cavity to avoid possible damage. In particular, all trays, etc. present in the oven cavity must be placed elsewhere: the enamel used here would in all likelihood not withstand the massive temperatures without damage.
The instruction manual
 Tips & tricks from the instruction manual
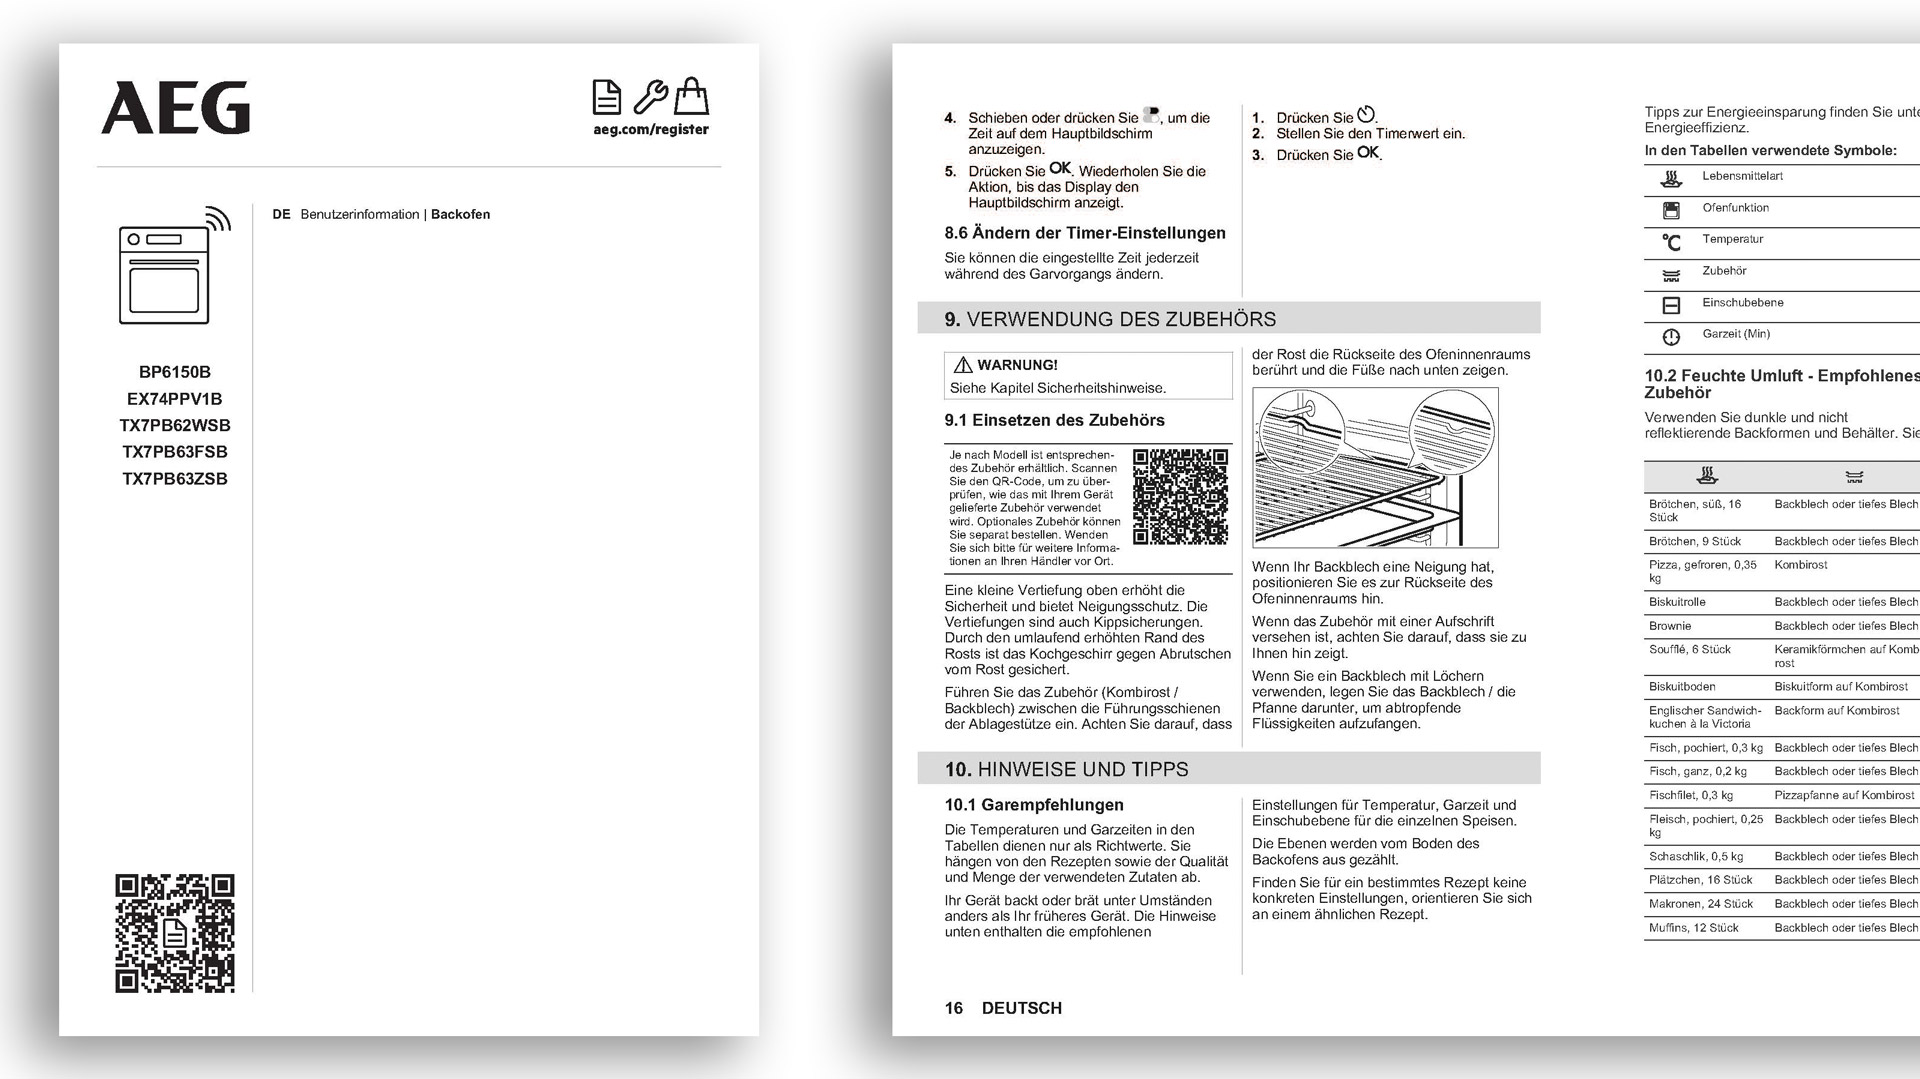
The instruction manual of the TX7PB63FSB is exceptionally detailed: even in the German-language section alone, everything essential that you need to know about using the model (operation, cleaning, etc.) is covered in a very clear style. There are also black-and-white graphics in many places illustrating parts of the text. They are also of very appealing quality, so that what they are meant to show can be recognized without too much difficulty.
It is nice that truly everything essential is also addressed in the instruction manual: this includes, for example, short notes on all cooking programs selectable in the menus, so that you get a basic overview of each individual cooking program here. That there are not all that many tables offering tips on cooking different foods (for example on choosing the right cooking program, temperature, etc.) is only understandable: after all, the model has been given an assistant in which all these tips can be viewed after selecting the relevant dish – directly on the model’s touchscreen.
Power & noise
 Power consumption in different cooking programs
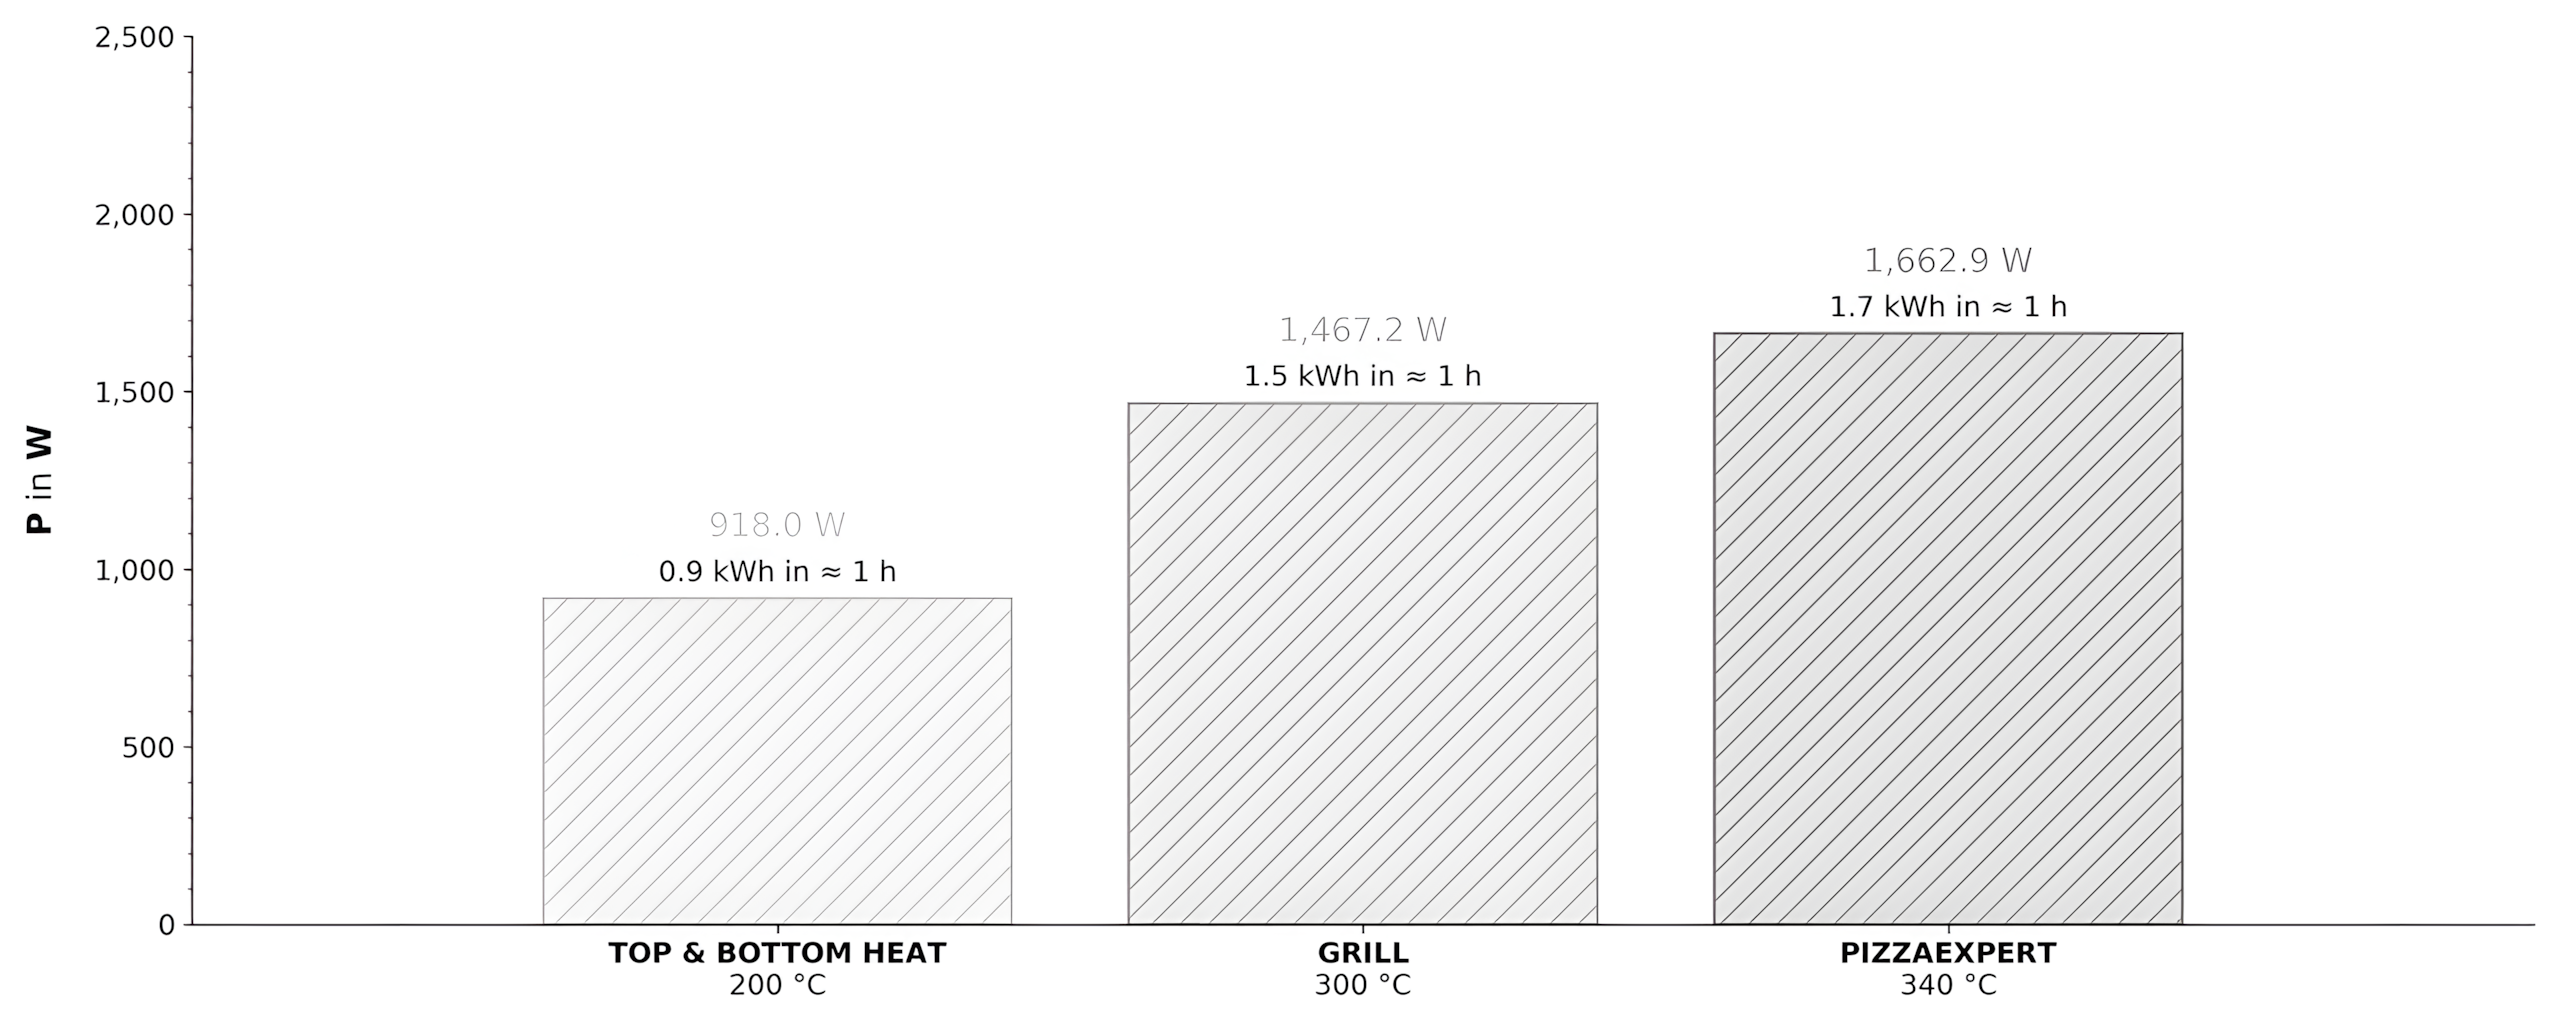
The power consumption of the TX7PB63FSB is similar to that of many other models, but depends to a significant degree on the respective cooking parameters (cooking mode, temperature, etc.). Thus, a cooking process lasting ≈ 1 h in the TOP/BOTTOM HEAT mode at a temperature of ≈ 200 °C consumes ≈ 0.92 kWh (≈ €0.25), in the GRILL mode at a temperature of ≈ 300 °C ≈ 1.47 kWh (≈ €0.40), and in the PIZZAEXPERT mode at a temperature of ≈ 340 °C ultimately ≈ 1.66 kWh (≈ €0.45). Admittedly, in PIZZAEXPERT mode it regularly takes only ≈ 2:30 min until a pizza can be served, so that the price per pizza is much lower (≈ 0.07 kWh or ≈ €0.02). Another interesting point is that the electricity consumption of the PYROLYTIC CLEANING program is enormous. For example, in the ≈ 60 min cleaning program, we measured ≈ 2.47 kWh (≈ €0.67), which is plausible given the high temperatures reached during this cleaning program.
How much does baking pizza in the AEG TX7PB63FSB cost me?
Would you like to know how much electricity you would consume by baking pizza regularly in this model and what electricity costs would be associated with it? Then you can use our electricity-consumption calculator! You only need to adjust all essential parameters to your personal requirements, for example by setting how many times per week you would bake pizza, how many pizzas you would serve each time, and how lightly or strongly you would like to brown the pizzas while baking. At the end, the electricity-consumption calculator displays everything essential in a clear table.
Here you can choose how intense the browning of the pizzas should be. The browning result achieved in practice is linked to the duration of the respective baking process, so lighter browning results in lower electricity consumption, while stronger browning results in higher electricity consumption.
If you want to bake several pizzas one after another during a single session, choose "full preheating phase only once per session". In that case, we include the electricity consumption of a full preheating phase only once per session and, starting with the second pizza, add only the electricity consumption of a reheating phase lasting approximately 2:30 minutes. After each pizza has been removed, the oven cavity must reheat until it reaches a temperature suitable for baking pizza again. If, on the other hand, you want to bake only a single pizza per session or plan to leave a great deal of time between individual baking processes, choose "full preheating phase per pizza" instead.
Here you can adjust the electricity price to the amount you are currently paying per kWh. As a general rule, our calculations are based on an electricity price of approximately €0.27 per kWh.
Electricity consumption & electricity costs
| Period | Electricity consumption in kWh | Electricity costs in € |
|---|---|---|
| Per week | – | – |
| Per month | – | – |
| Per year | – | – |
 Noise emission in the TOP/BOTTOM HEAT cooking program
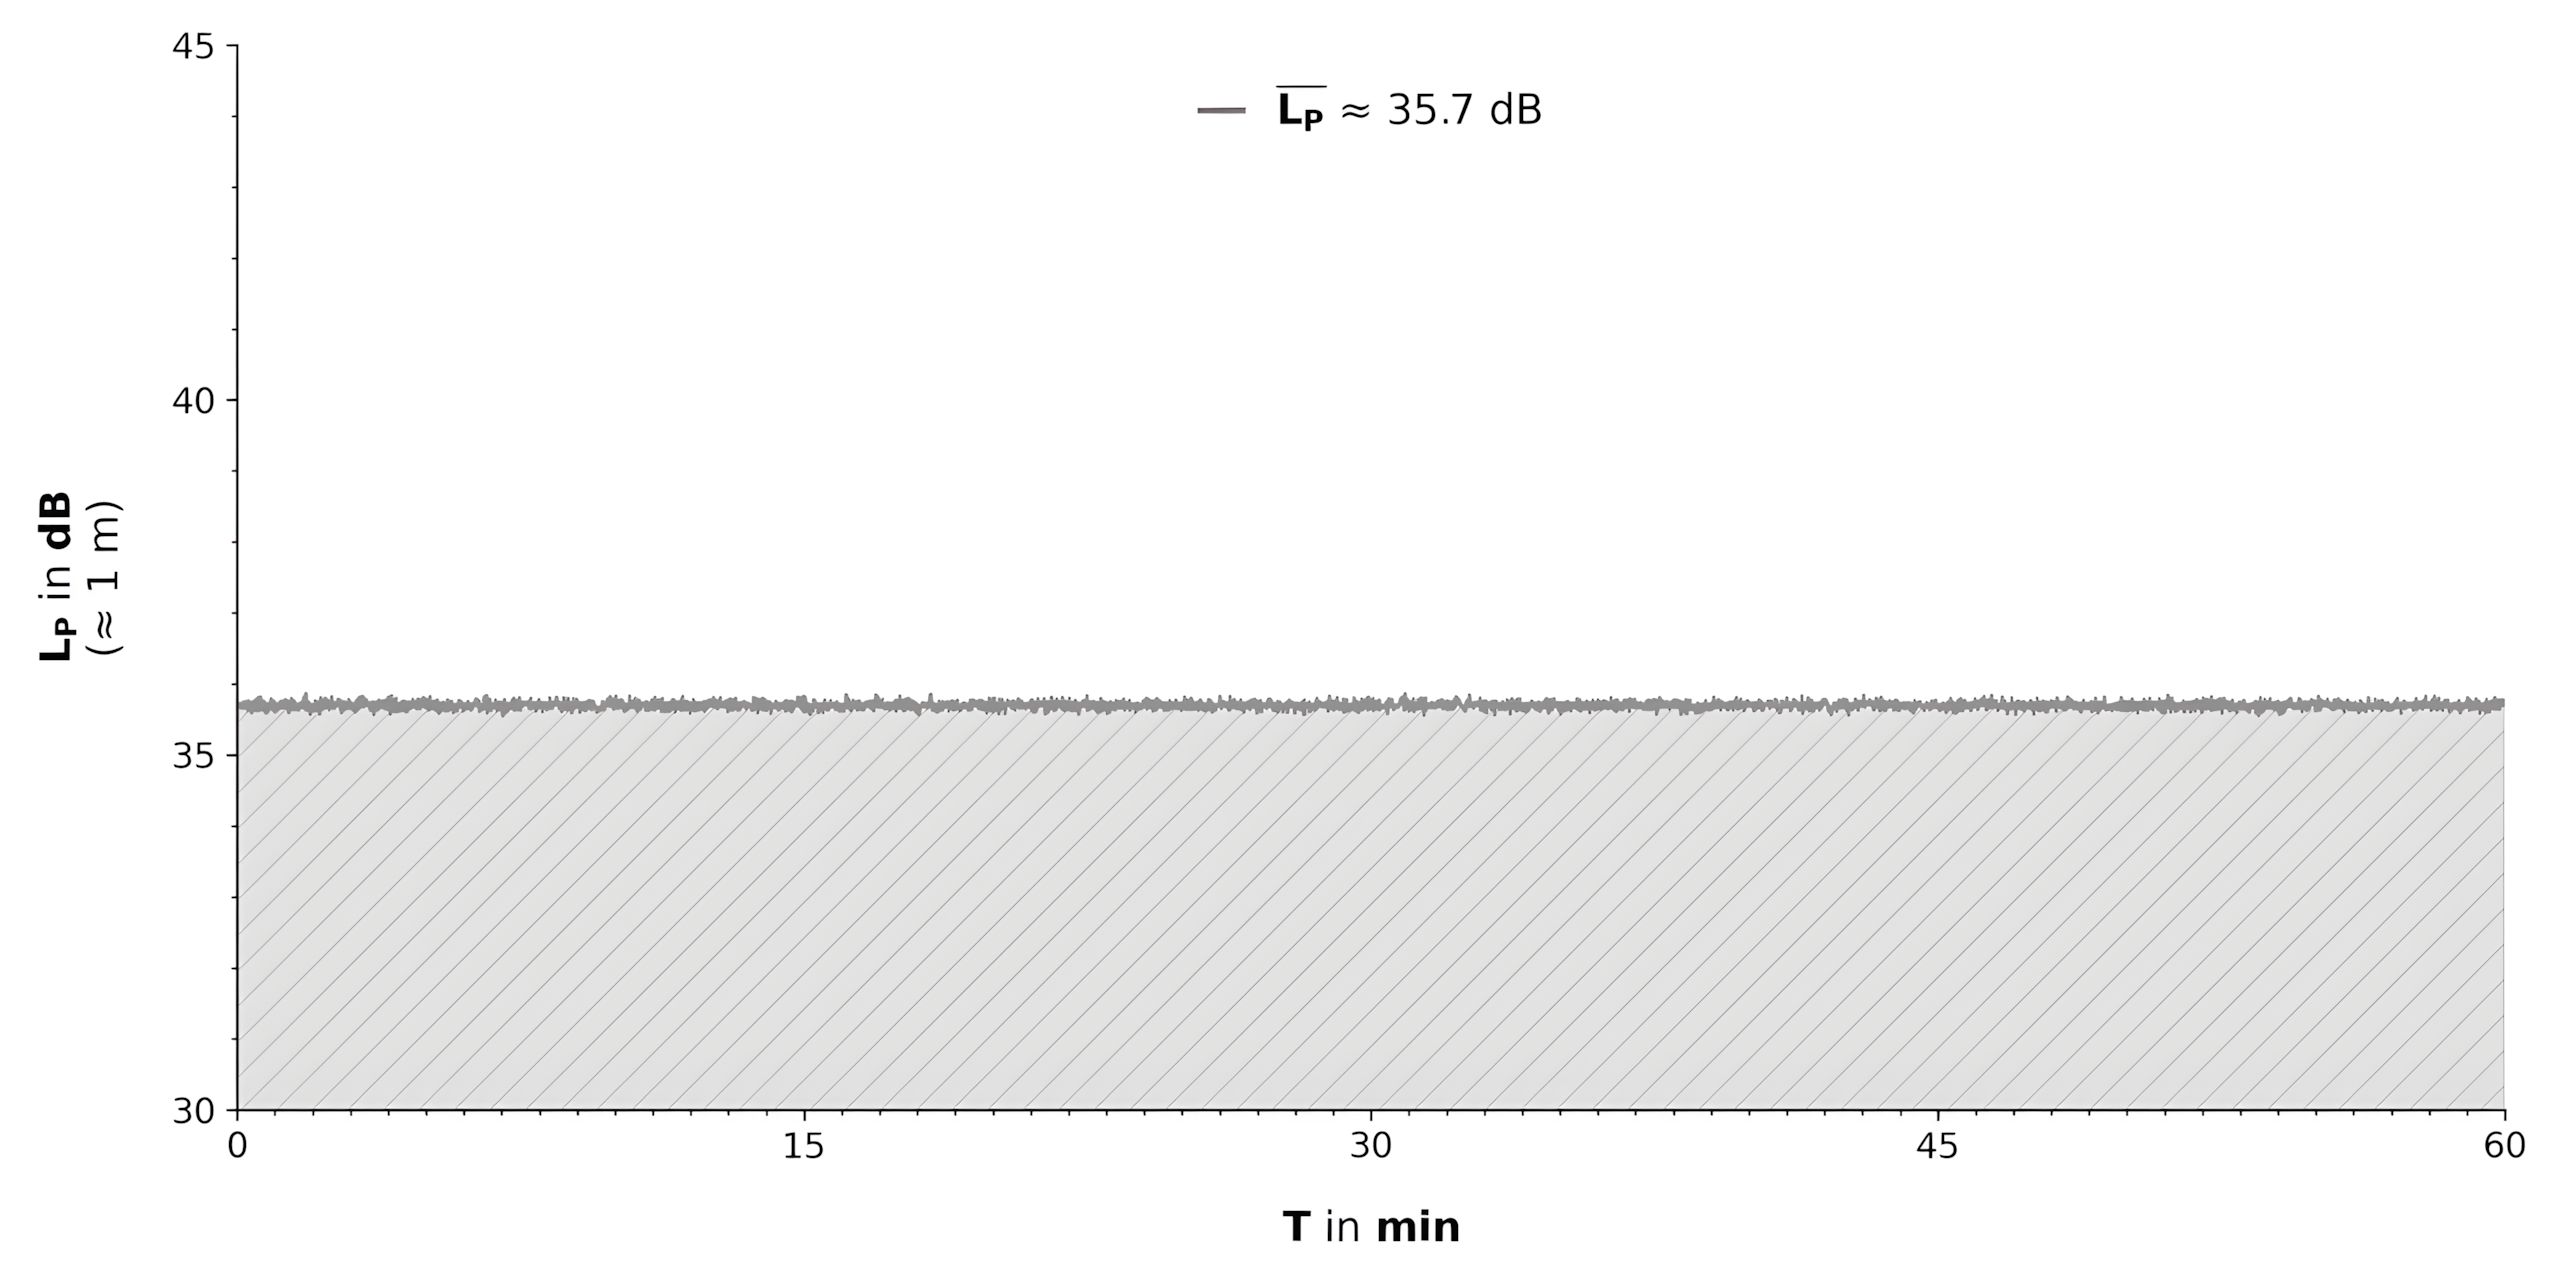
Another surprising point is the very low sound pressure level the TX7PB63FSB emits during use – regardless, incidentally, of which cooking program is used: the model regularly works so quietly that it can only be perceived minimally from more than ≈ 1 m away. When using the TOP/BOTTOM HEAT cooking program, for example, we measured an average sound pressure level of ≈ 35.7 dB, with occasional peaks of max. ≈ 36.5 dB, in each case from ≈ 1 m in front of the model. Even the cooking programs in which the model uses its fan are only minimally louder (max. ≈ 40.1 dB).
Speed & consistency
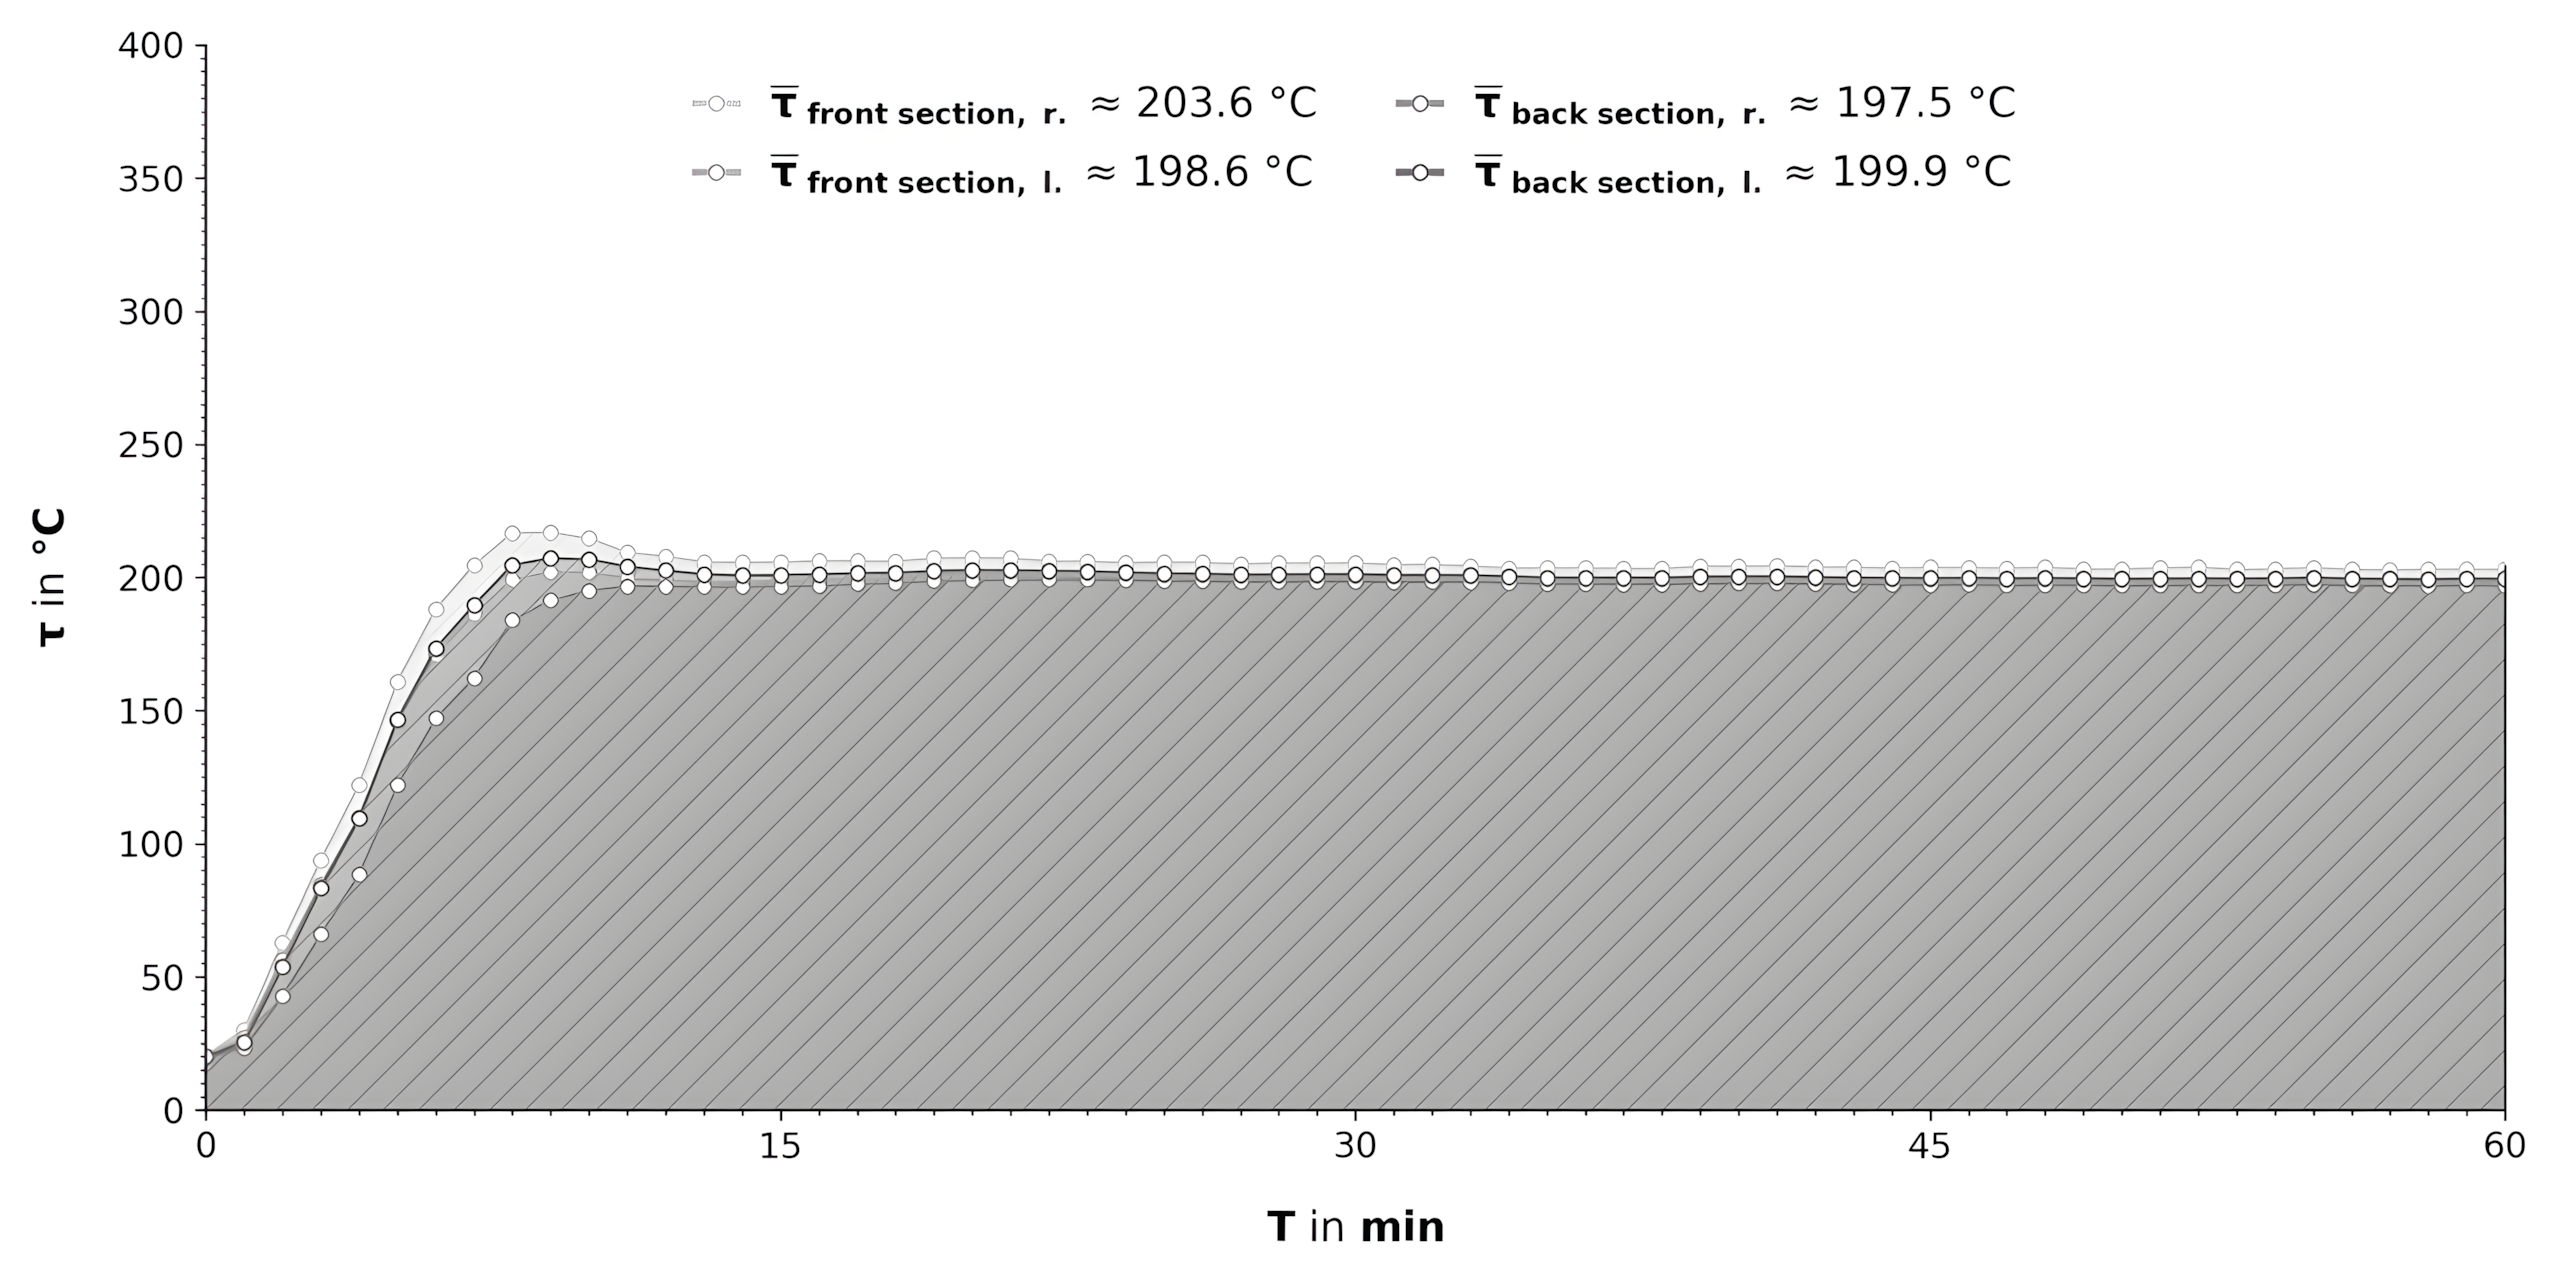
 Temperature curves in the TOP/BOTTOM HEAT cooking program
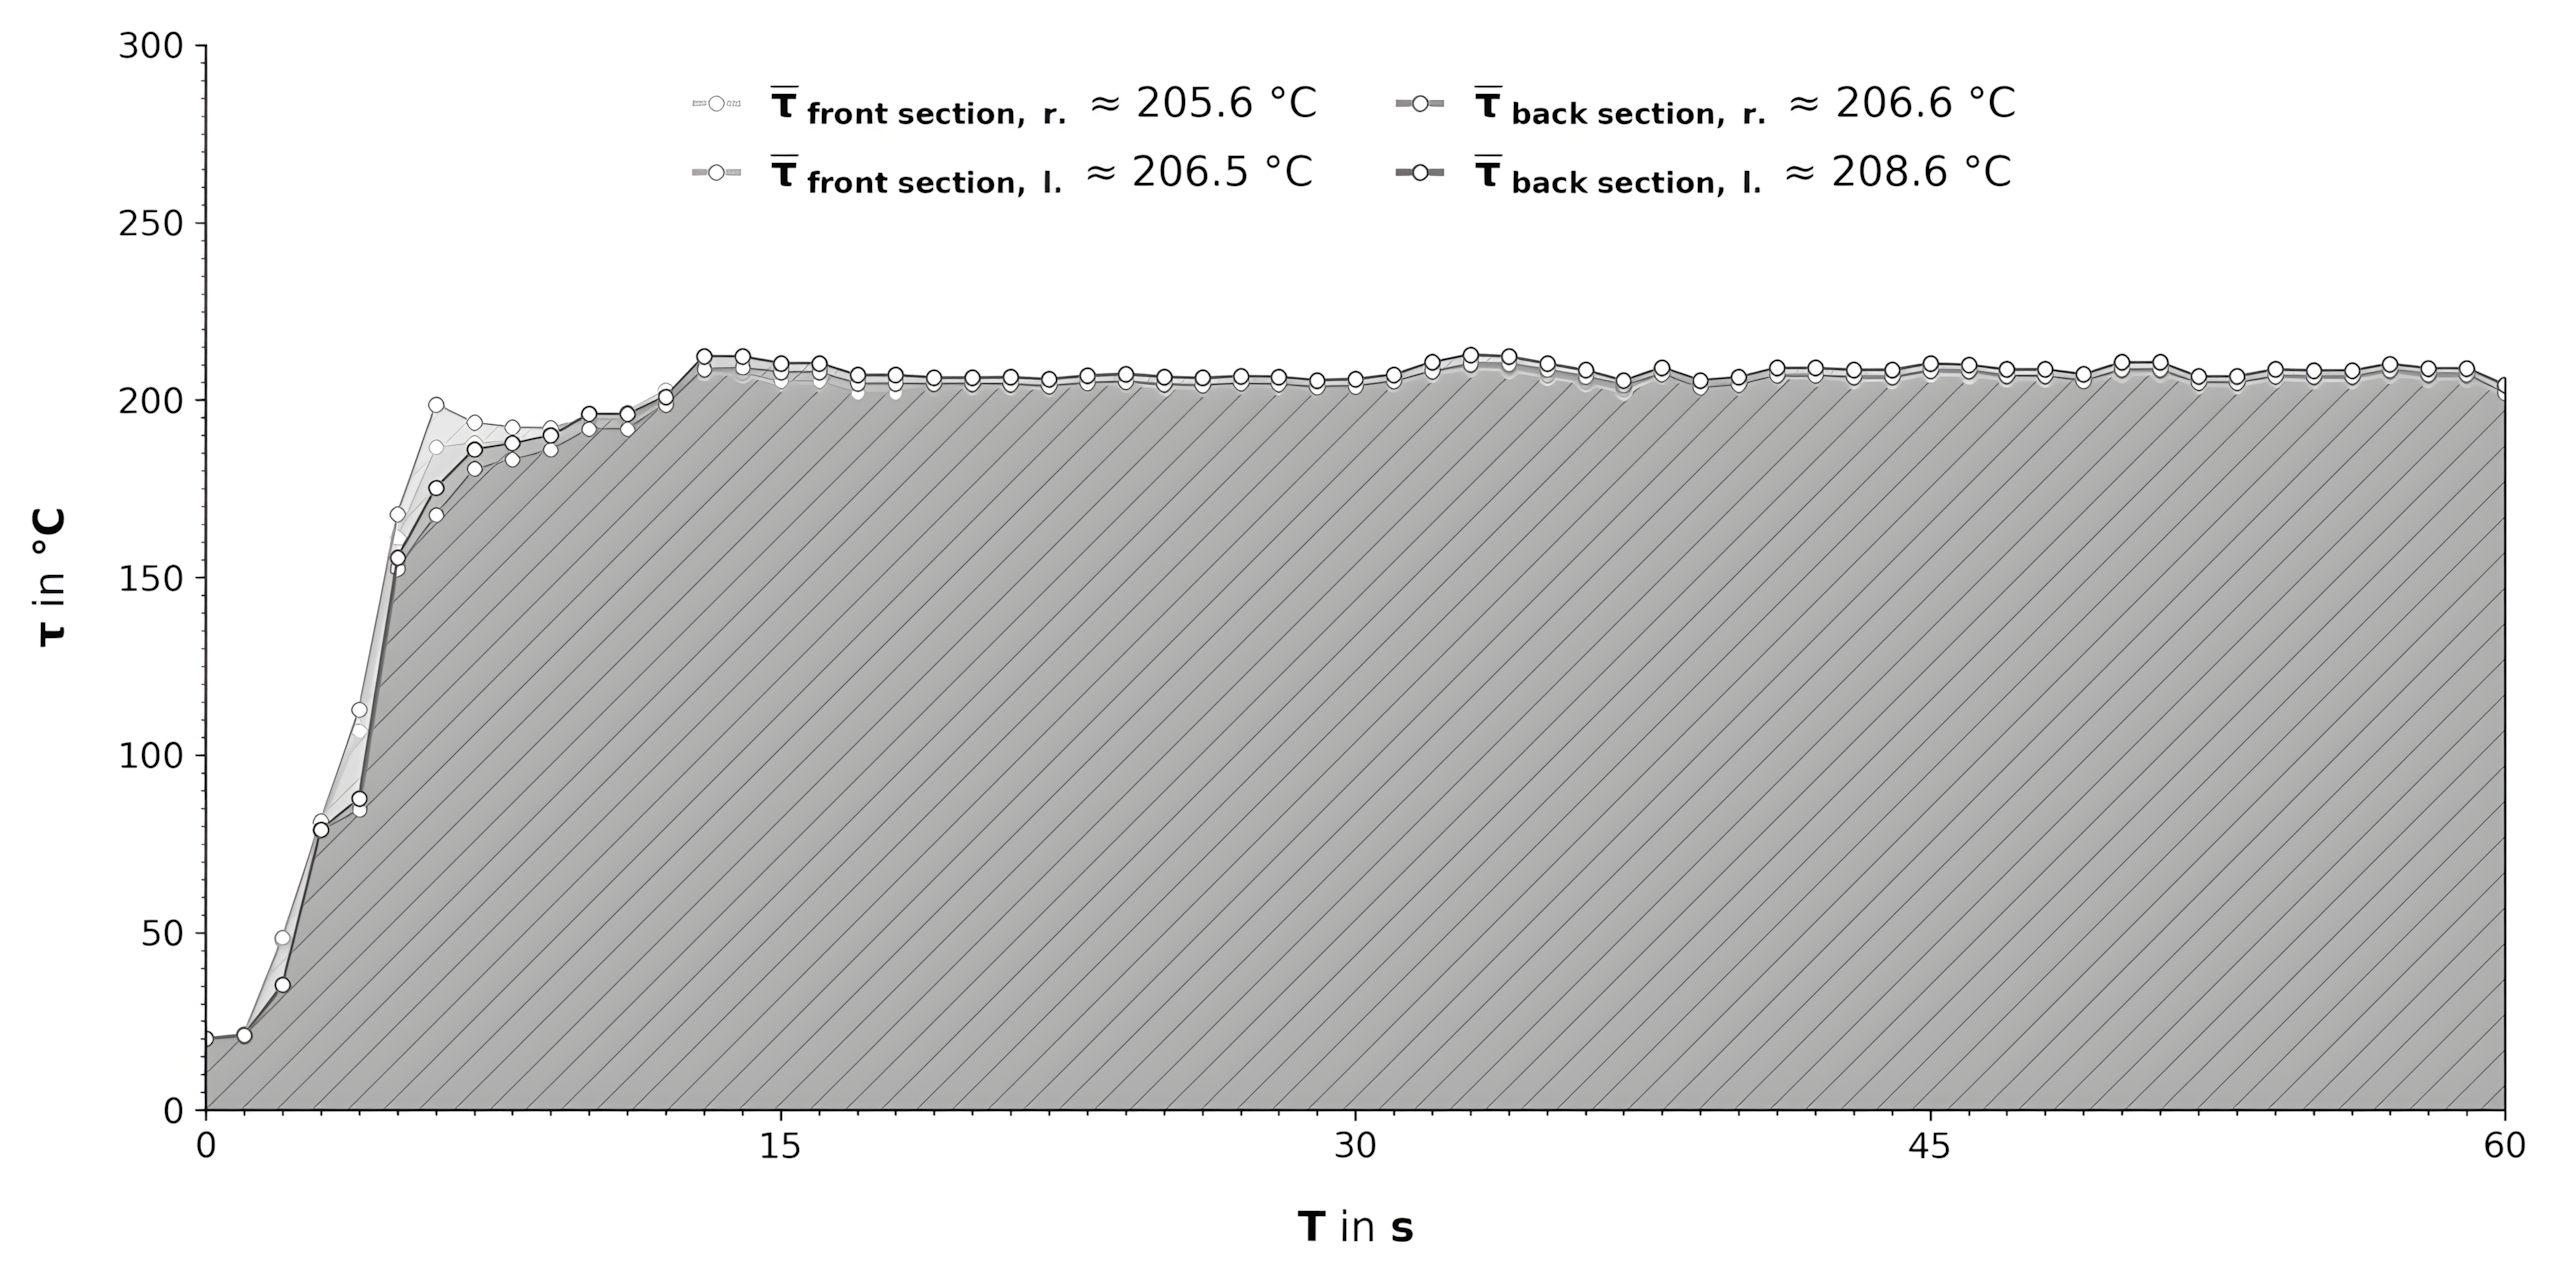
The oven cavity of the TX7PB63FSB heats up quickly, especially when using FAST HEAT-UP: in the TOP/BOTTOM HEAT cooking mode at a programmed temperature of 200 °C, for example, it regularly takes only ≈ 13 min until the target temperature is reached. Without FAST HEAT-UP, it takes ≈ 26 min; using it is therefore extremely valuable whenever the cooking process needs to be started quickly.
The preceding graphs also show how the temperatures in the oven cavity change during cooking in the TOP/BOTTOM HEAT mode at a programmed temperature of 200 °C. The temperature is distributed evenly throughout the oven cavity: during the cooking process, that is after preheating had ended, we measured differences of max. ≈ 4.0 °C; during preheating, with FAST HEAT-UP engaged, the maximum was ≈ 10.8 °C. These differences are very small and almost always irrelevant to the quality of the cooking result.
 Temperature curves in the GRILL cooking program
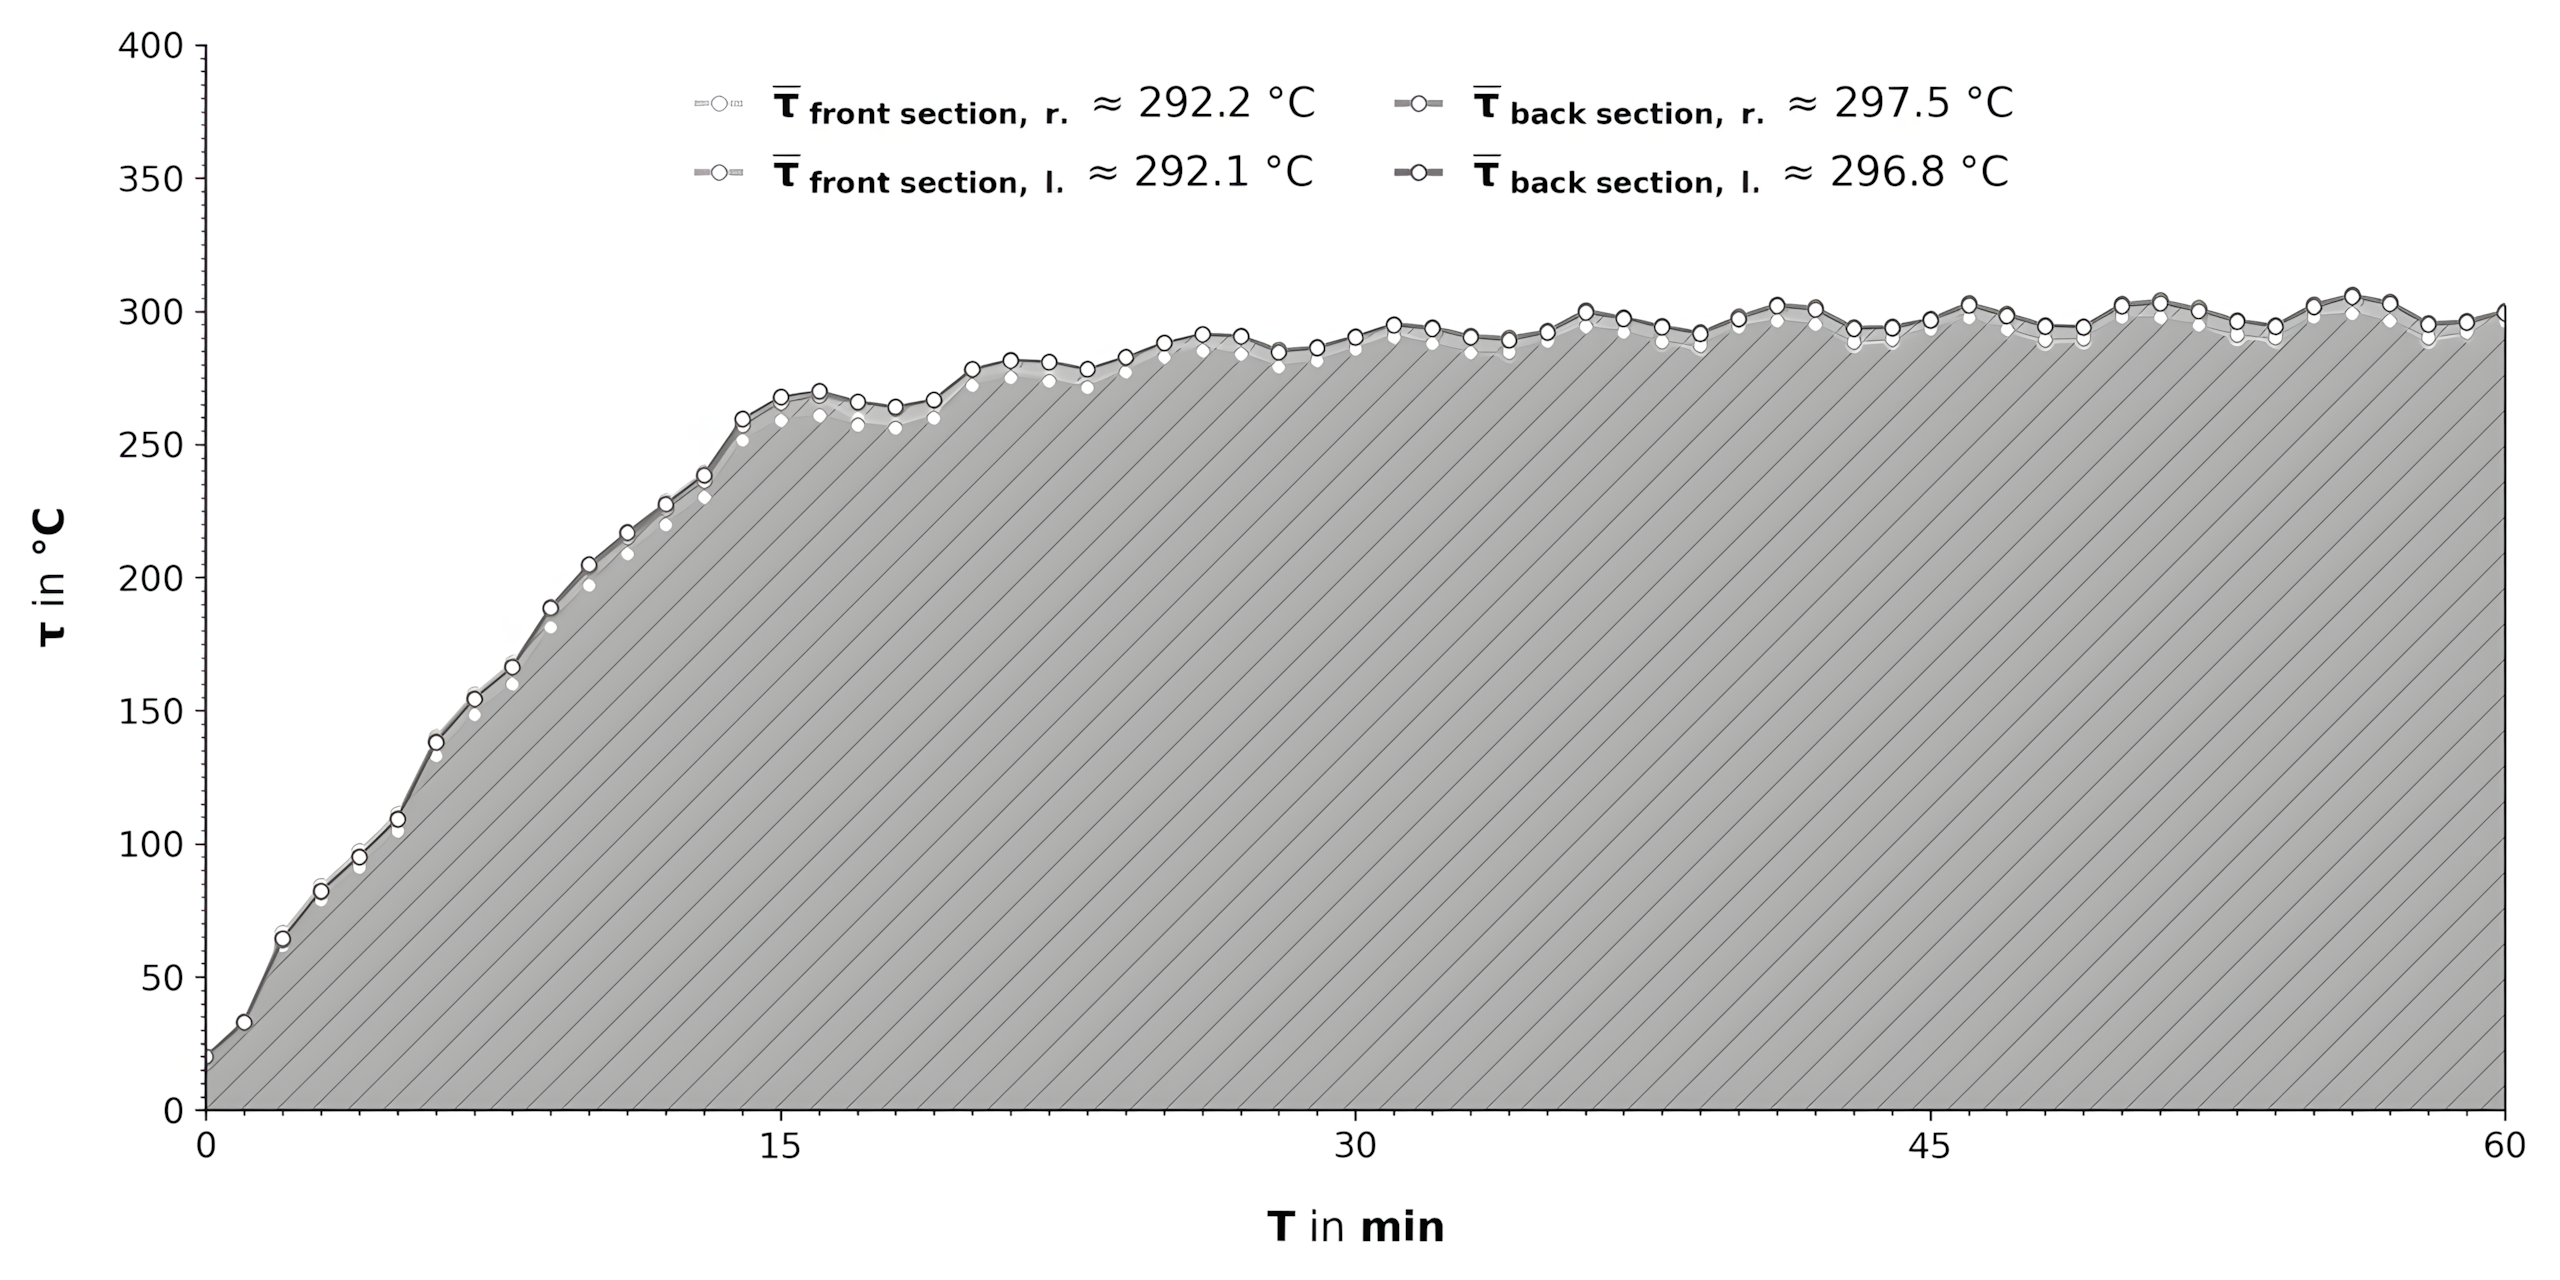
The temperatures in the GRILL cooking mode at a programmed temperature of 300 °C are very similar: here, too, the differences were regularly ≈ 7.1 °C, which is still exemplary given the extremely high temperatures (max. ≈ 299.1 – 306.2 °C, depending on the respective position in the oven cavity).
Baking performance
But what about the model’s baking performance? At the beginning, we mentioned that in this test project we would focus primarily on baking pizza, which is why we omit here the impressions we gained while cooking vegetables, meat, and fish. Instead, we illustrate below how the TX7PB63FSB performs specifically when baking pizza. Before we present the pictures of the various pizzas taken after the end of the individual baking processes and our impressions of them, however, we will first cover all those elements of the model that are important during the baking process.
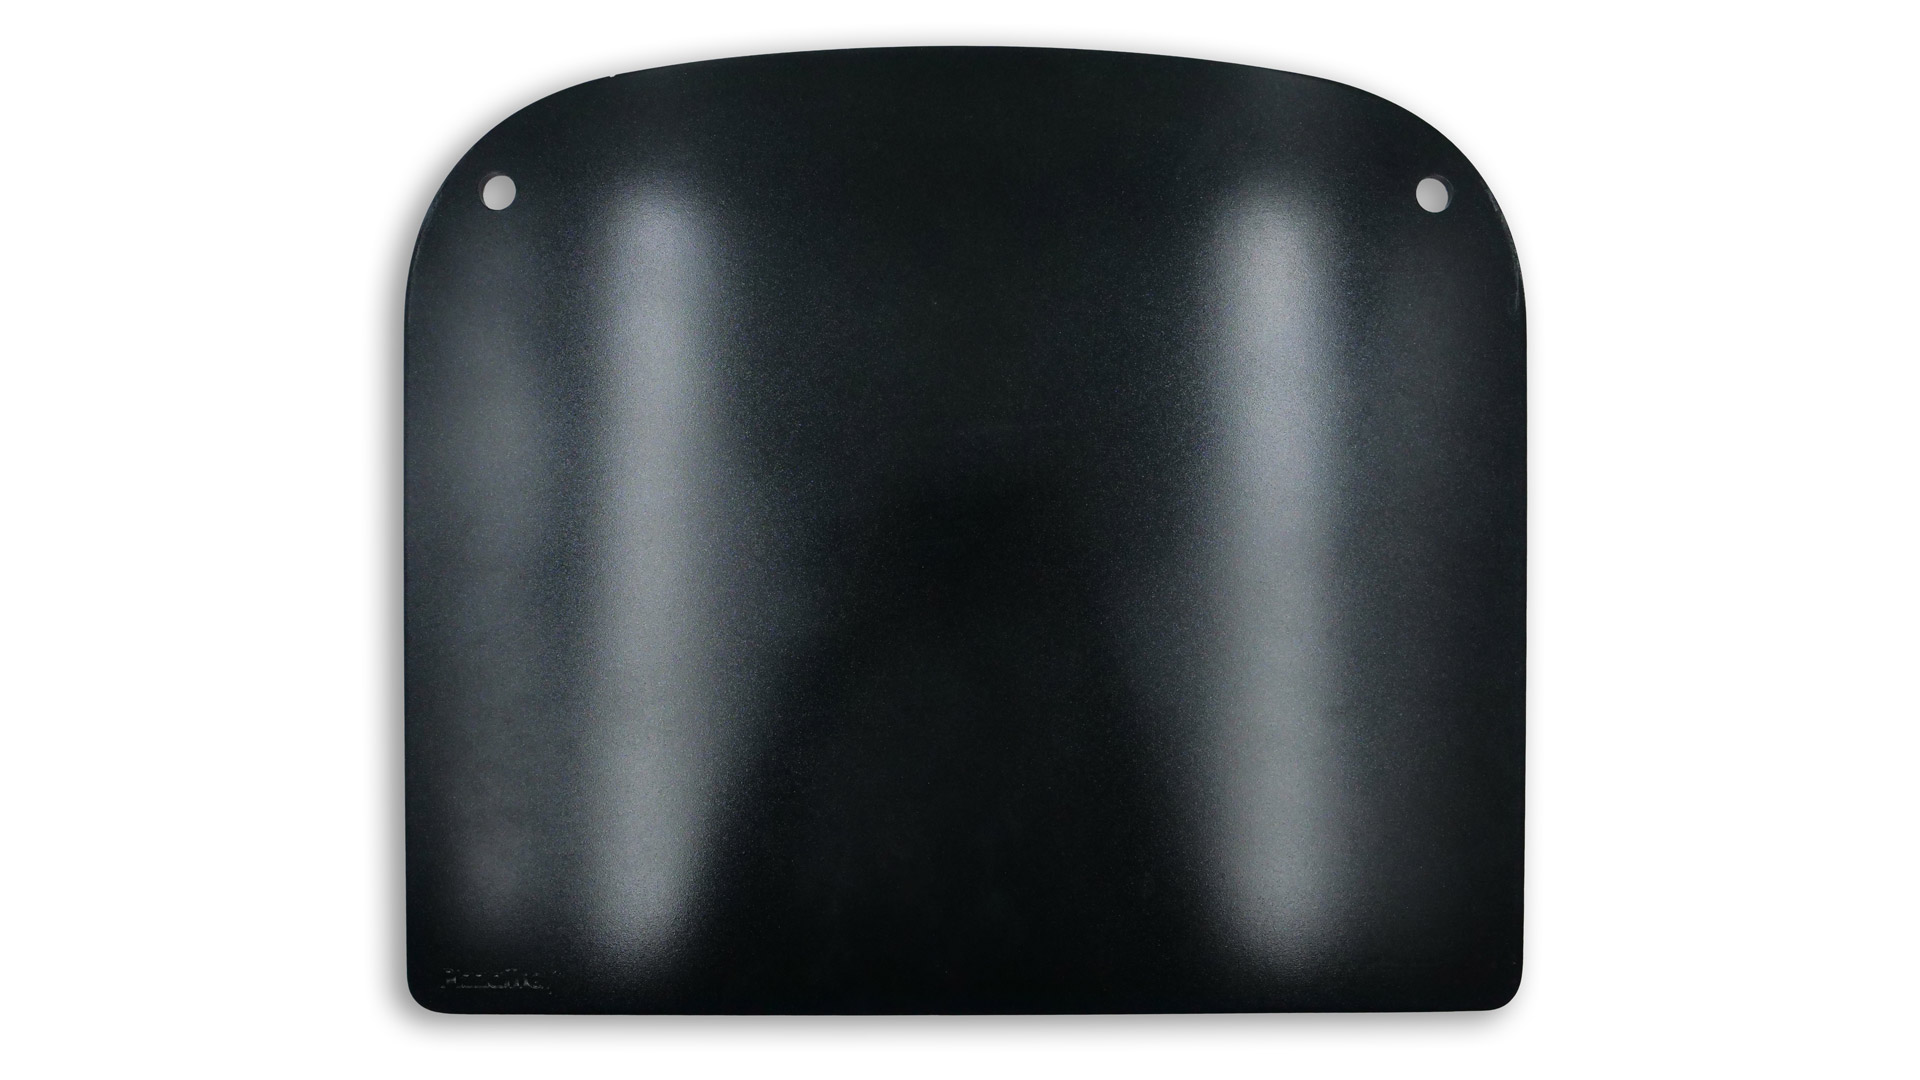
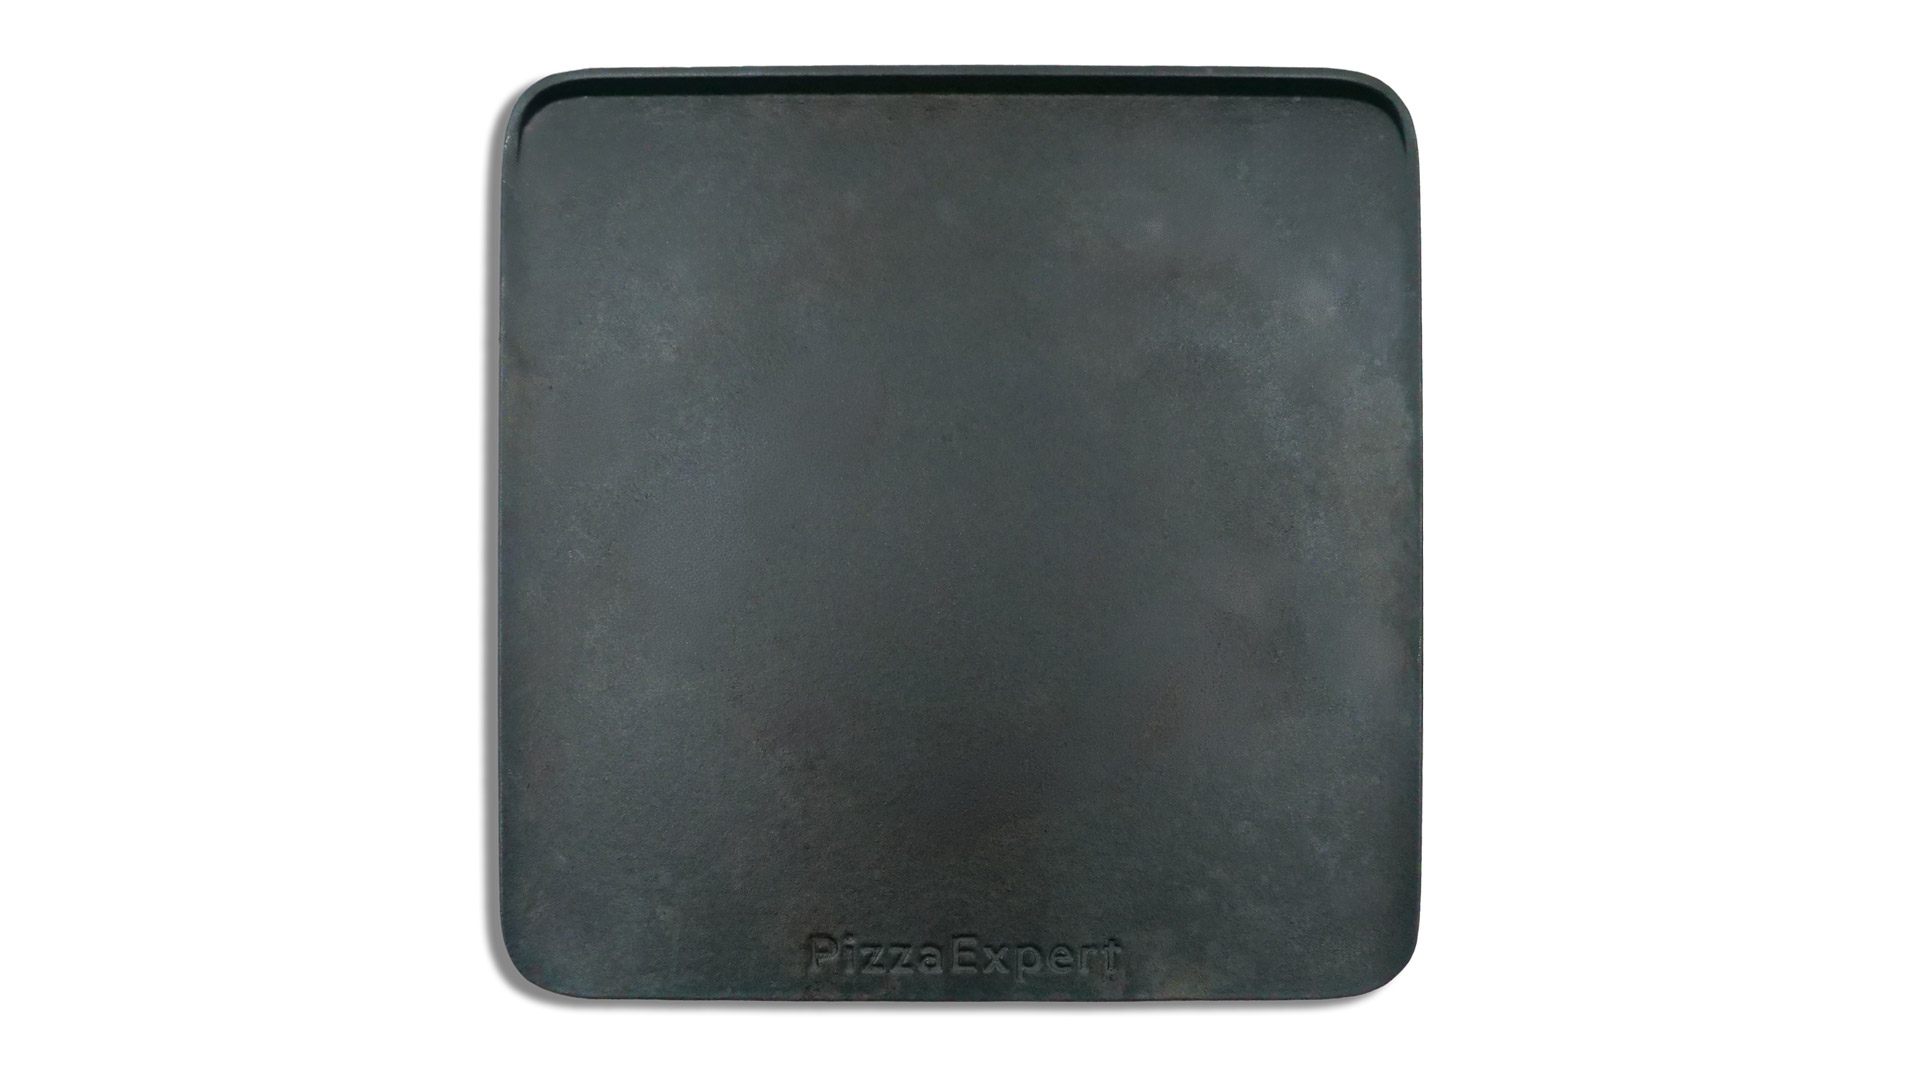 The cast-iron pizza plate
As part of the PIZZAEXPERT ensemble, the TX7PB63FSB comes from the factory with a special dark-gray pizza plate: because of its material (cast iron), it is extremely heavy (≈ 4.6 kg, mmax of the pizza plate), but can nevertheless be used without much effort. It is placed in the oven cavity before the preheating phase of the pizza program begins, so that afterward, i.e. after preheating, you only need to place the pizza on top of it. At ≈ 34.6 × 34.2 cm (Wmax × Hmax of the pizza plate), it offers plenty of room, so that even larger pizzas can be baked with the TX7PB63FSB.
Why, however, is a cast-iron pizza plate so valuable? Well, several reasons come into play here:
- Cast iron regularly stores a great deal of heat. Especially when baking pizza, a pronounced temperature that lasts longer than just a few minutes is essential. Because of these substantial temperatures that remain stable over time, several pizzas can also be baked one after another without too much heat being lost in the process.
- Precisely because cast iron releases heat so evenly, the base of the pizza regularly achieves much more uniform browning – regardless of whether you prefer the pizza lighter or darker in the end.
- A cast-iron pizza plate can withstand enormous temperatures without suffering damage. This is essential because good pizza can ultimately only be baked at such substantial temperatures, especially if you want to achieve an all-round crisp texture. This is also advantageous when the pizza is loaded with vegetables & more, because it helps prevent the base from becoming soggy.
- Finally, cast iron is exceptionally durable, which is why you can in principle enjoy such a pizza plate for decades without it warping during baking or the like.
- A cast-iron plate can also be used very flexibly beyond the pizza baking primarily discussed here: many other treats, such as wonderfully savory focaccia, can also be baked on it.
So with a heavy cast-iron plate like the one the TX7PB63FSB offers, it is possible to achieve a crisp, crunchy base with evenly distributed, substantial browning throughout; and especially if you want to bake several pizzas one after another, you will very much appreciate the temperature stability of cast iron.
Cast iron versus stone
The cast-iron pizza plate included here has major advantages over a pizza stone: pizza stones are regularly very brittle, so that even a more forceful bump can cause enormous damage. Cast iron, by contrast, is far more robust, which is why a pizza plate made of this material can be handled much more safely without constantly having to exercise maximum caution. In addition, cast iron is much easier to clean than a porous pizza stone: such a stone can unfortunately also absorb the oils & more running off a pizza, which can leave lasting marks. Beyond that, cast iron also offers greater temperature stability: particularly in a model like the TX7PB63FSB, which can reach very impressive temperatures of ≈ 340 °C but still does not come close to the ≈ 500 °C temperature peaks regularly reached in pizzerias, the exceptionally stable heat transferred from the cast iron to the pizza base is highly valuable. Anyone wanting to bake fresh pizzas with an initial temperature of ≈ 20 °C benefits from much more effective heat transfer with cast iron: the upper part of the cast iron, which loses heat through contact with the pizza measuring ≈ 20 °C, can compensate for this heat loss much more quickly than a classic conventional pizza stone.
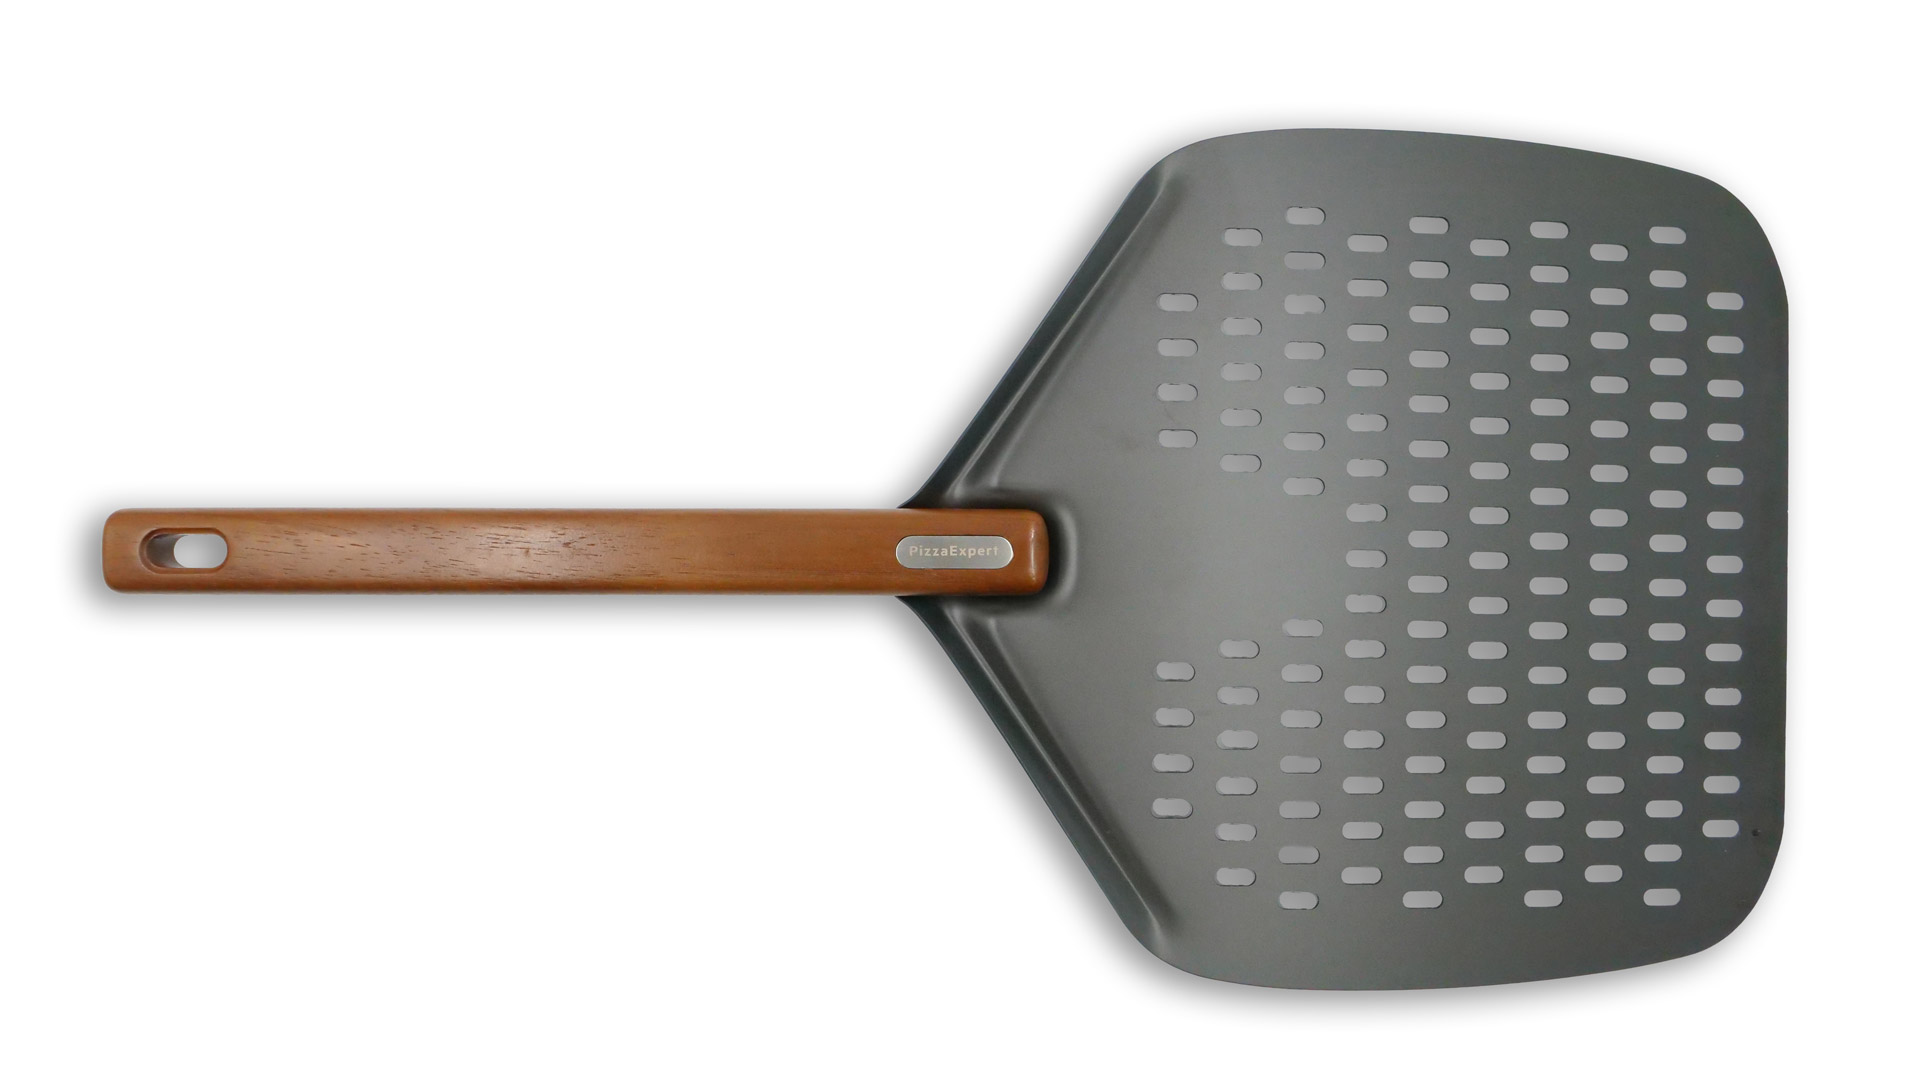 The pizza peel
The TX7PB63FSB also comes from the factory with a very attractive pizza peel, which means that all pizzas can be handled safely before, during, and after baking: the pizza peel has to be assembled before use, but this is extremely easy and can be done within ≈ 1 min. The quality of the pizza peel is excellent in every respect: particularly pleasing is the wood on the handle, whose texture provides a very secure grip during use. The surface of the pizza peel is also generously sized (≈ 33.0 × 28.4 cm, Wmax × Dmax of the pizza peel).
Is such a pizza peel really necessary? Yes, because although the pizza could in principle be slid into the oven cavity in another way, a pizza peel like the one that is part of the PIZZAEXPERT ensemble provided here is extraordinarily valuable:
- Thanks to the pizza peel, the pizza can be placed very precisely on the cast-iron plate in the oven cavity: especially with fresh pizza, which is regularly much softer, using the pizza peel is therefore a must.
- Because the pizza peel is stable all around, it can preserve the pizza’s original shape while lifting and moving it. A fresh pizza, for example, can quickly become distorted, especially if it carries heavier toppings (for example vegetables & more).
- Just as important is the enormous safety benefit associated with using the pizza peel: during the pizza program, the oven cavity can reach temperature peaks of ≈ 334.6 °C, which means burns can occur much faster than in other cooking programs. The pizza peel allows sufficient distance to be maintained with arms and hands.
- Using the pizza peel is also essential for reasons of temperature stability in the oven cavity because it allows the pizza to be slid into the oven much faster and more simply before baking, so that the door only has to be lowered for a few moments during which some heat can escape. Trying to do this by hand would involve a far greater heat loss.
- Finally, the pizza can be rotated much more confidently during baking with the pizza peel. In the TX7PB63FSB, however, this is not really essential, because the temperature in the oven cavity during the pizza program is largely even, so that the pizza can remain in the same place without the browning becoming uneven as a result.
Precisely because the pizza is to be placed on the cast-iron plate mentioned above, the pizza peel is superb: after all, the cast iron must reach extraordinarily high temperatures of ≈ 300 °C and more before the pizza should be deposited on it. And this very act – depositing the pizza on such a hot cast-iron plate – could never be done safely without the pizza peel. Thanks to the many holes in the front metal section, there is also no need to worry that, for example, the softer base of a fresh pizza might stick to the metal; for this reason, unlike with the pizza peel from Gorenje, the metal does not have to be dusted with a lot of flour beforehand to prevent such sticking. This is not only more convenient in use, but also benefits the quality of the pizza base.
The pizza peel is therefore an essential part of the PIZZAEXPERT ensemble, without which the pizzas baked in the TX7PB63FSB could never achieve such wonderful quality.
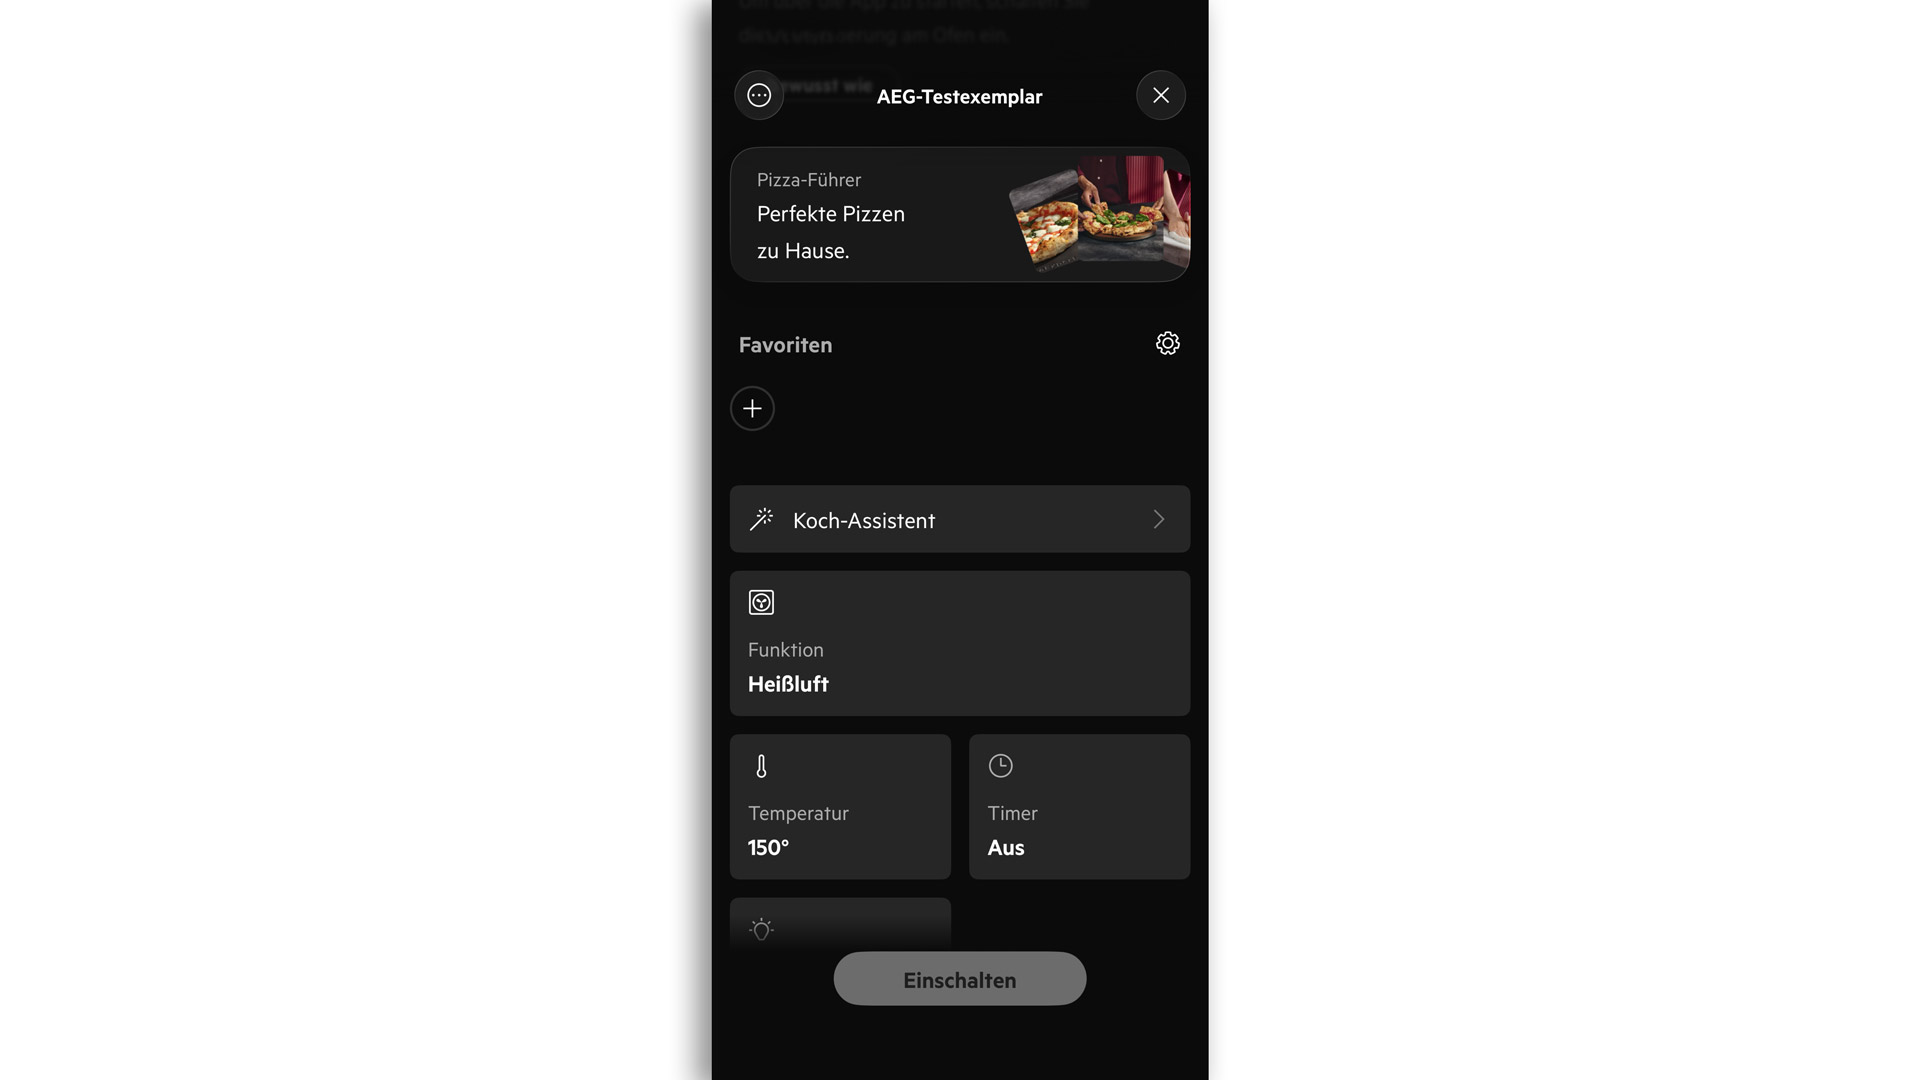 Tips & tricks in the app
If you ultimately want to enjoy truly masterful pizza, you should also take a closer look at the manufacturer’s app, which can be used from Android 11.0 and iOS 17.0 onward (see here and here). The TX7PB63FSB can be connected to it completely without any problems (max. ≈ 30 s). After that, you only need to scroll once through the app’s main screen.
Here you will find the PIZZA GUIDE: this part of the app conveys, in a very memorable style, everything you need to know if you want to become a true pizzaiola or pizzaiolo!
 Dough preparation & more
Here, the entire process of making a pizza is covered, including, for example, the initial dough preparation (choice of flour, etc.). Some of the tips and tricks readable here are also linked to suitable videos (each max. ≈ 1 min), which are even more valuable than the individual texts: they make the full process truly very vivid. For consumers trying their hand at baking pizza for the first time, the materials accessible in this part of the app are incredibly valuable.
The app also includes many dough recipes through which you can work your way. In the end, this allows different types of pizza to be tried out so that, by trial & error, you can determine which type you want to serve regularly in future. Even though the pizzas always end up with exemplary quality, we do have to criticize one thing: the in some respects very mixed linguistic flaws.
 The linguistic flaws
A few of the flaws mentioned can be seen here by way of example: for instance, the text is regularly in German, but in some places suddenly in English again – without any apparent reason. Naturally, this does not pose a significant problem in use, as the English-language parts can also be understood effortlessly; AEG has furthermore indicated that the errors we criticized are to be corrected soon.
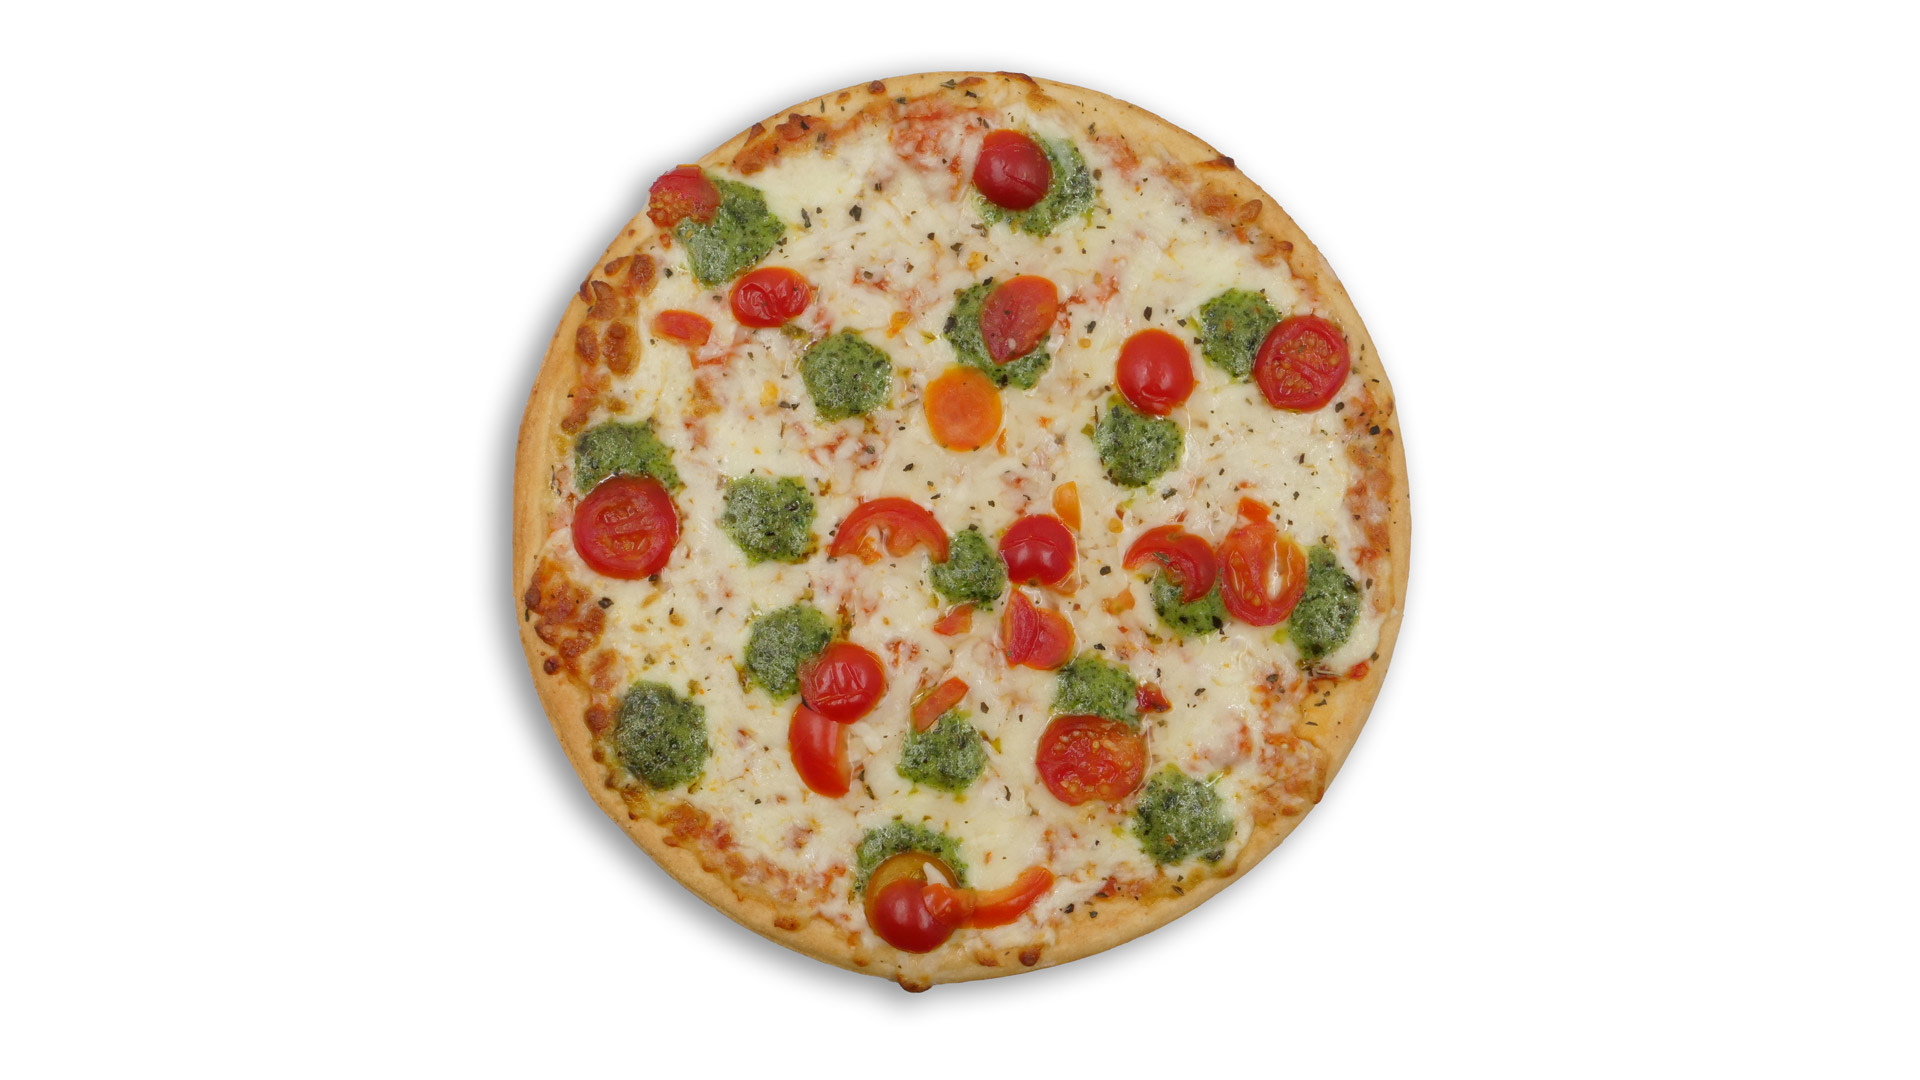
Now we finally turn to the pizzas we baked over the past few weeks with the TX7PB63FSB. We had the model carry out the baking process for the fresh pizza in the PIZZAEXPERT pizza program with a temperature setting of 340 °C, and for the other pizzas in the appropriate automatic program with a temperature setting of 210 °C. Each pizza remained in the oven cavity for ≈ 3:30 min after the preheating process associated with the pizza program had ended.
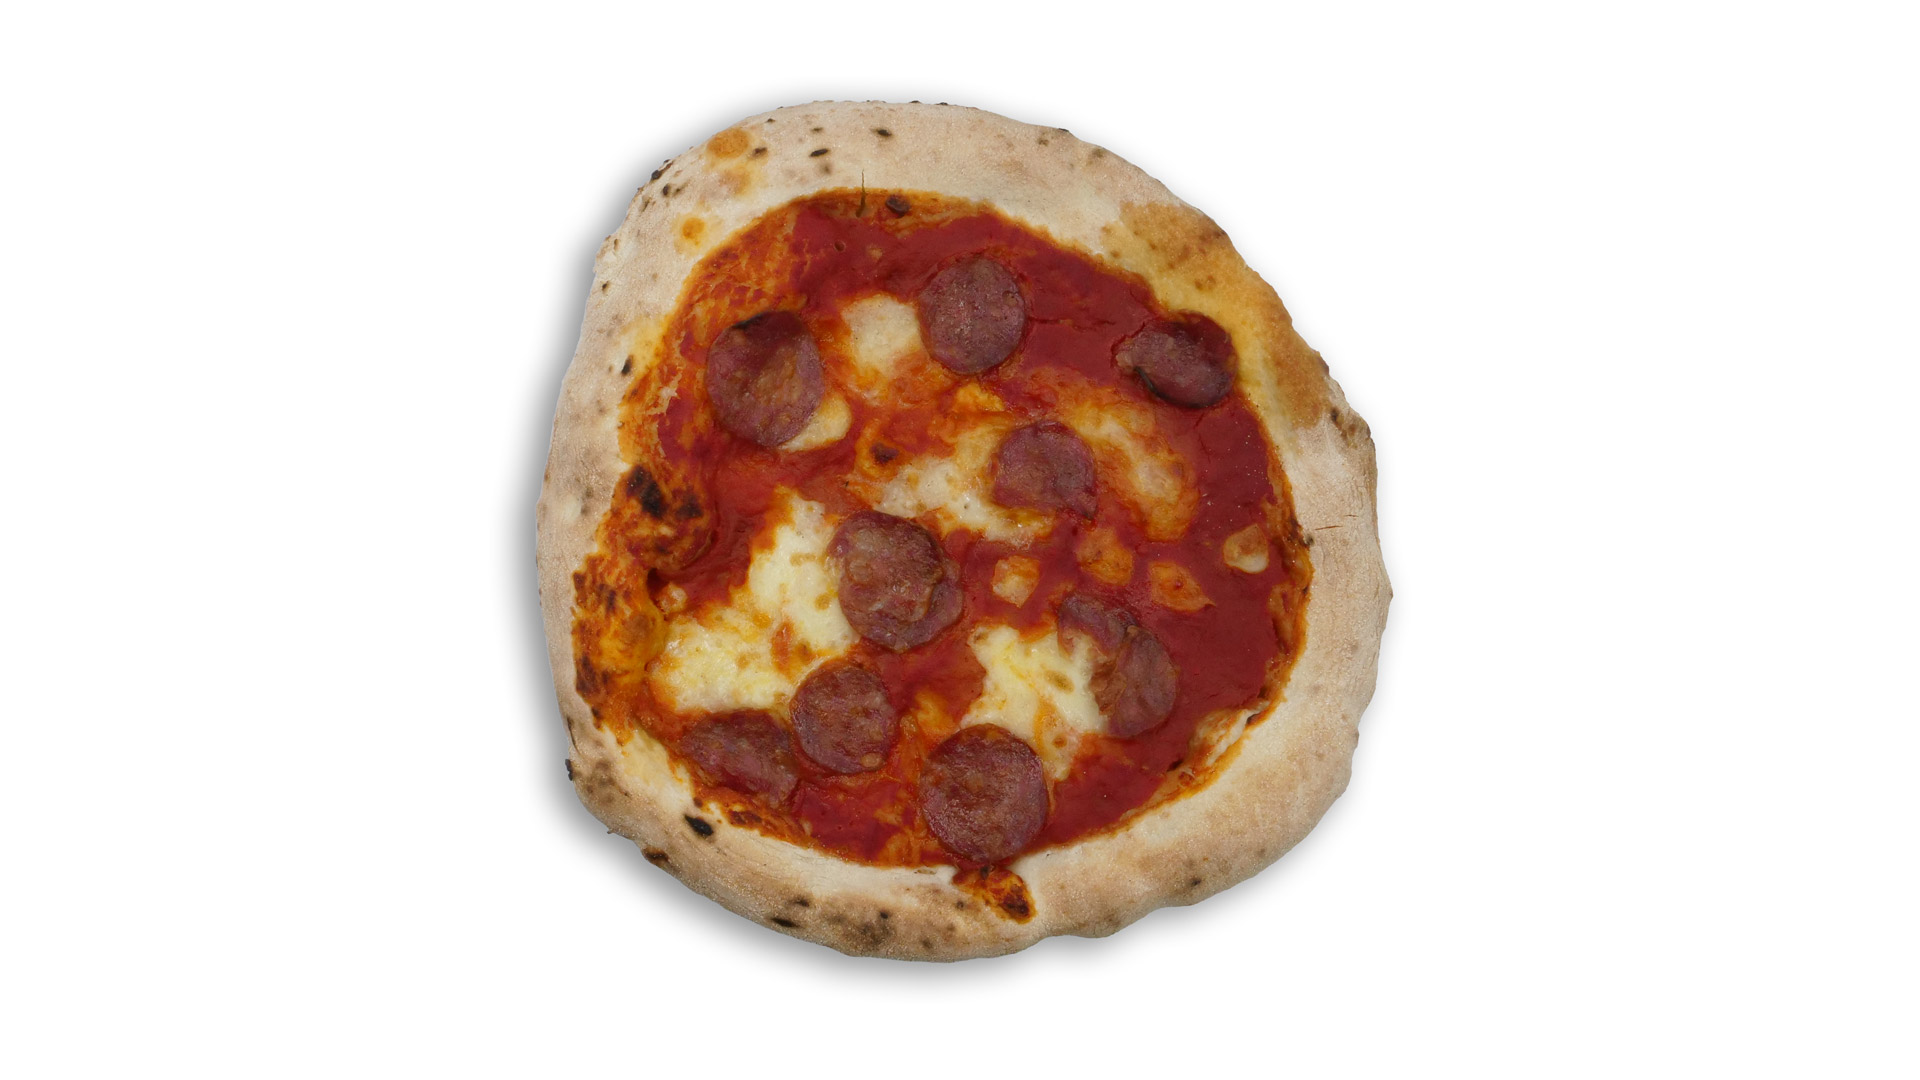 Pizza Salame | initial temperature of ≈ -18 °C
A pizza with an initial temperature of ≈ -18 °C regularly makes the baking process very demanding, because the enormous temperature difference between the pizza and the much hotter oven cavity can only result in appealing quality if the temperature is already high from the outset, present in all parts of the oven cavity, and remains completely stable during baking. Fortunately, the TX7PB63FSB can do all this: for example, the base of the pizza was crisp and crunchy throughout, and the browning performance also proved very even. The quality of the Gouda & more was just as exemplary. The cheese melted very uniformly in all areas and in the end took on a very attractive tone extending into golden brown; it is also nice that it showed only a few blackened spots, without any real loss of flavor being noticeable. The same applied to the outer pizza rim: it was crisp and crunchy and had lost only slightly more moisture in a few places. The very fact that the TX7PB63FSB can turn even a pizza with an initial temperature of ≈ -18 °C into a true pleasure experience without real flaws at such an impressive speed is a sign of solid baking performance.
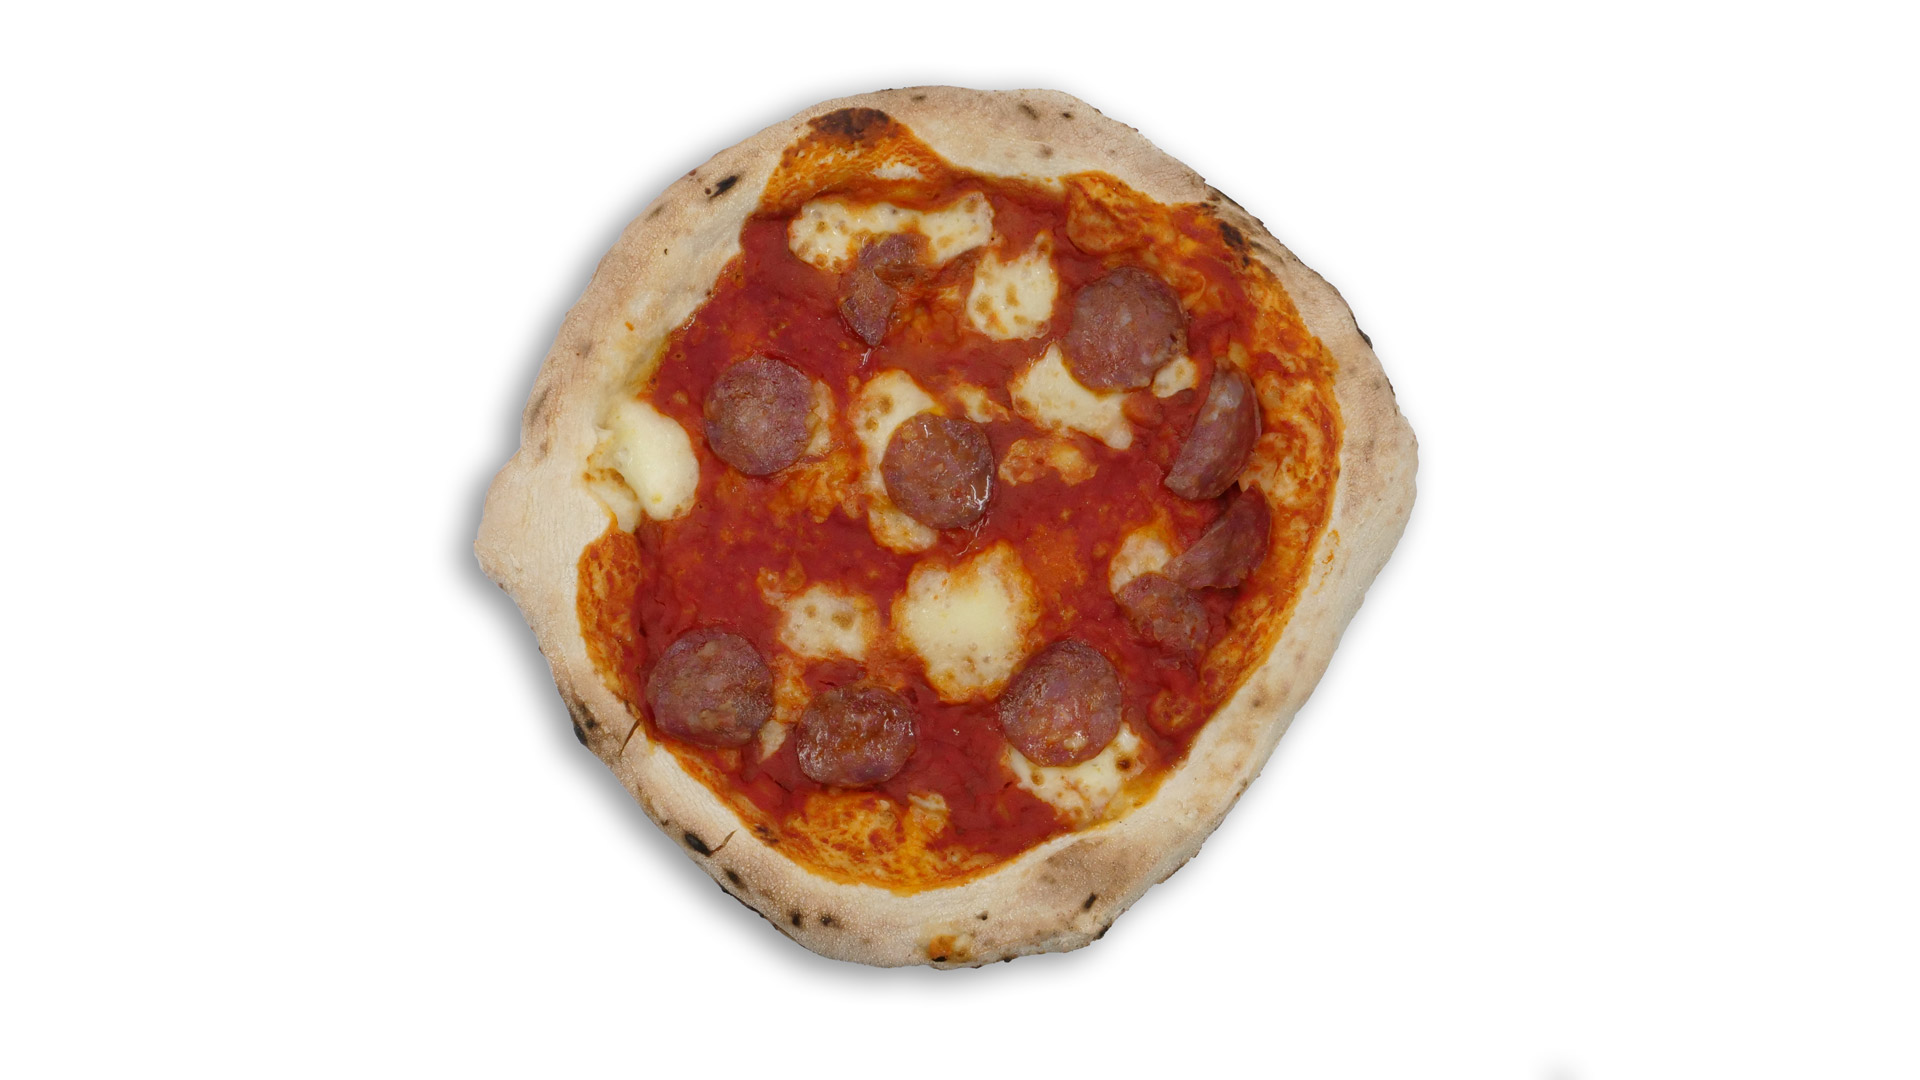
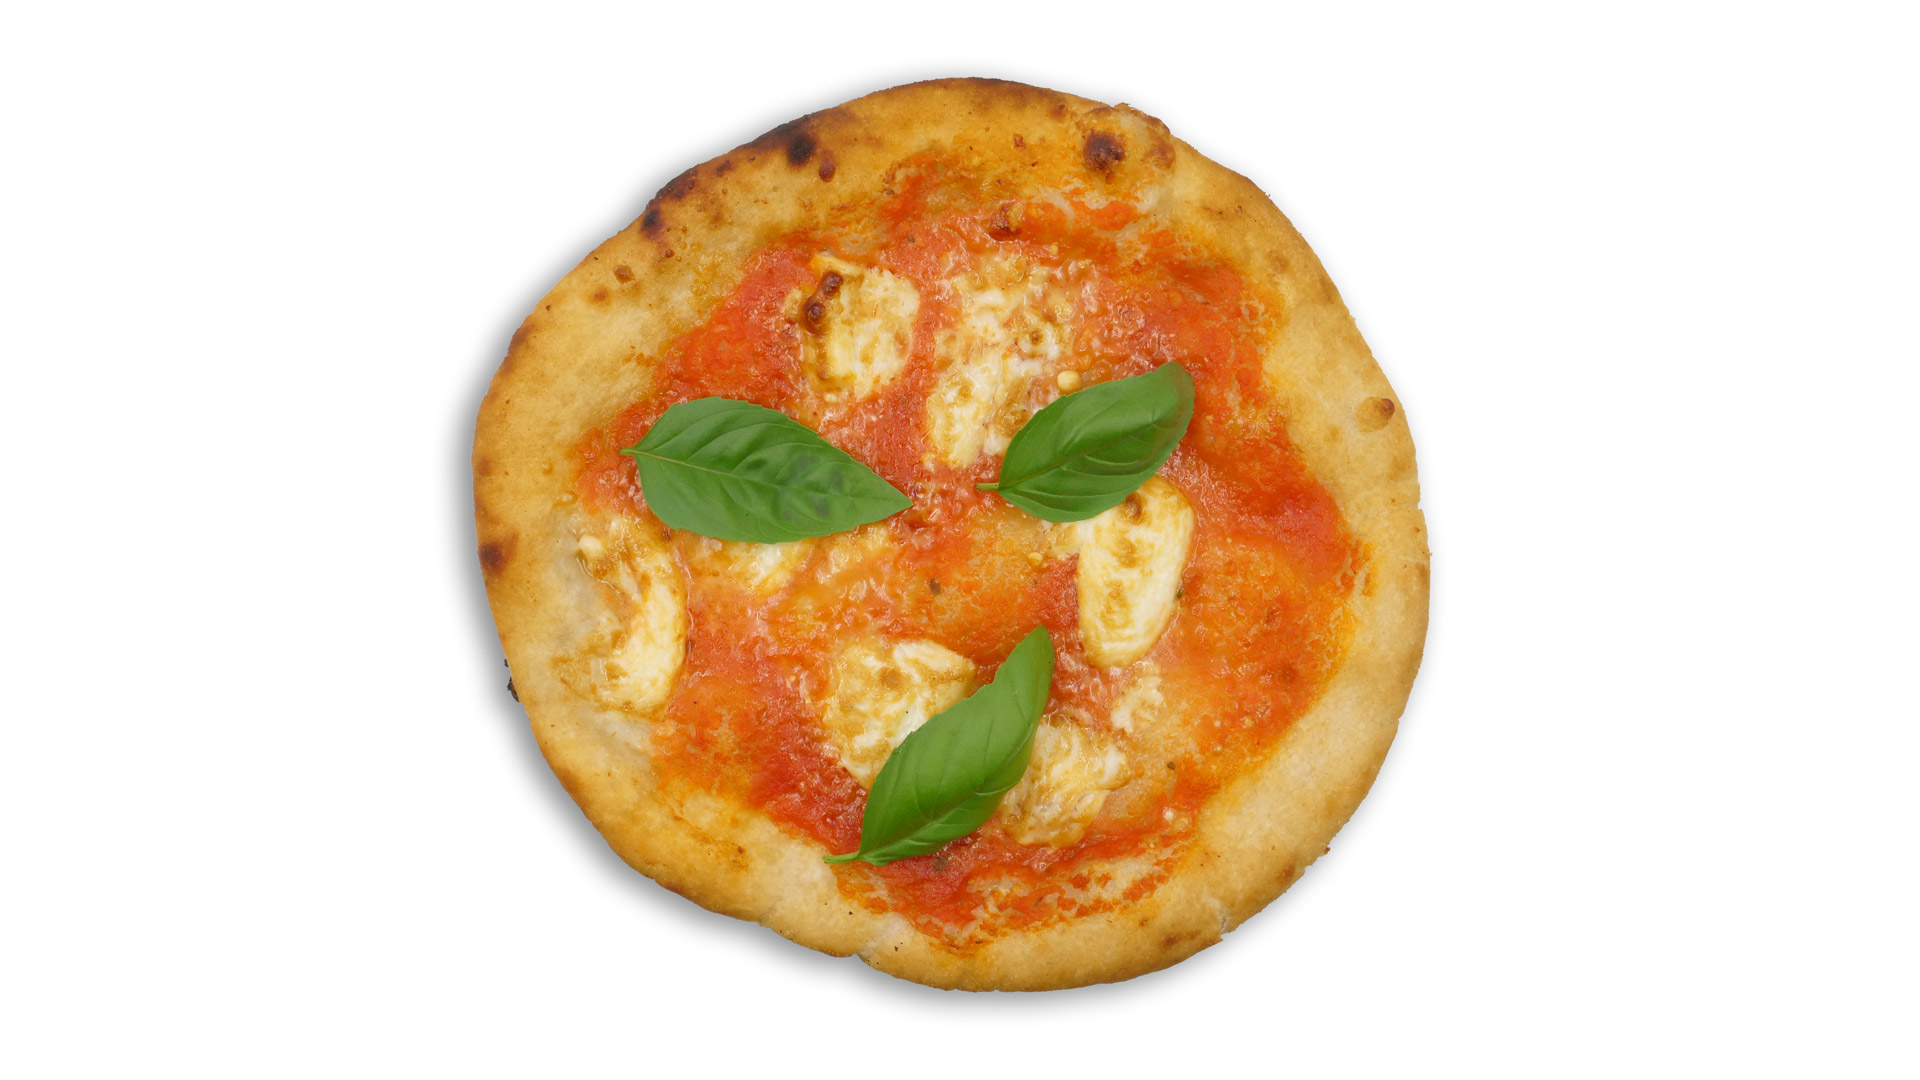
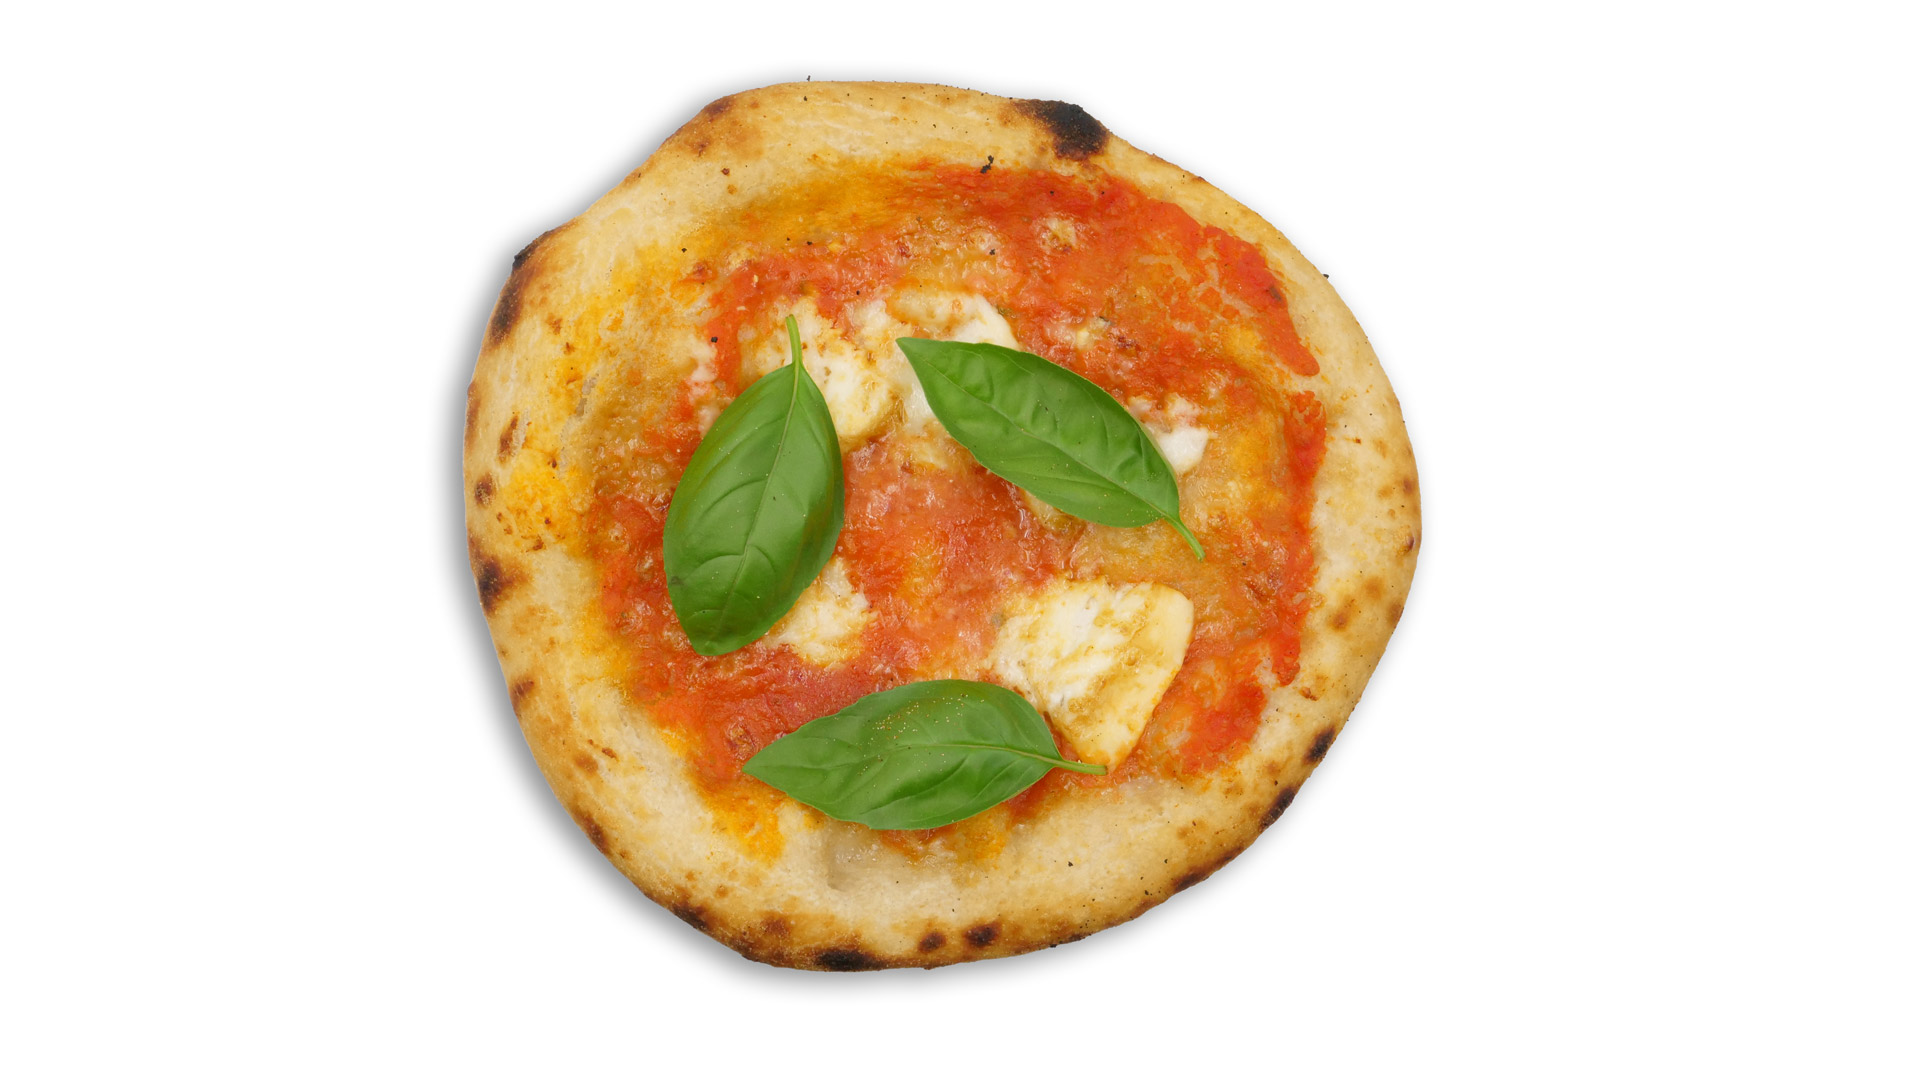 Fresh Pizza Margherita | initial temperature of ≈ 20 °C
The baking process made an even stronger impression in the case of a ≈ 20 °C warm fresh pizza in Neapolitan style: after all, the heat loss regularly associated with sliding the pizza into the oven cavity is much smaller. That is also one of the reasons why the pizza as a whole achieved exemplary texture; in the outer sections, a few signs of the wonderful leopard pattern could already be seen, which is an expression of thoroughly masterful quality – not only of the pizza itself, but also of the baking process. At the same time, the pizza rims became very voluminous. The base of the pizza was equally praiseworthy – crisp and crunchy in every part, completely stable, but nowhere dried out. That the TX7PB63FSB can achieve this at such tremendous speed is also thanks to the effective heat transfer from the cast iron. The mozzarella turned out equally beautifully: it distributed itself evenly over the pizza, though in the end parts of it still remained light white. The uniform color once again shows very clearly how extraordinarily even the temperature levels in the model’s oven cavity actually are.
 Pizza Margherita without gluten & more | initial temperature of ≈ -18 °C
The model also made a strong impression with this pizza, because pizzas without gluten are truly very demanding to bake, above all because the flours used here are more sensitive than conventional wheat flour. This is also why it makes sense to evaluate the quality of a pizza program using such a pizza. Yet once again, the TX7PB63FSB proved very composed here: the base of the pizza again became sufficiently stable without losing so much moisture that it turned brittle in the end. That is anything but self-evident with a gluten-free pizza, as its texture can, for example, suffer significantly if temperatures fluctuate heavily during baking. The same applied to everything else: thanks to the enormous temperature, the tomatoes developed an excellent flavor and showed only a few darker traces at the edges in some areas. The mozzarella also spread evenly over the pizza and took on a light golden-white color. The quality of the pizza was therefore solid all around, which can only be explained by the very appealing baking power of the TX7PB63FSB.
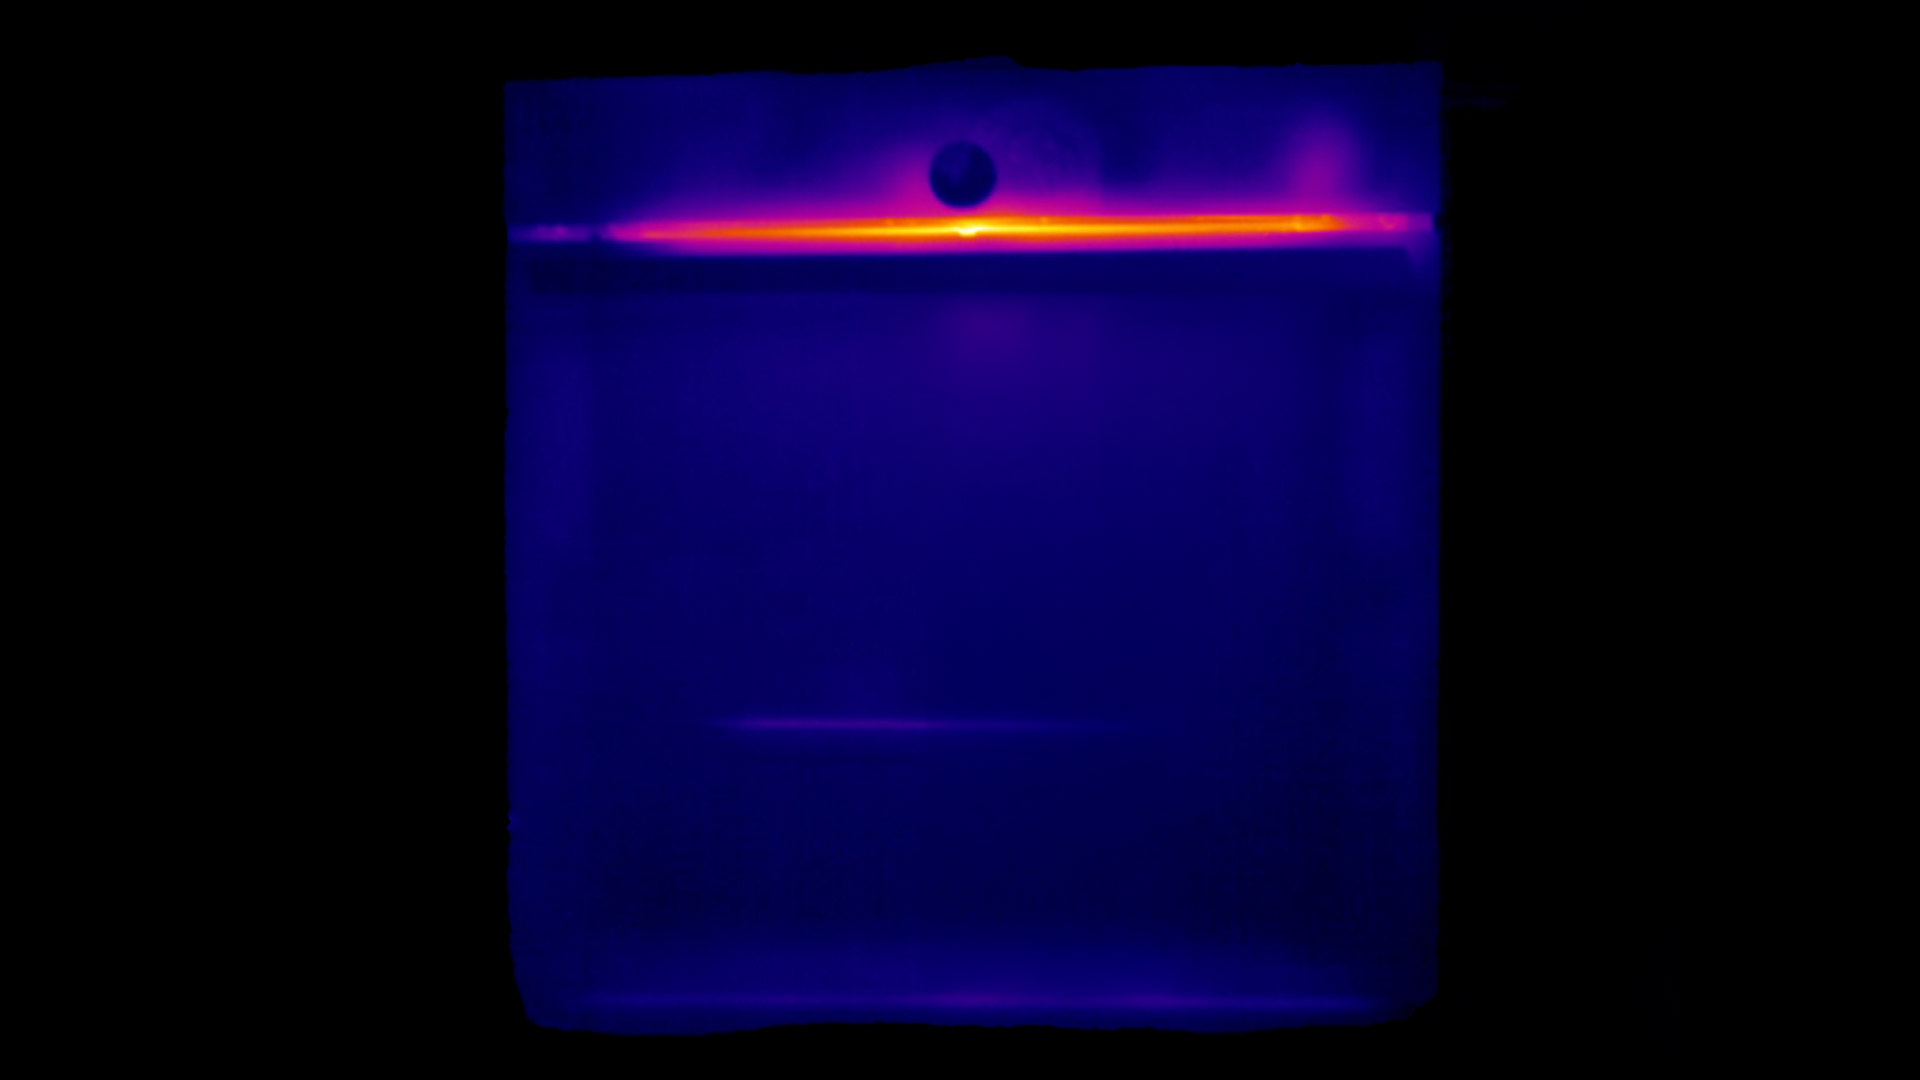
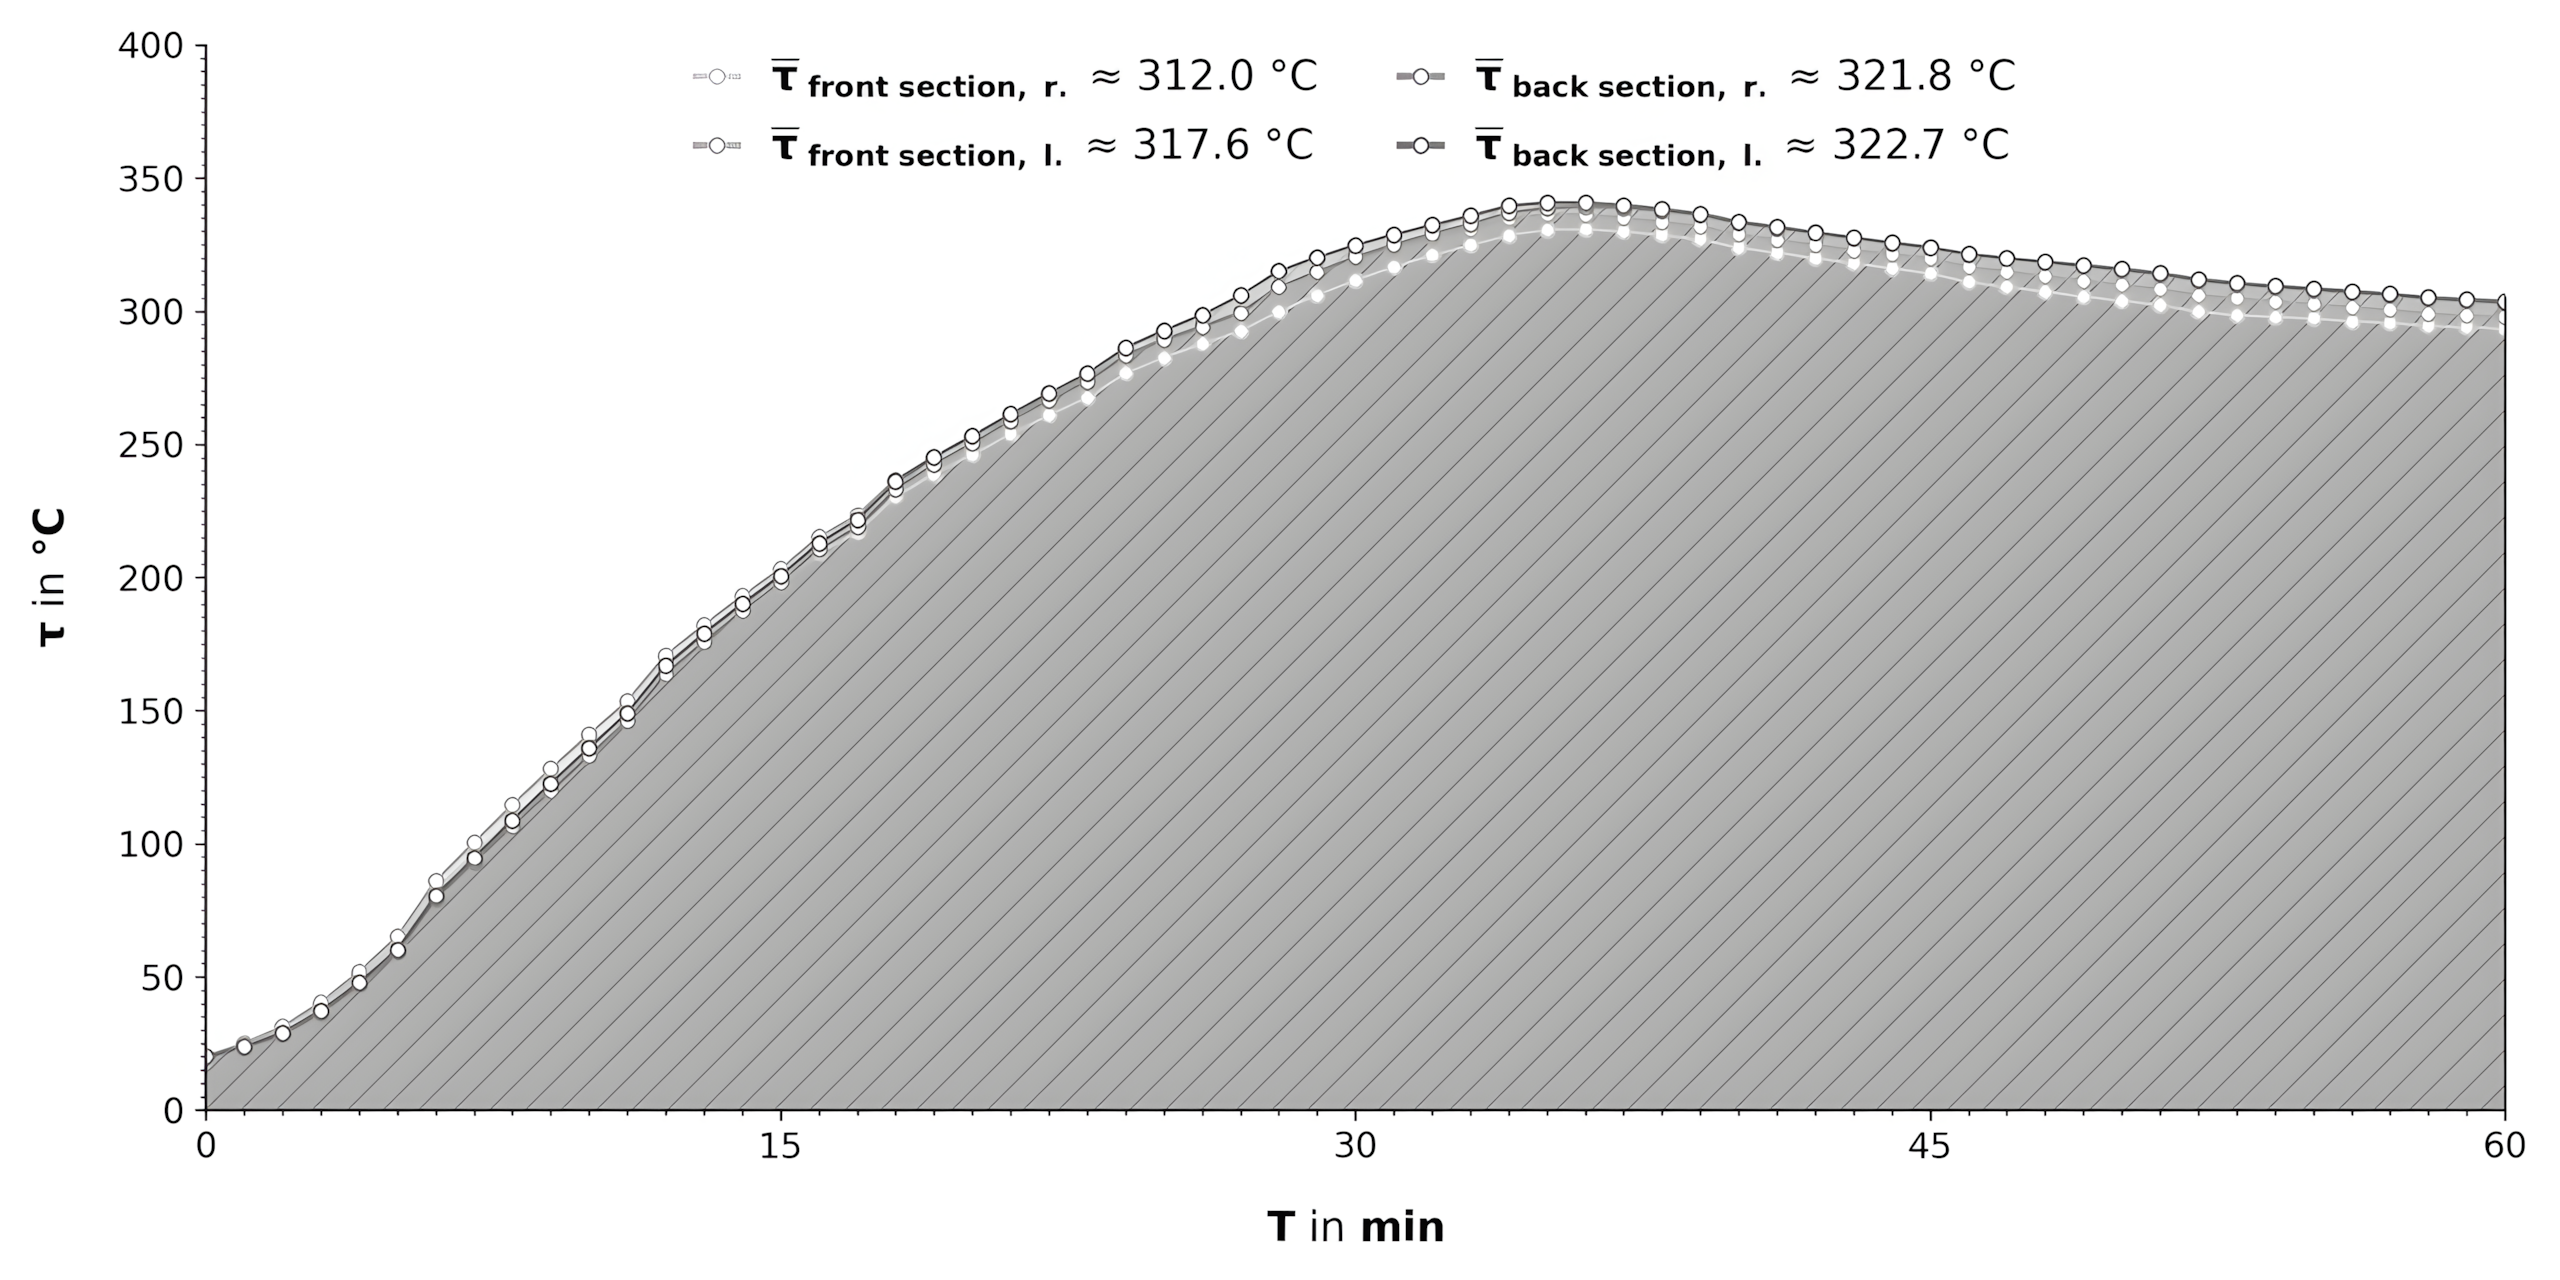
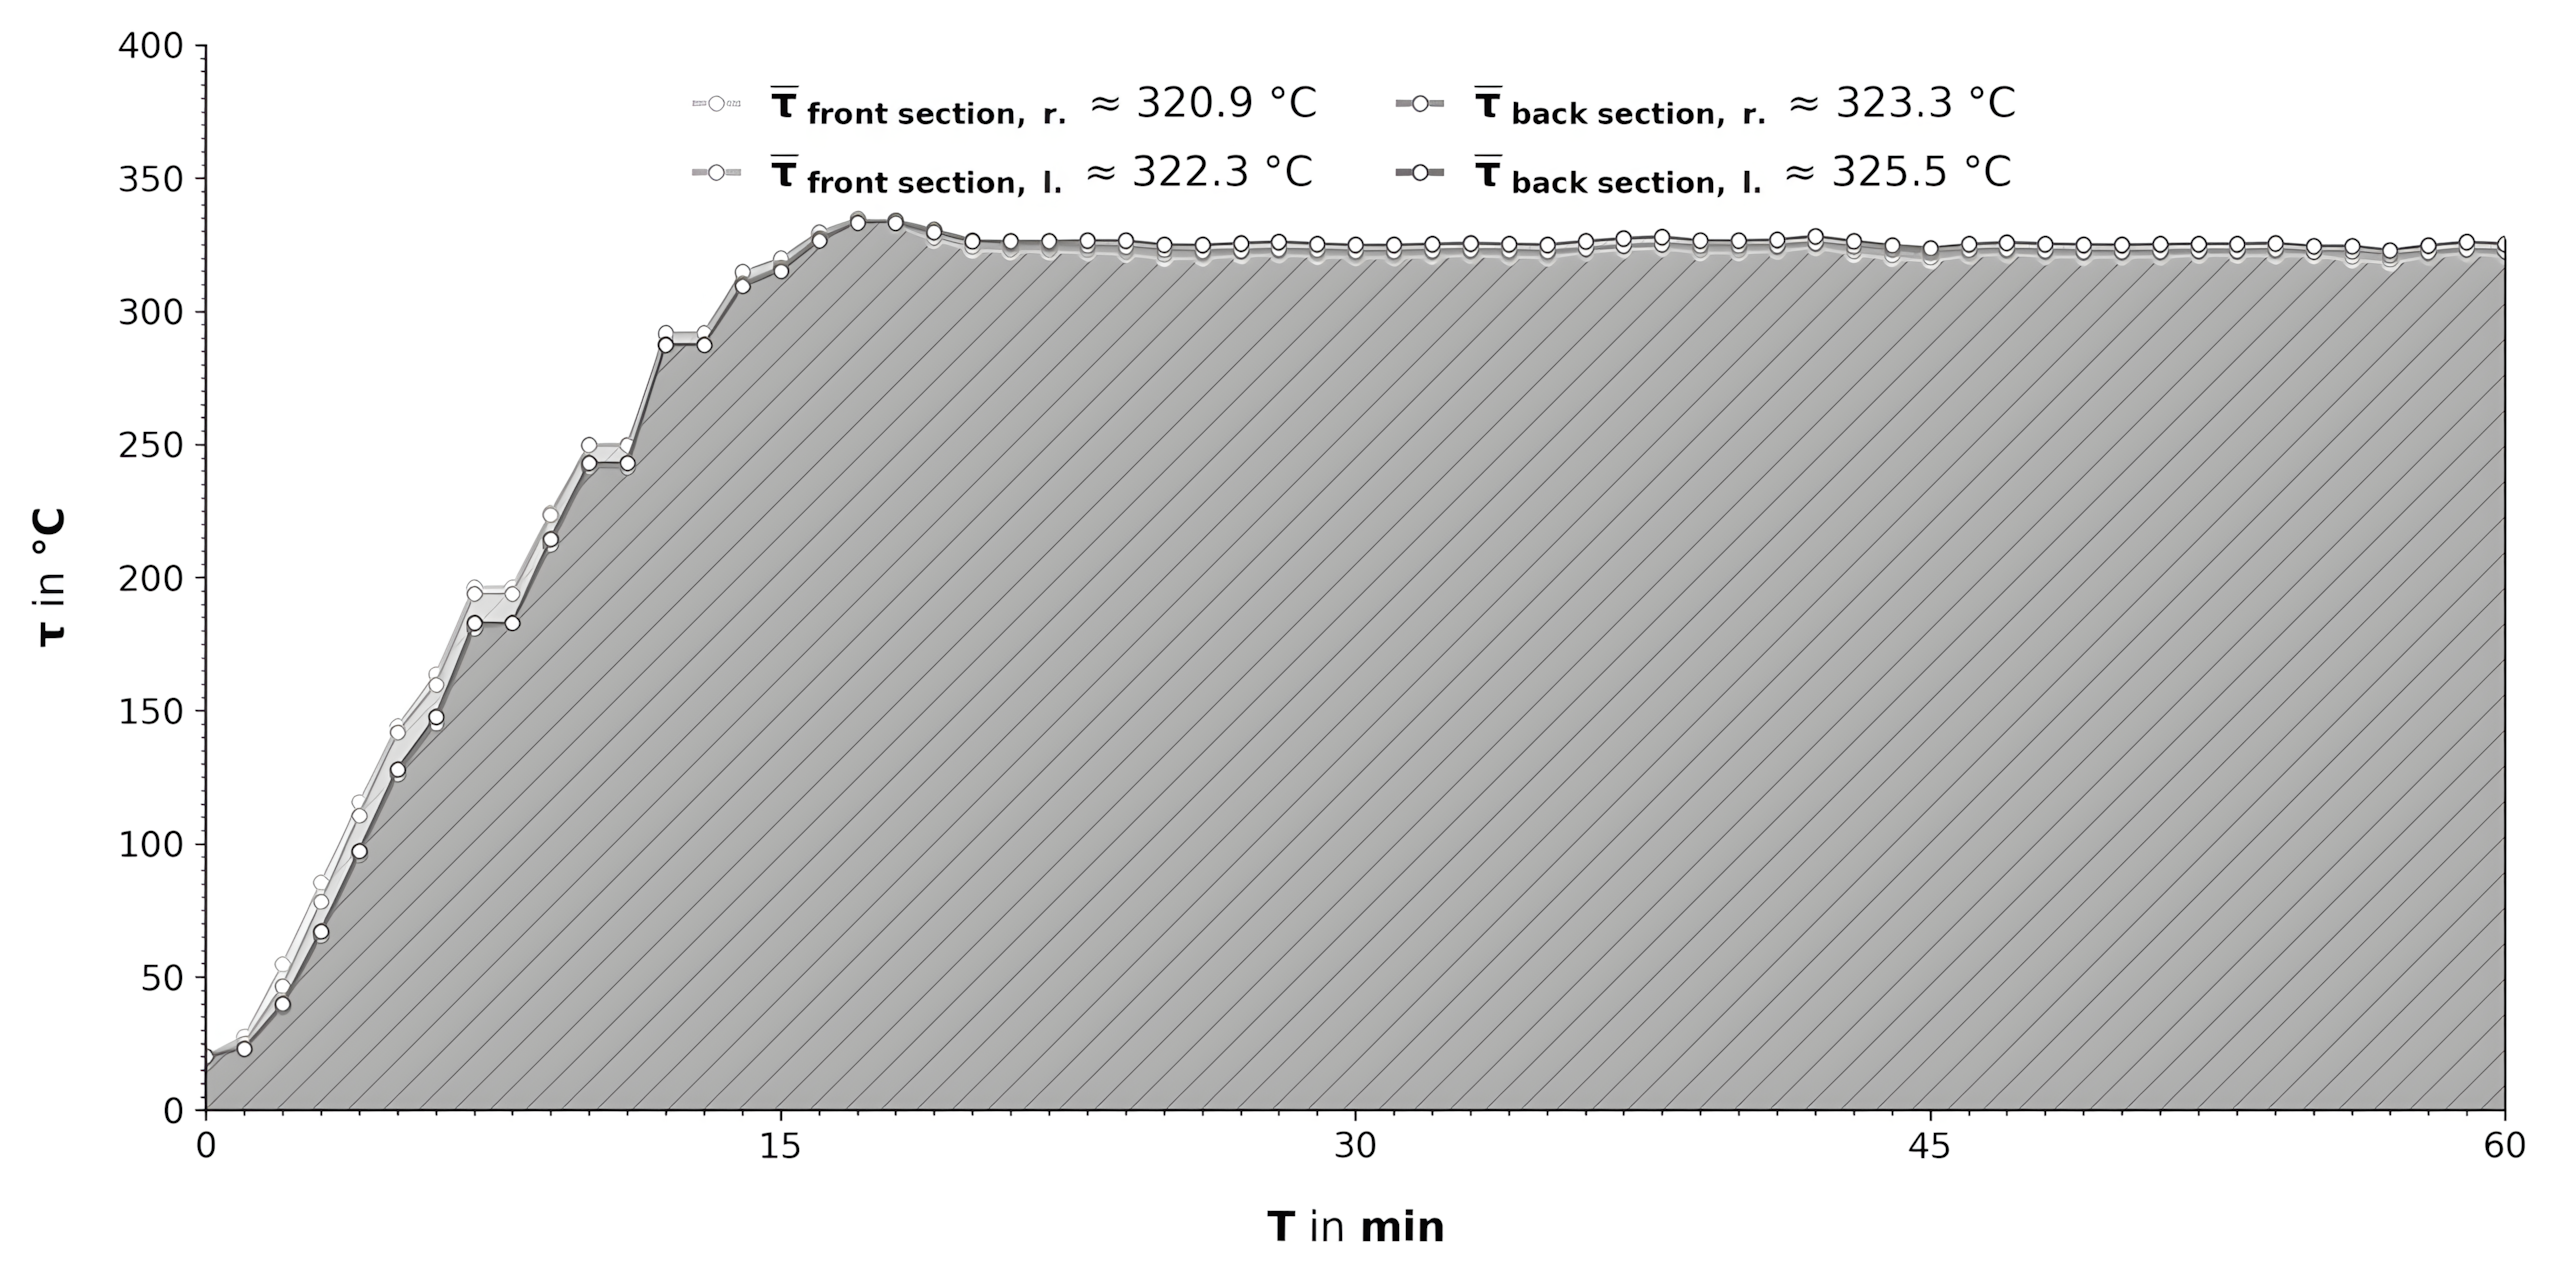 Temperatures in the special PIZZAEXPERT program
Here, too, it becomes very clear what tremendous temperatures are reached in all parts of the oven cavity during the pizza program and how even the temperature levels are. This is one of the reasons why pizzas in this model regularly turn out in such superb quality.
Gorenje
GO66E PIZZA350C

Key features
- Size of the oven cavity (Hmax × Wmax × Dmax): ≈ 38.6 × 47.2 × 42.2 cm
- Volume of the oven cavity (Vmax): ≈ 77.0 l
- Temperatures (tmin – tmax): 30–350 °C (depending on cooking program & more)
- Cooking programs: 16 (see the table)
- Automatic programs: 22 (see the table)
- Accessories: Baking tray (1 ×); pizza tray (1 ×, cast iron); pizza peel (1 ×); telescopic rails (2 ×); drip tray (1 ×)
Pros
- largely appealing baking performance for pizza (also thanks to the pizza bundle)
- evenly distributed temperatures in all cooking programs
- solid cooking performance for vegetables, meat, and fish in all cooking programs
- very easy cleaning (effective pyrolytic cleaning)
Cons
- sound pressure level can become more significant, for example in the pizza program
- unfortunately, the screen displays only graphics, not the names of the respective cooking programs as well
Size, weight & more
At ≈ 59.5 × 59.5 × 56.4 cm (Hmax × Wmax × Dmax of the model), the Gorenje GO66E PIZZA350C can be installed without any effort whatsoever. The rather moderate weight of only ≈ 36.6 kg (mmax of the model) also plays a role here. As a result, the model can be lifted completely effortlessly: especially if it has to be carried up a few flights of stairs after purchase, the weight will be very welcome.
 The model from the front
A large part of the front door is fitted with exceptionally sturdy glass. Nevertheless, during a cooking process you can only look into the oven cavity and get an impression of the food with difficulty because the glass is dark-tinted and lets only silhouettes show through. The size of ≈ 44.2 × 37.4 cm (Wmax × Hmax of the glass), however, is very proper. What is surprising is this: although the lamp inside the oven cavity is very bright, the rear parts of the cavity can still only be guessed at through the glass; this is annoying because the door has to be opened if you want to take a closer look at the current state of the food. For this reason, it is also irrelevant if, for example, several trays are used at once: after all, the food can hardly be recognized through the door glass anyway, so the blocking of the light by one of the upper trays is of secondary importance in the final analysis; the lamp can also be switched on or off manually via the front touch panel.
The oven cavity is of a truly very impressive size (≈ 38.6 × 47.2 × 42.2 cm, Hmax × Wmax × Dmax of the oven cavity): its usable volume of ≈ 77.0 l is greater than that of AEG (≈ 72.0 l) and Bauknecht (≈ 73.0 l). This means that even larger foods can be prepared in this oven cavity without difficulty: for example, we were also able to place tomahawk steaks inside to let them finish gently after initial searing. For that reason, this model can also be used in multi-person households without any real drawbacks.
 The shelf levels
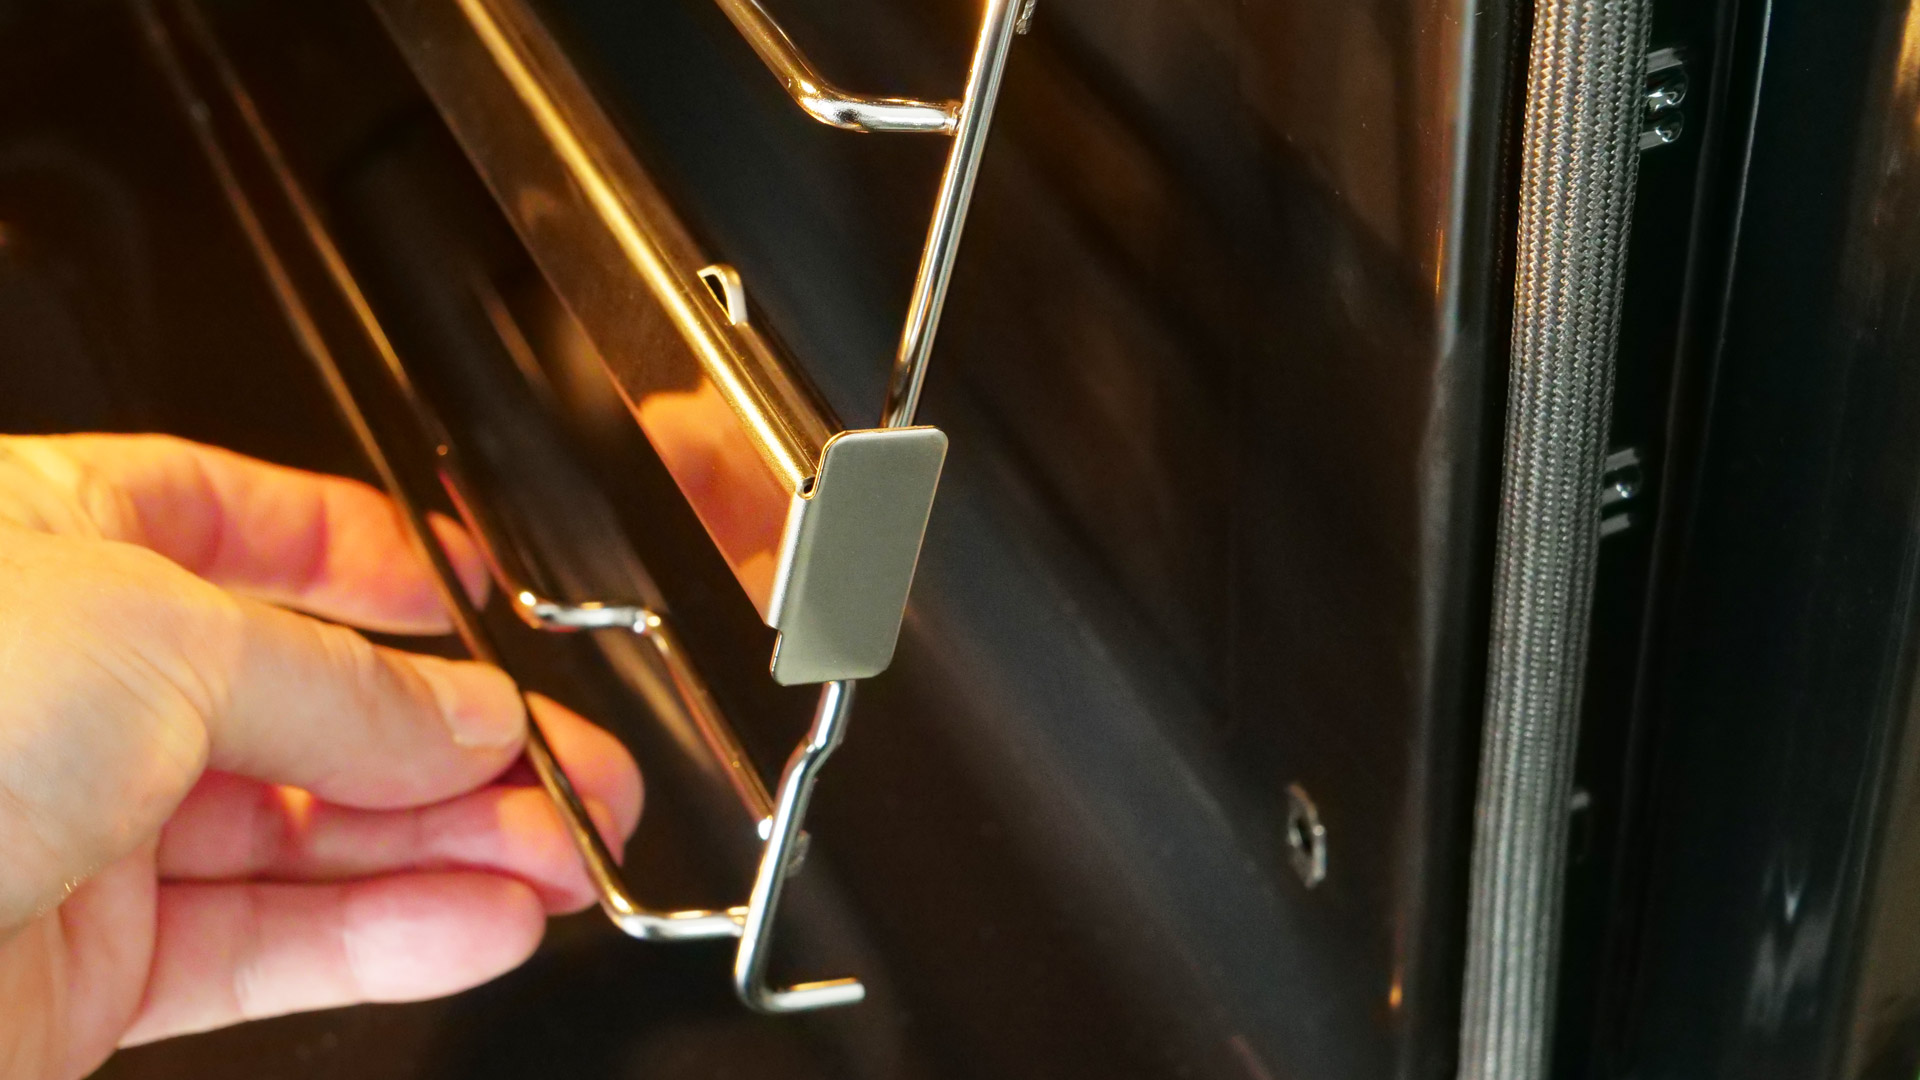
The shelf levels provided here are perfectly sufficient in cooking practice, because the height at which the food should remain during cooking can be reliably adapted to the respective cooking mode; in the relevant pizza program, for example, the pizza has to be placed on the 1st level, as only there can it benefit from the model’s maximum heat output.
Thanks to the numbers stamped into the metal (1, 2, 3, etc.), it is easy to see which level must be used: after all, the cooking notes in the instruction manual also regularly refer to the respective cooking position.
 How trays & more slide
The sliding movement is largely smooth; only occasionally can the trays catch so that you have to pull them out again, change the angle by a few degrees, and then push them back in. That can be irritating, but in practice it is not a real problem.
We gained the same impression when using the other parts of the accessory bundle: the wire rack also merely has to be pushed into the oven cavity precisely.
 The telescopic rails
The GO66E PIZZA350C comes from the factory with a pair of telescopic rails that are already connected to the oven cavity. They are so stable that they can also be used while cooking very heavy foods (for example a goose, a chicken, etc.) without making the use of the telescopic rails more difficult; we were always able to carry out the sliding movement smoothly.
The model’s accessory bundle includes a double pack of baking trays and a versatile rack. One of these baking trays has a very simple style with a height of only ≈ 2.8 cm; meat, fish, and vegetable dishes can be spread out on it with plenty of room. The other baking tray, meanwhile, is much deeper (≈ 5.8 cm). Its use is sensible in various situations, for example during grilling when you want to prevent meat and fish juices from soiling the bottom of the oven cavity; they can instead collect in this tray and be poured out at the end of cooking. The rack is especially valuable when foods are meant to receive heat from all angles, for example when cooking in the AIR FRYER (AIR FRY) mode or the like. Like the model from AEG, the GO66E PIZZA350C comes from the factory with a special metal pizza tray: we will discuss its quality in cooking practice in much greater detail elsewhere.
Operation
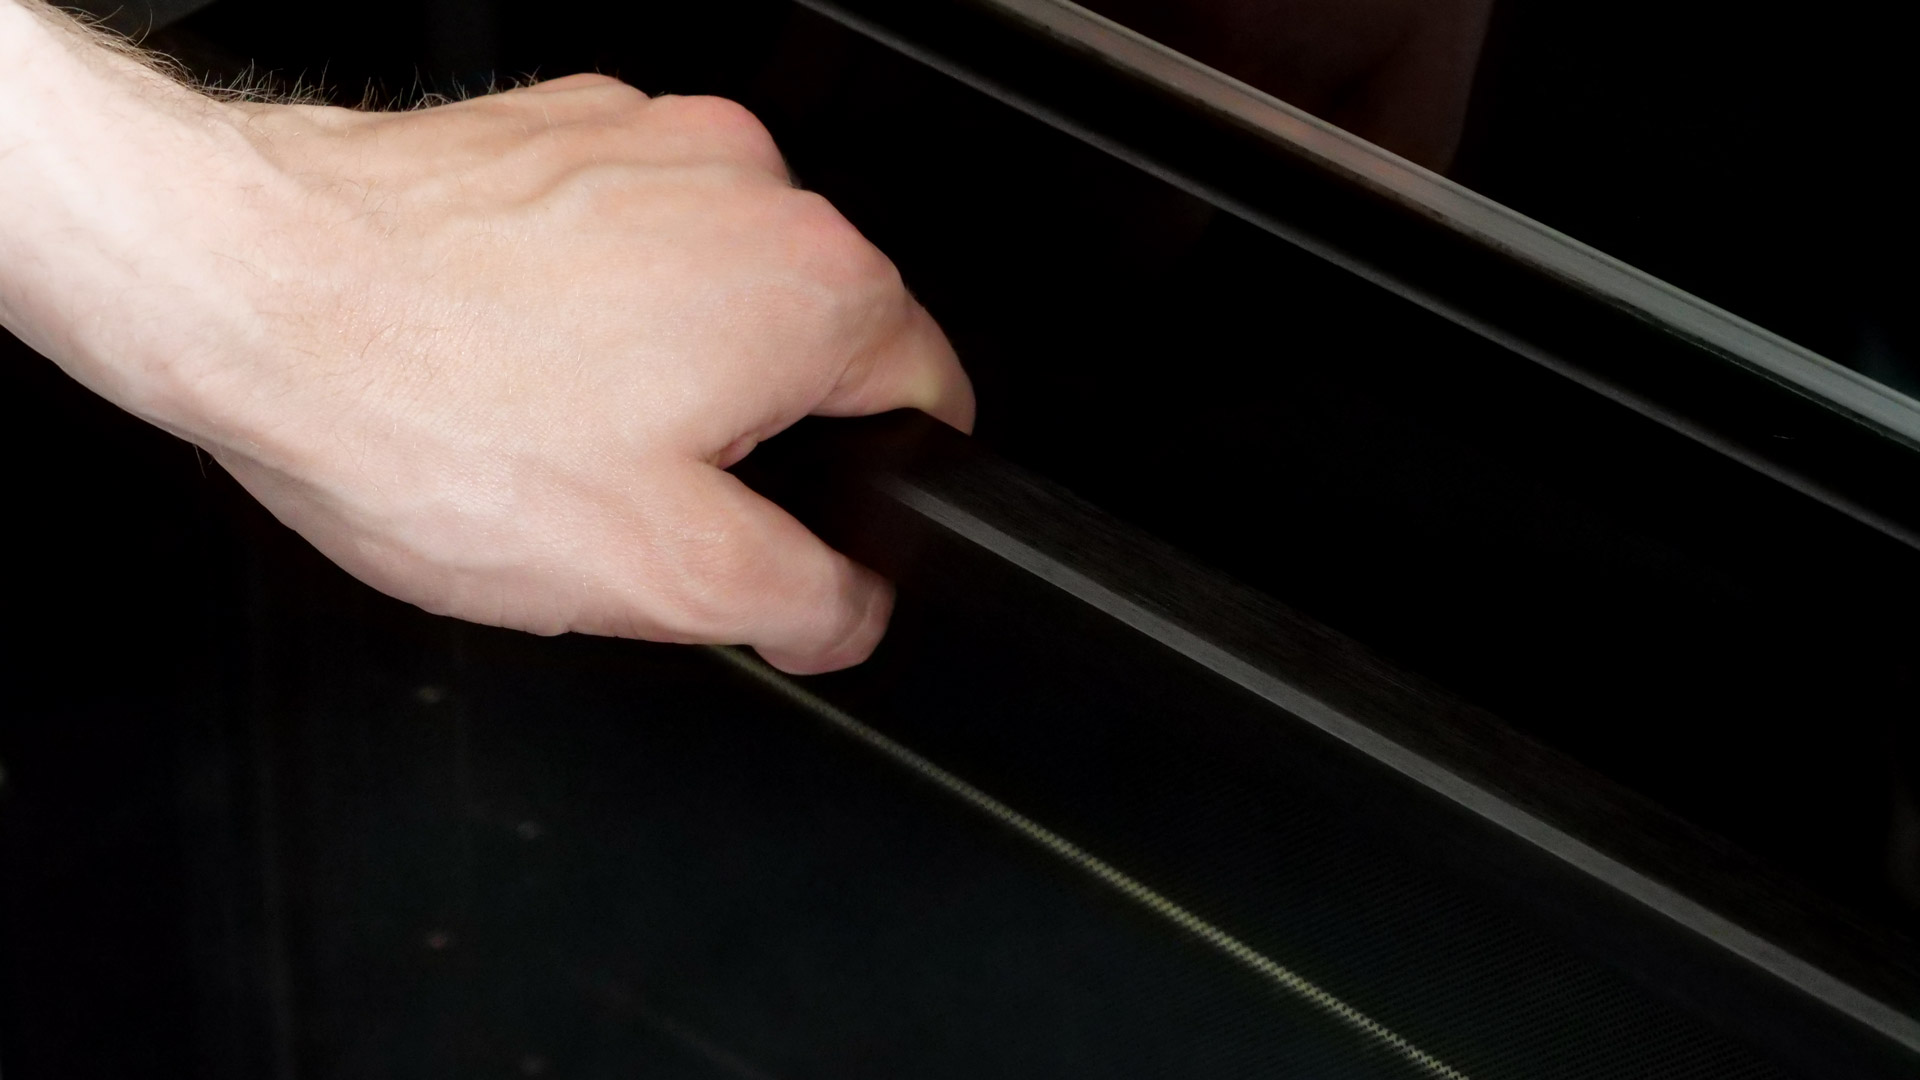
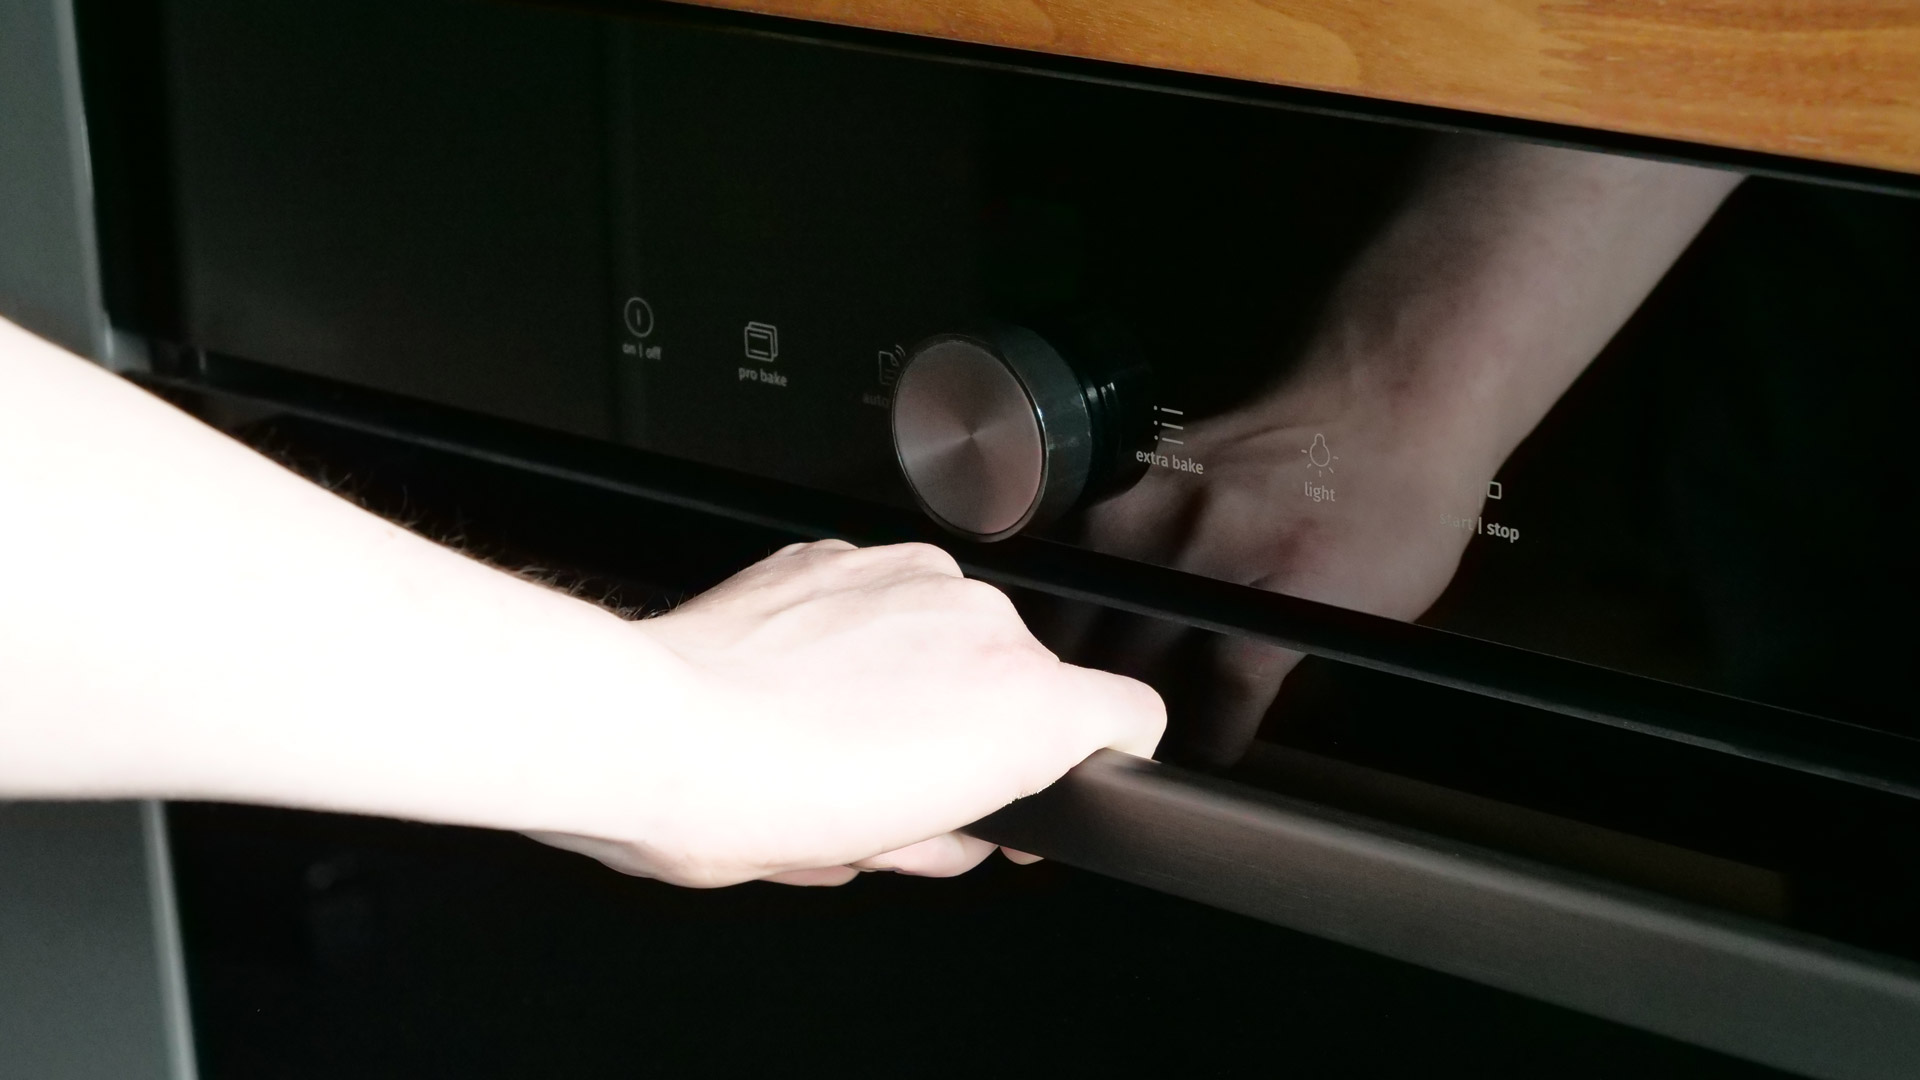
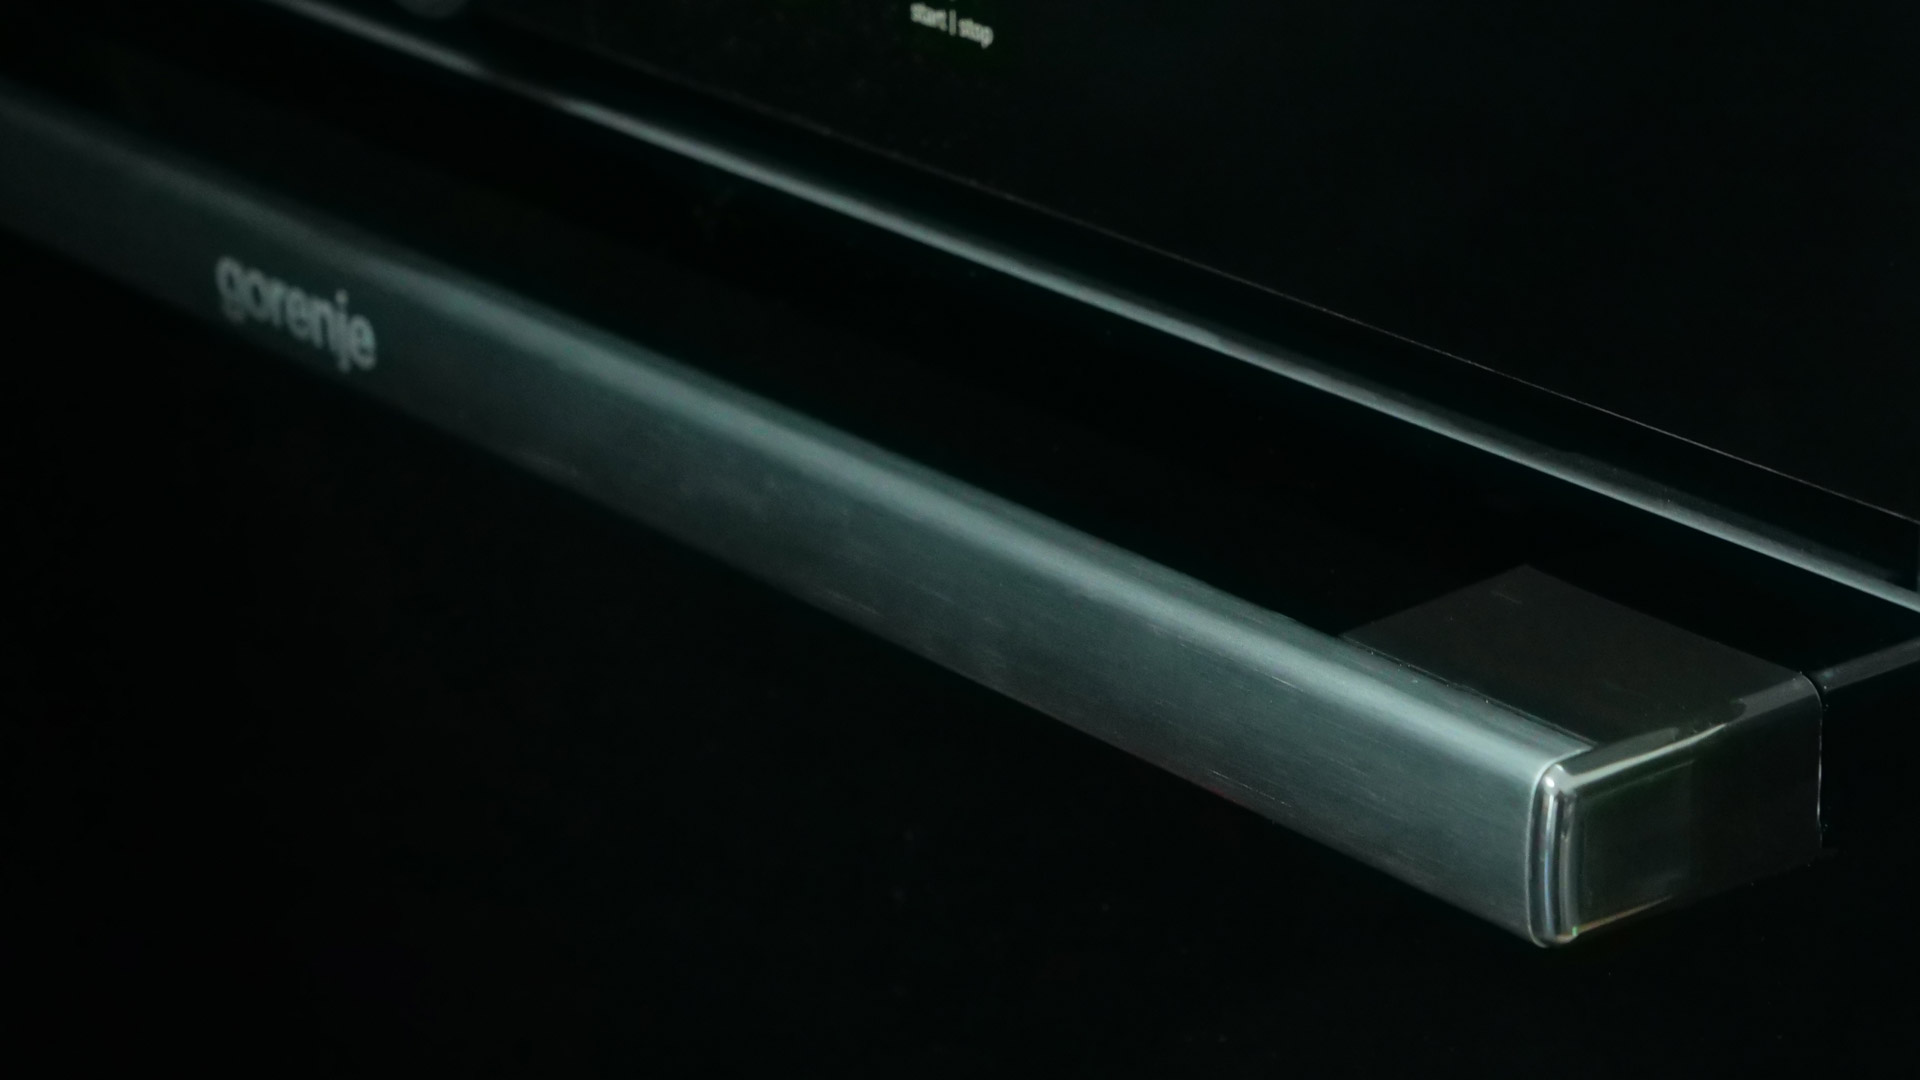 The door handle
The door has been given hinges of very solid quality, which means the door movement can be performed very securely. Also pleasing is the rounded metal handle, which can be grasped completely without difficulty and with a secure grip. The door can be lowered and raised without this opening and closing movement involving any truly significant resistance.
Just like, for example, the model from AEG, this one also features a special mechanism that allows the door to close only at a moderate speed: this means you do not have to worry at all about damage to the materials of the door, especially the glass (GENTLECLOSE).
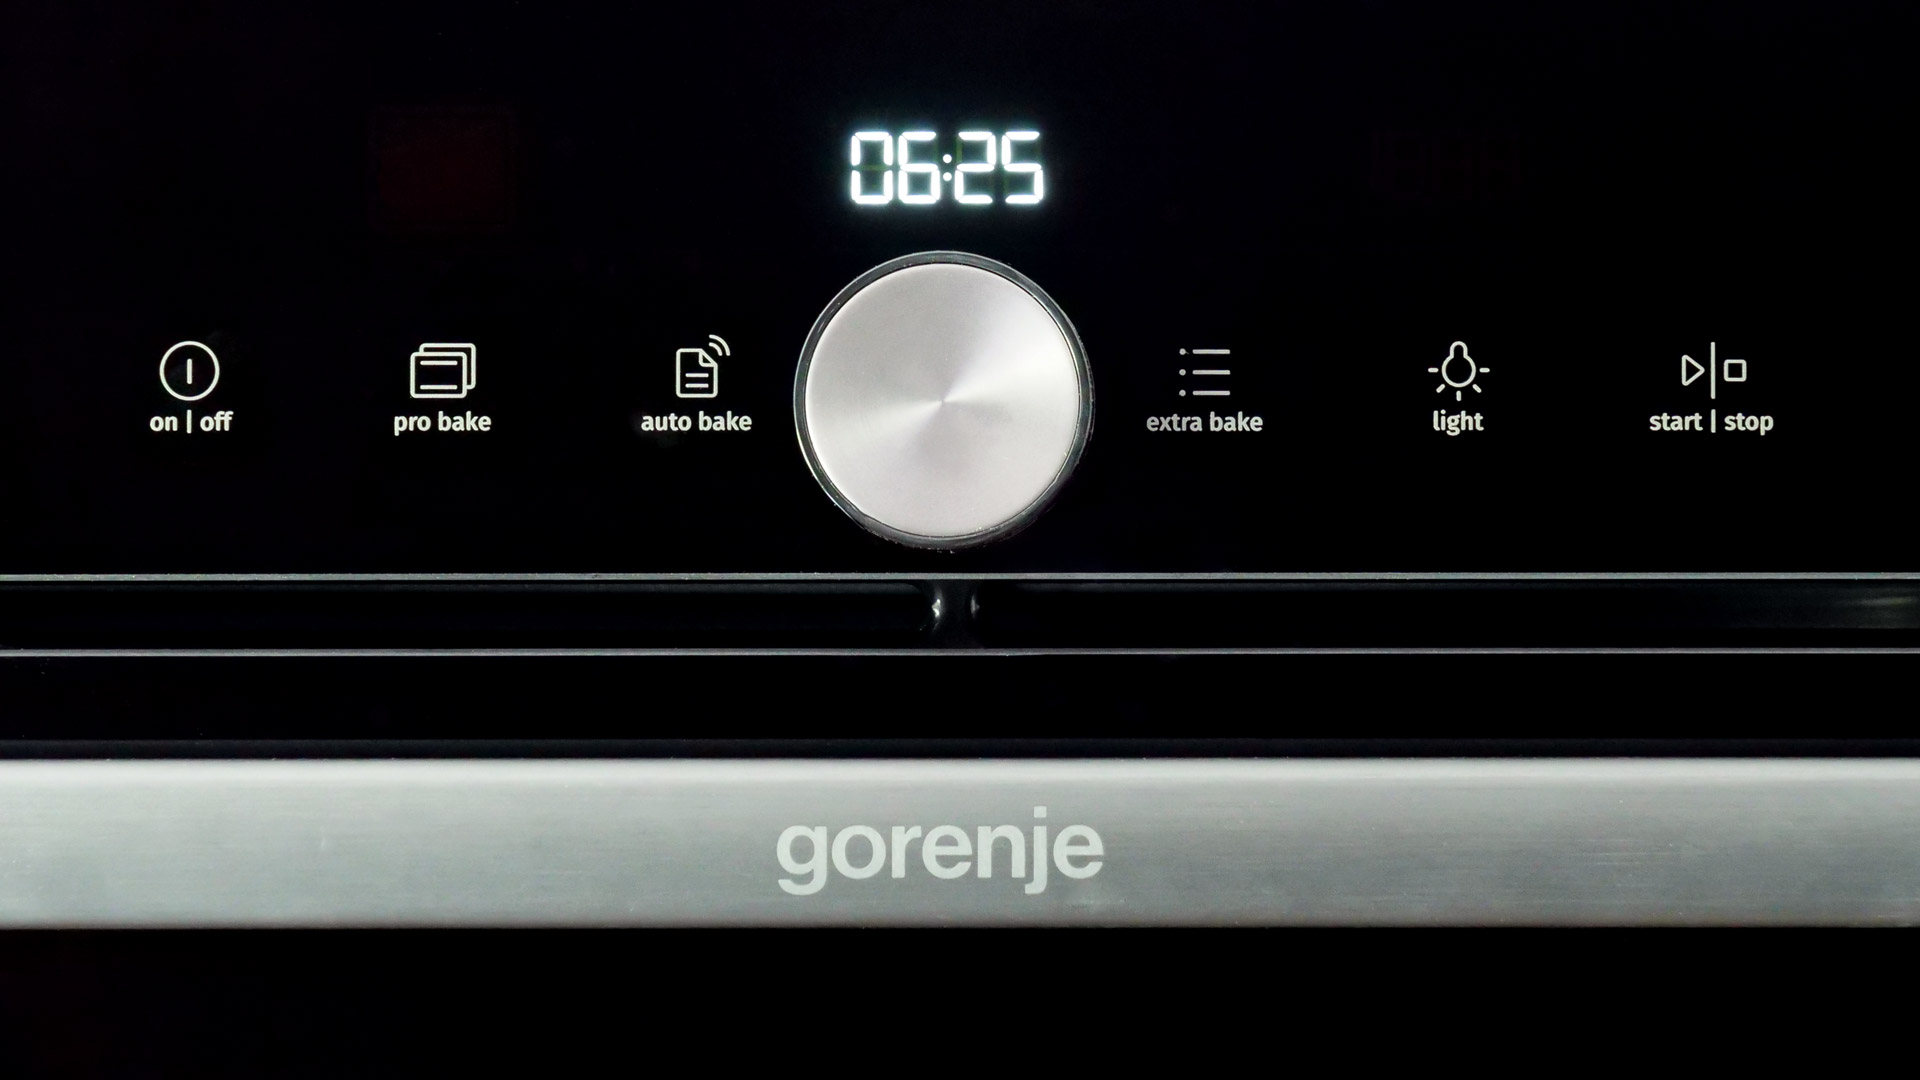 The touch panel
The full touch panel of the GO66E PIZZA350C is located above the door. In addition to the six touch controls, there is also a screen that illustrates, for example, the current cooking program, the cooking parameters associated with it, and more. The touch controls are labeled not only with useful graphics but also with English-language texts that are nevertheless fully understandable. Finally, there is also a rotary knob with which temperature & more can be adjusted.
At ≈ 16.5 × 2.5 cm (Wmax × Hmax of the screen), the screen is of truly appealing size. Even so, it displays many texts only as abbreviations, for example during preheating PRHT instead of PREHEATING. What is wonderful, however, is that the screen can be read from all angles, even from more than ≈ 1 m away. It also shows the cooking parameters in bright white and at a very appealing size. Admittedly, if the sun shines directly onto the screen it can cause considerable reflections, but this is hardly avoidable and was also observed with the models from AEG and Bauknecht.
 The different parts of the touch panel
The six touch controls are located at the foot of the screen: they are arranged around the rotary knob, which stands out very nicely in a lighter gray from the black glass panel. The touch panel is basically very reliable; only sometimes can it happen that a gesture has to be repeated if, for example, you want to access another menu of the cooking programs. What may surprise some people is that the touch controls really do have to be pressed if you want the model to respond effectively. While the graphics visible here are only more or less self-explanatory, the additional texts are fully understandable. For that reason, using the GO66E PIZZA350C is basically very intuitive – unfortunately, though, not in every respect.
What we have to criticize above all is this: while selecting the cooking program, the model displays only graphics which are of very appealing quality, but many of which are nevertheless very difficult to classify. Whereas the graphics for TOP AND BOTTOM HEAT and other standard cooking programs are readily understandable, the situation is different for those of LARGE-AREA GRILL, LARGE-AREA GRILL WITH FAN, etc. Here, a look at the instruction manual is necessary.
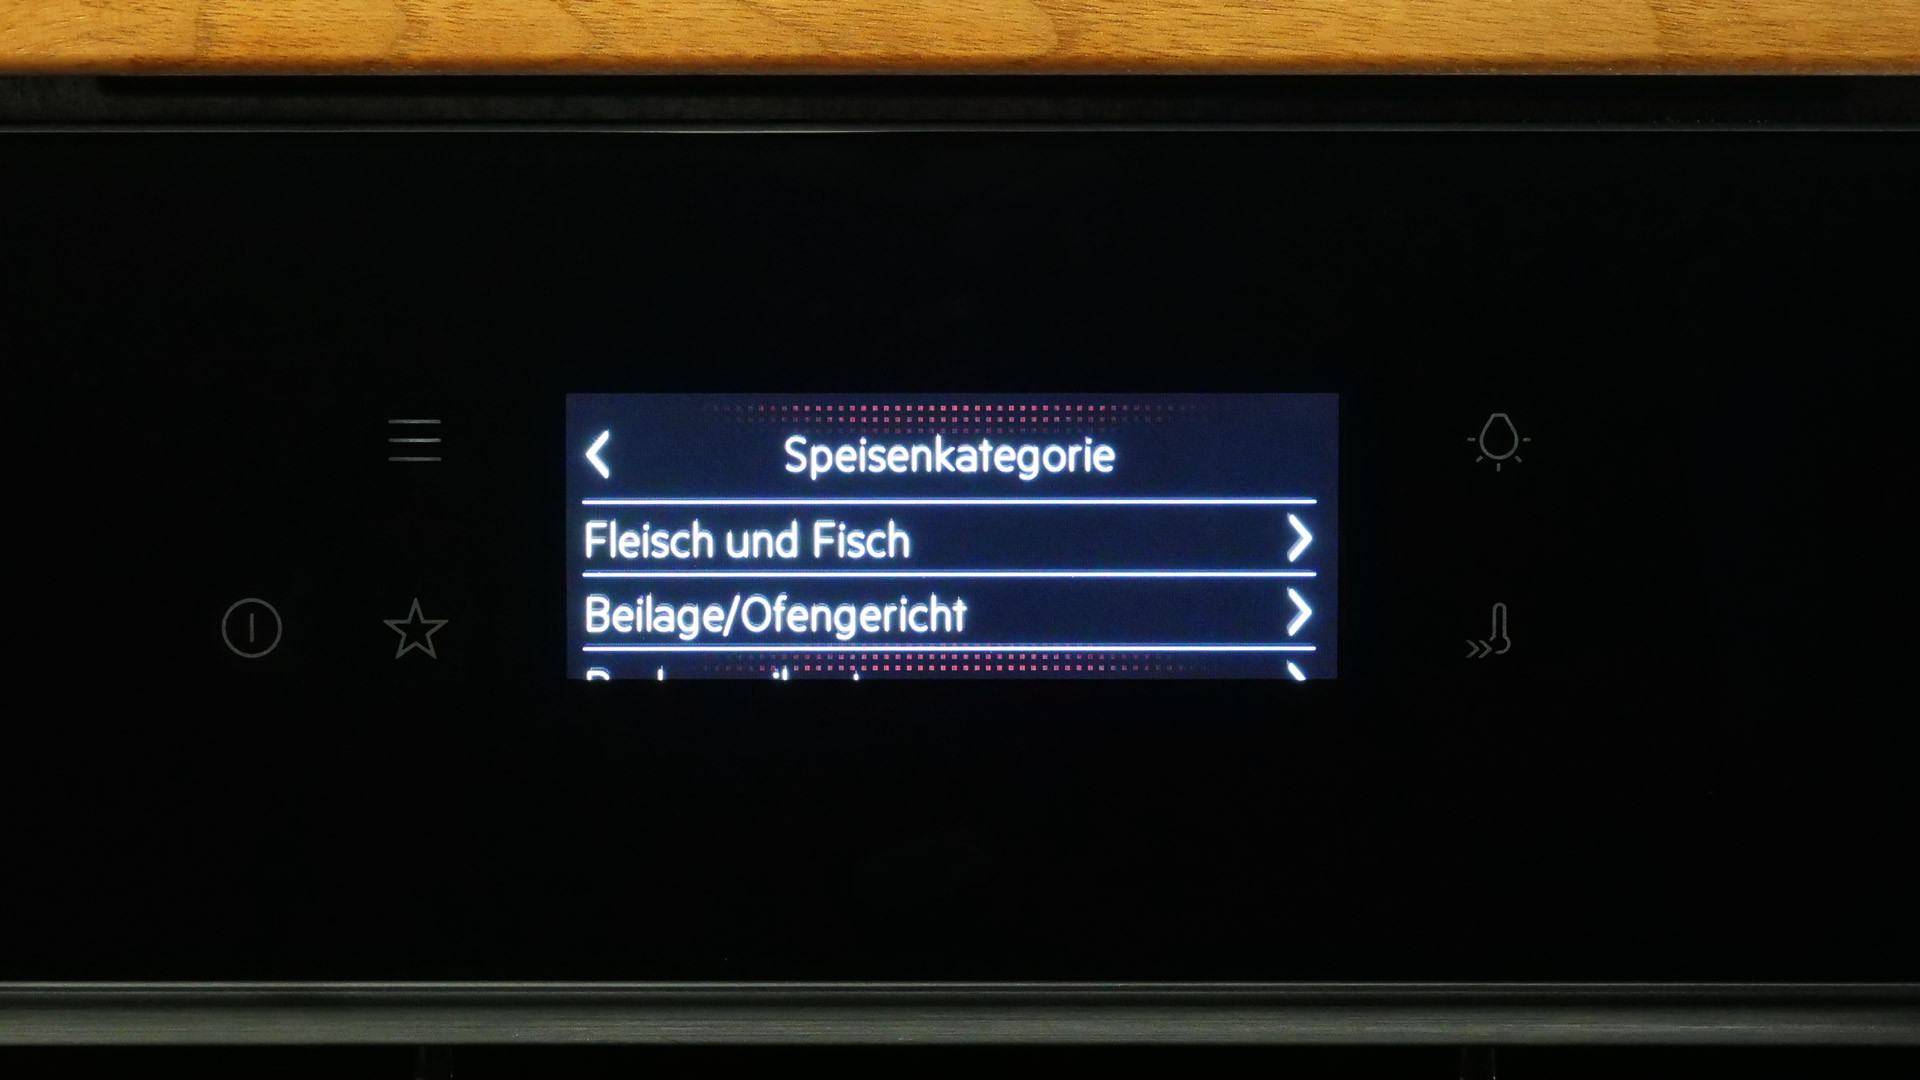
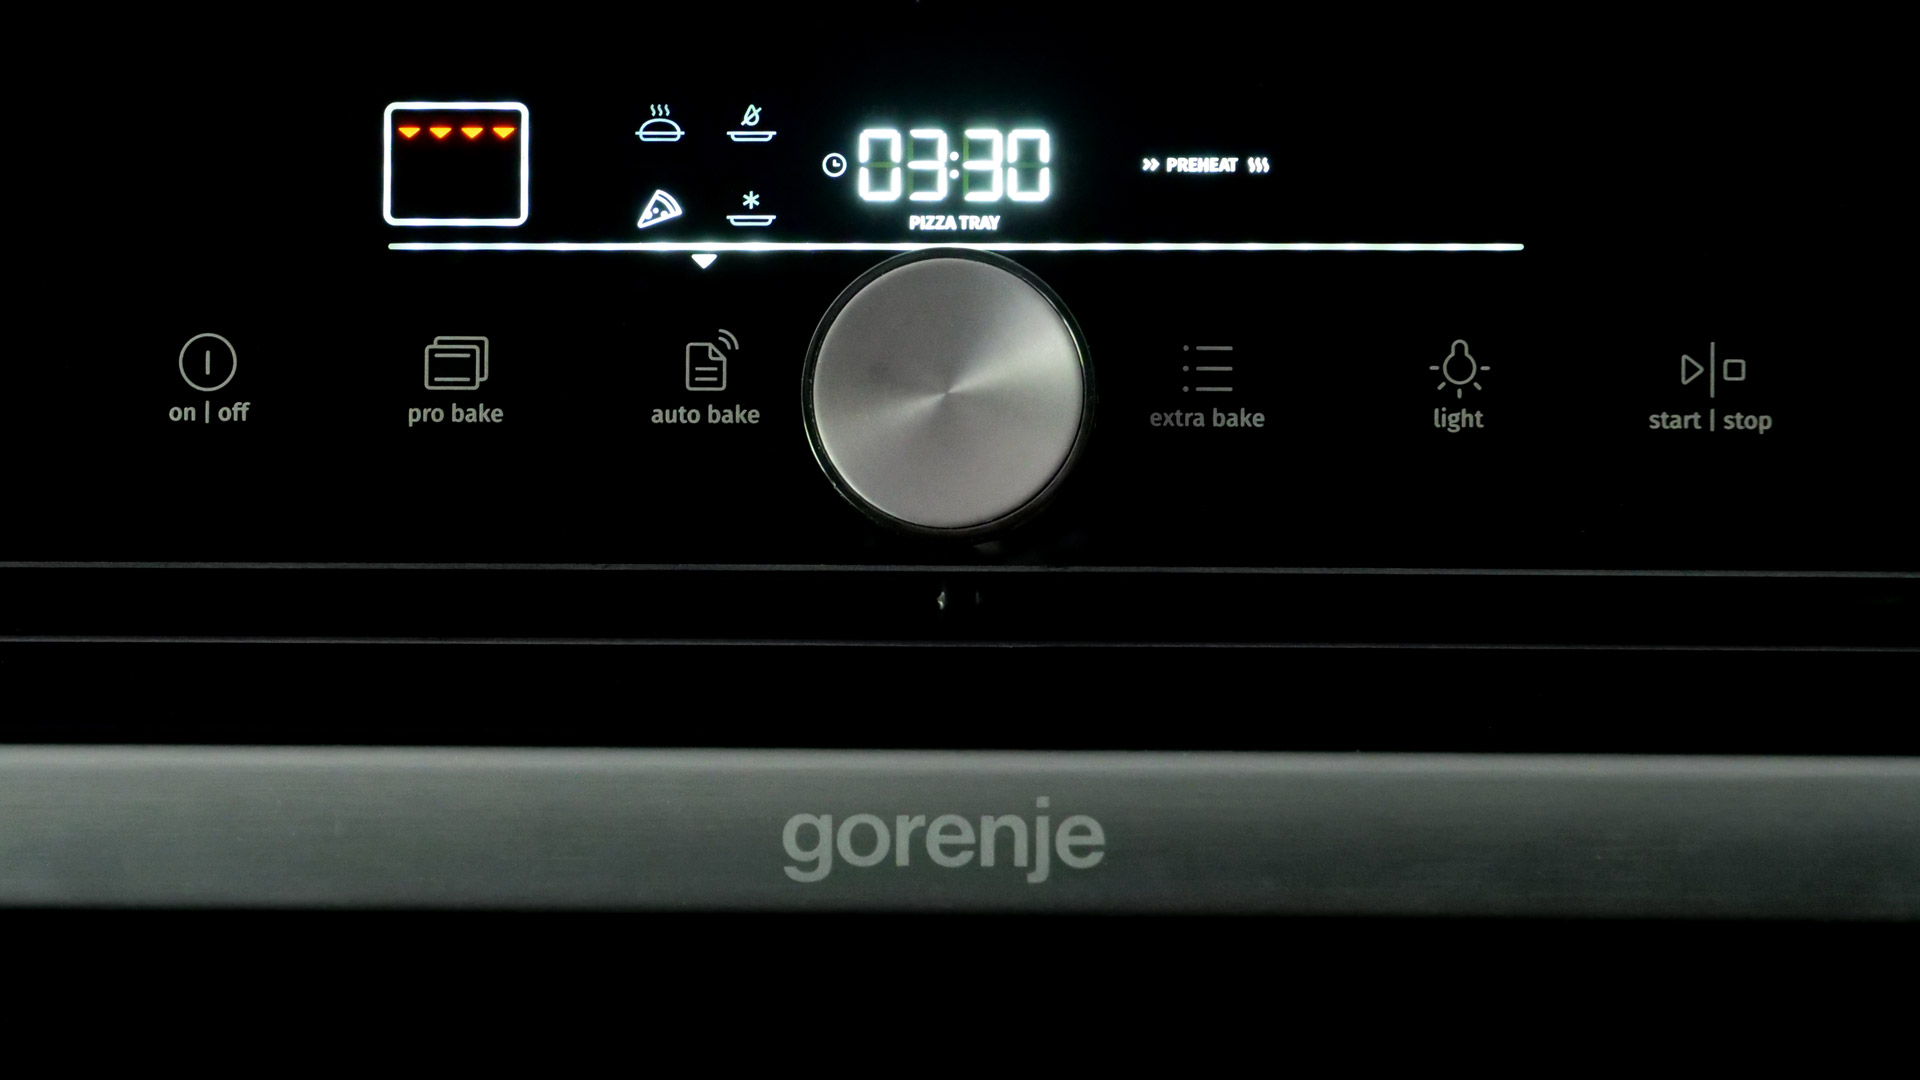 The cooking programs
The GO66E PIZZA350C offers cooking programs from the PRO BAKE group (16) and cooking programs from the AUTO BAKE group (22): after choosing PRO BAKE, in addition to basic cooking modes (such as HOT AIR) you can also select more specialized cooking programs such as AIR FRYER (AIR FRY), which very nicely demonstrates how versatile the model can be used (see the table). After selecting a cooking program from the PRO BAKE group, all significant cooking parameters still have to be programmed: how much scope is available here always depends on the respective cooking program.
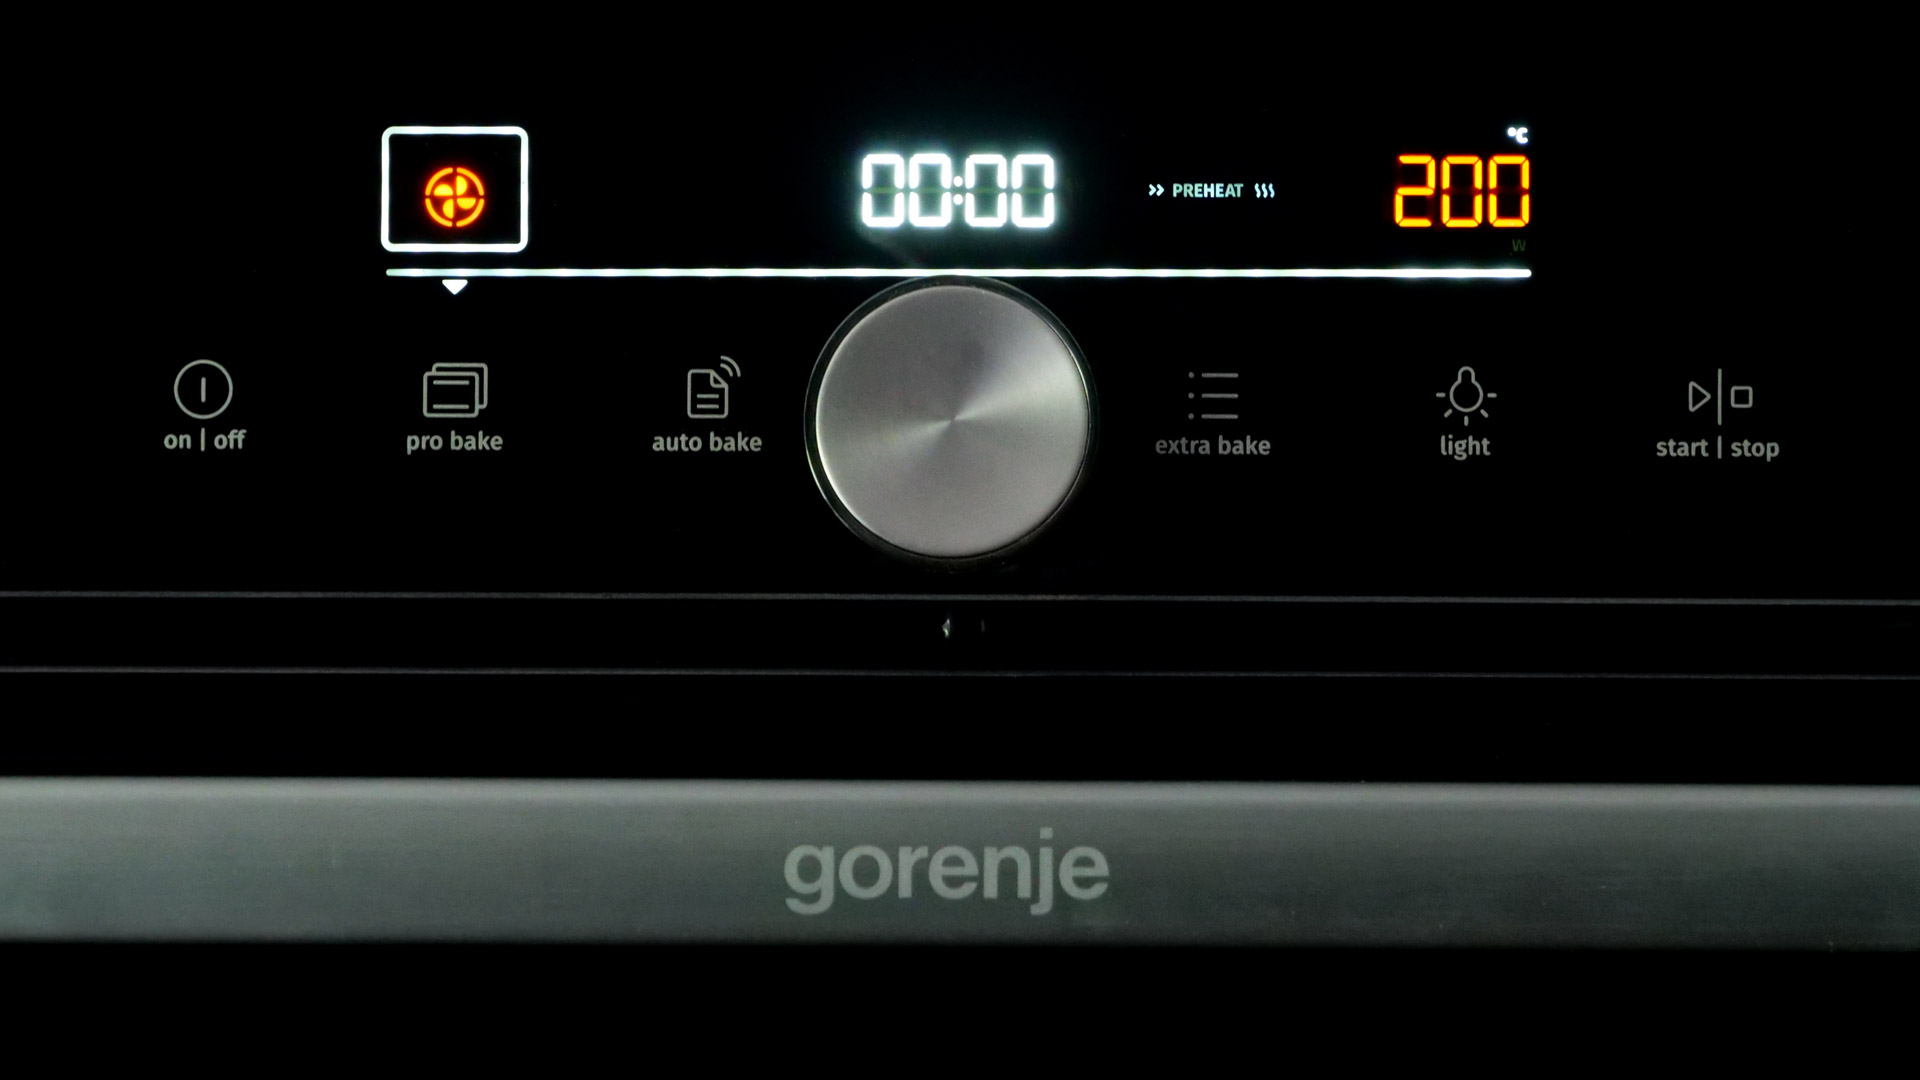
During a cooking process, all relevant cooking parameters of the respective cooking program can be read from the screen. What we miss, however, is the current temperature in the oven cavity. The model shows what temperature it should reach in light of the previously programmed cooking parameters, but withholds the actual current temperature. This makes it difficult to estimate how many minutes it will probably still take until preheating is over and the food can be placed in the oven cavity. This is a considerable impairment of the user experience.
 The rotary knob
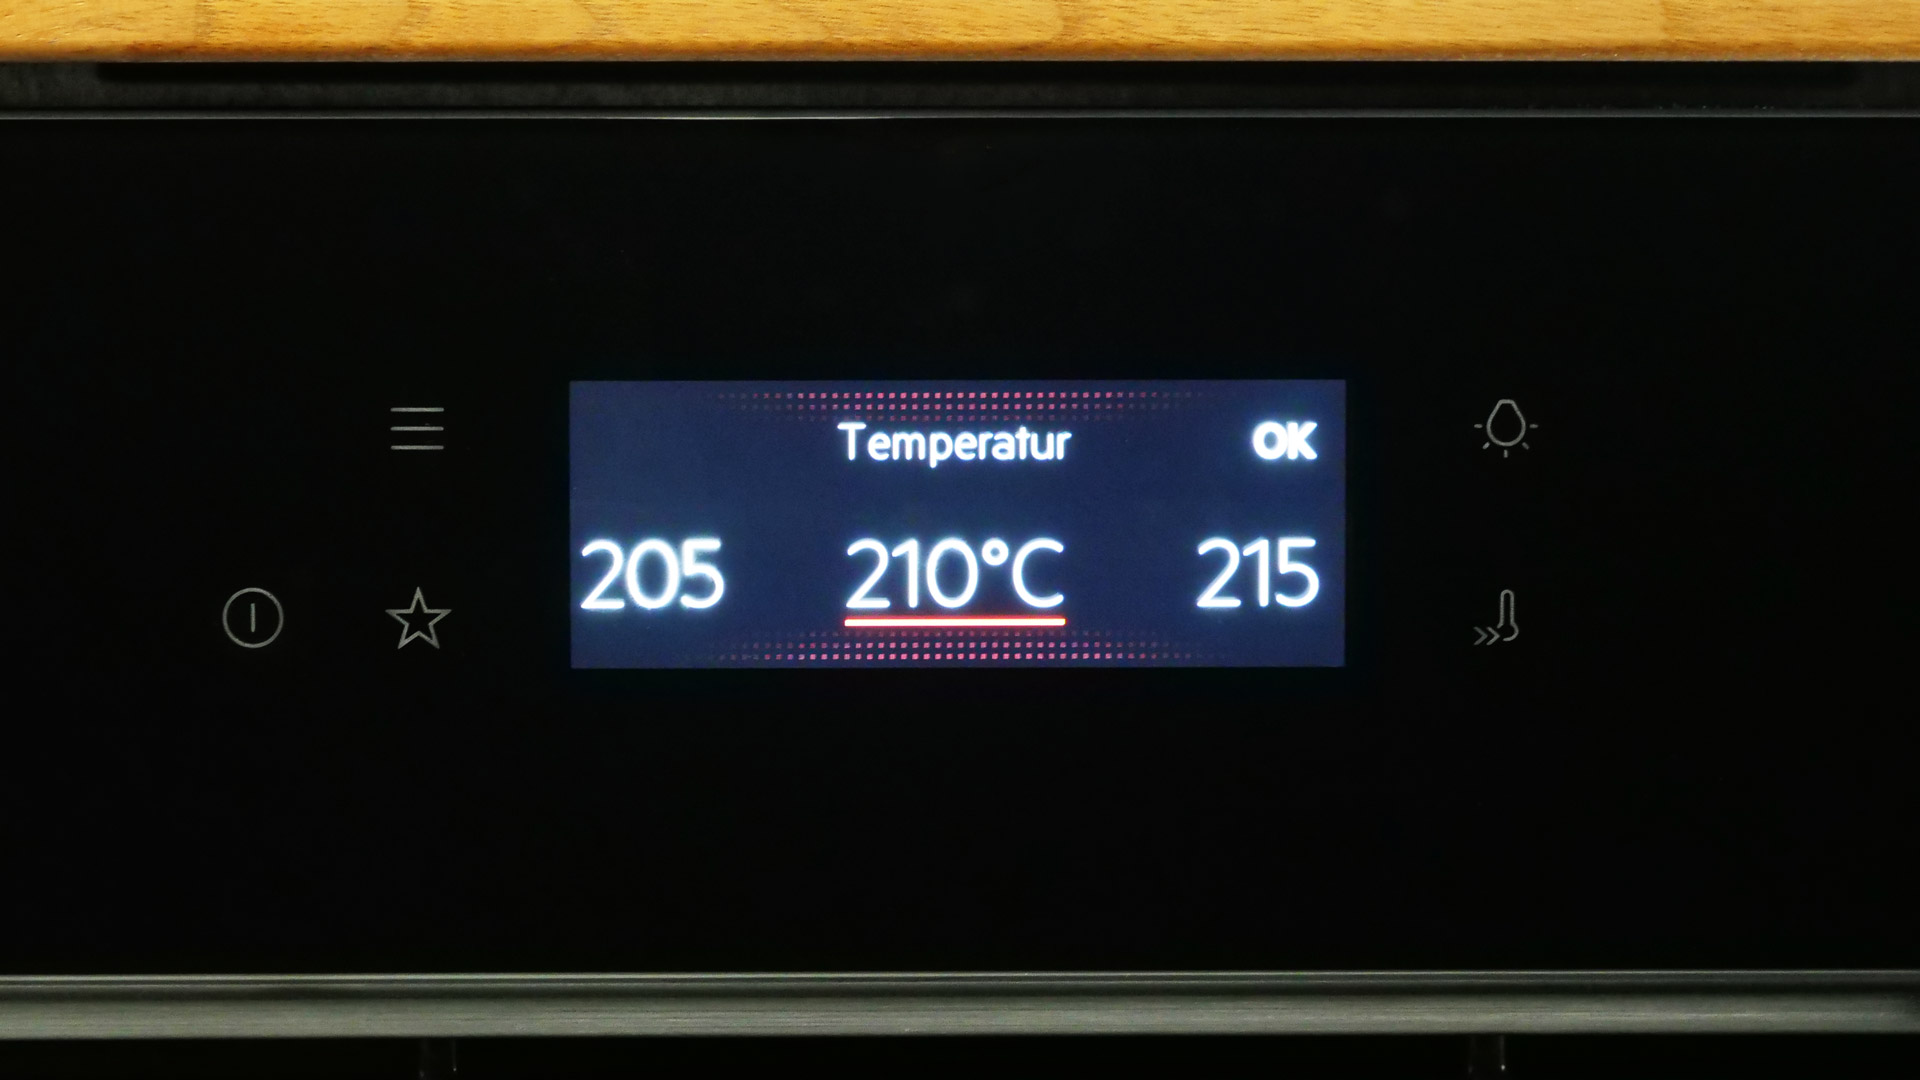
All cooking parameters such as temperature can be adjusted effortlessly using the rotary knob because how precisely the temperature is to be set can be changed via the speed of the turning movement. This means the temperature can be set in increments of ± 1, 5, or 10 °C. This is a very clever and surprisingly intuitive principle that makes temperature programming much easier to carry out than, for example, with the model from Bauknecht.
Which temperatures can be set always depends on the respective cooking program. The maximum temperature setting of 350 °C can, for example, only be selected in the PIZZAPLUS cooking program. If you want to prepare meat dishes such as racks, ribs & more, then in the LARGE-AREA GRILL cooking program a temperature peak of max. 300 °C can be set, which the model can then also come close to reaching. Grilled aromas can therefore certainly be achieved in this model. The wonderful thing about the model’s enormous power is that demanding meat and fish dishes can also be served in truly appealing quality without this requiring much effort. Particularly excellent, for example, is the AIR FRYER (AIR FRY) cooking program, in which the GO66E PIZZA350C can be used much like an air fryer: for example, fries also develop very even golden browning here because ventilation is so effective in this program.
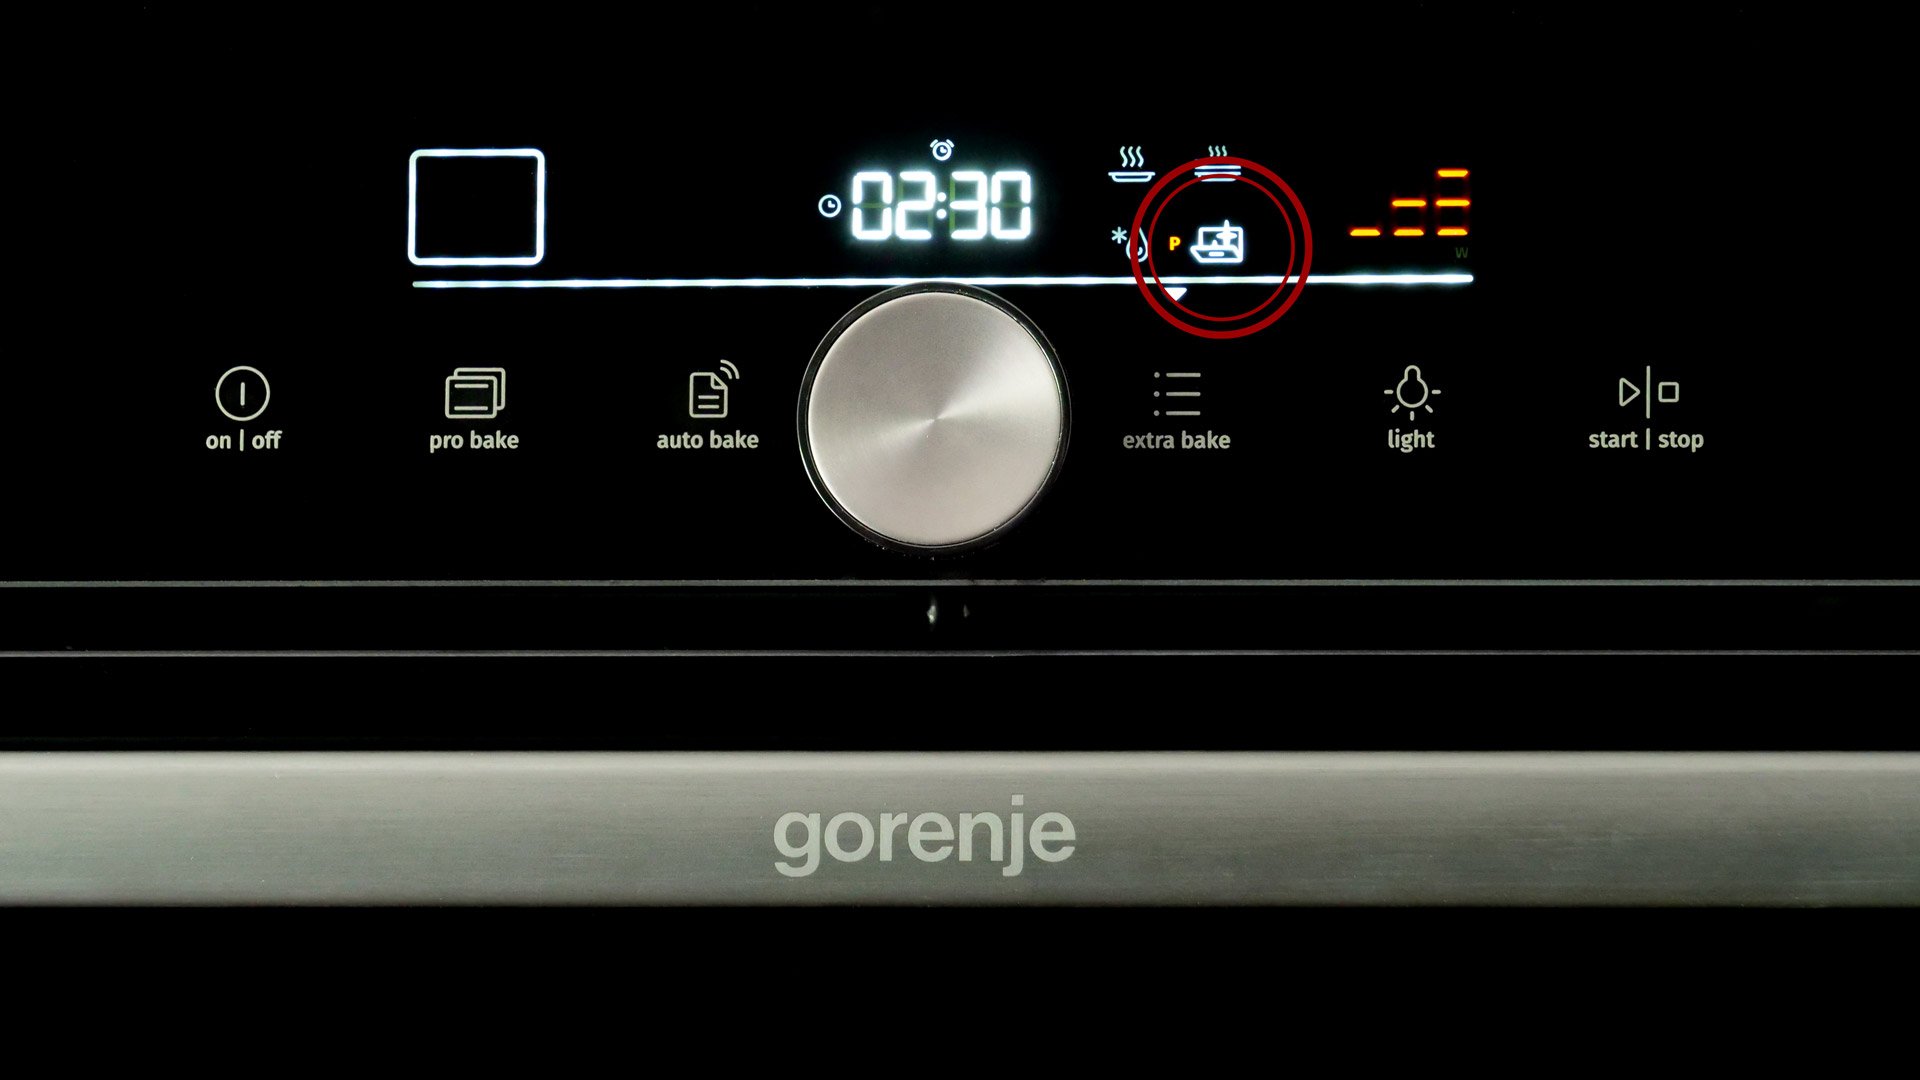
 The automatic programs
In addition to the PRO BAKE programs mentioned above, much more specialized dish-specific programs from the AUTO BAKE group can also be selected: unfortunately, the screen illustrates them only by means of codes (PR01 – PR22), so that the respective code regularly has to be looked up in the instruction manual. This makes using these cooking programs much more cumbersome.
How, then, about the range of options these cooking programs open up? Well, they allow a great many different dishes to be prepared: besides pleasantly sweet treats such as APPLE CAKE, APPLE STRUDEL, or CHOCOLATE SOUFFLÉ, also more demanding meat and fish dishes (for example ROAST BEEF, BAKED/GRILLED FISH, or PORK ROAST). While the cooking parameters associated with these programs from the factory proved very reliable, it is nevertheless annoying that every time you still have to look up in the instruction manual which part of the accessory bundle to use, on which level of the oven cavity it has to be placed, and so on. It would be much nicer if the screen of the GO66E PIZZA350C showed all this.
 The timer
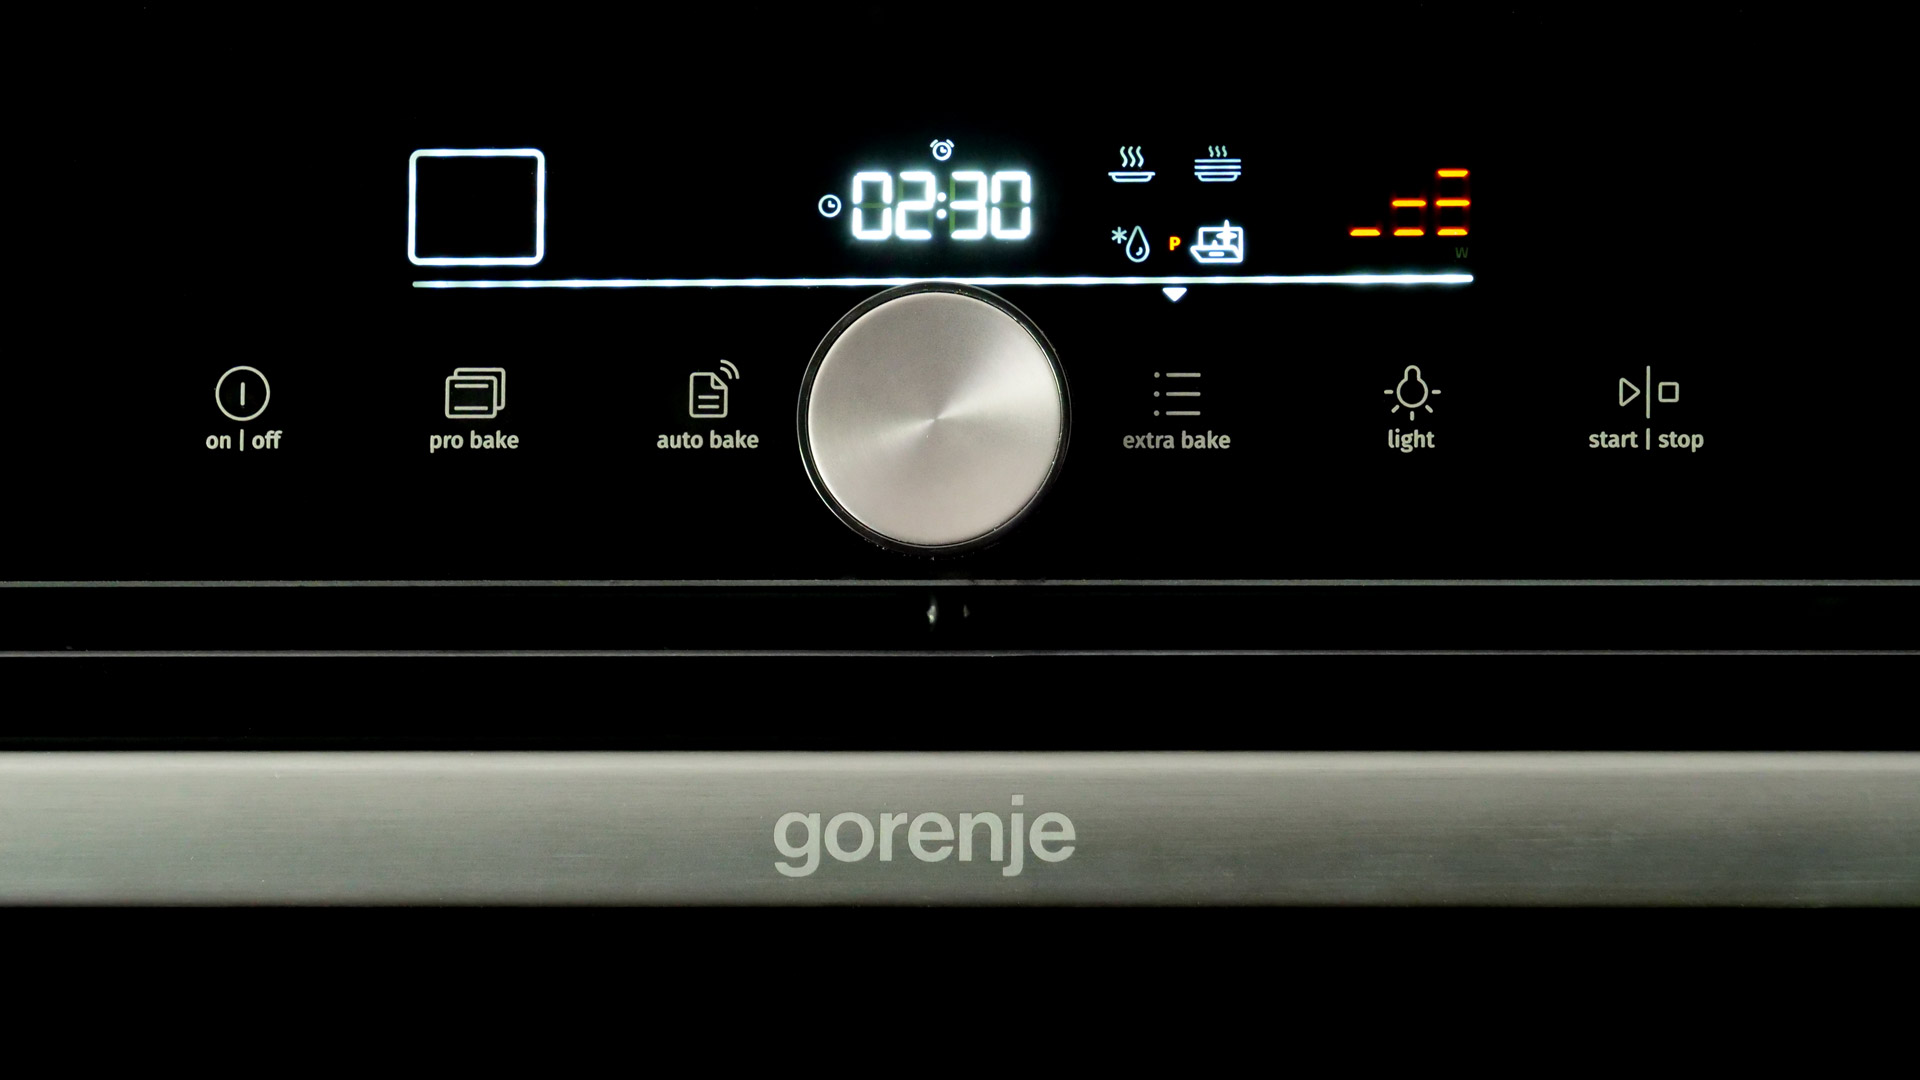
The timer of the GO66E PIZZA350C can be used in different ways: for example, you can set in advance when the respective cooking program should end (00:01 – 23:59 h). At the end of the timer, the model emits a sound that can still be perceived from more than ≈ 1 m away (max. ≈ 44.6 dB from ≈ 1 m). This is a classic conventional timer of the kind also known from other, much older models.
Instead of such a timer, you can also set the model to emit only an alarm after 00:01 – 23:59 h, without, for example, the current cooking program ending as well. This is really useful in some situations, for example if the alarm is intended merely to remind you that the food in the oven cavity should be turned after a while. Finally, the timer can also be used to make sure that the dish is ready to be served at a preprogrammable time (00:01 – 23:59 h). Thanks to this DELAYED END function, you only have to slide the dish into the oven cavity beforehand and can then take it out at the right time, for example when friends and family are visiting in the evening, when it will still be wonderfully warm.
 The acoustic signals
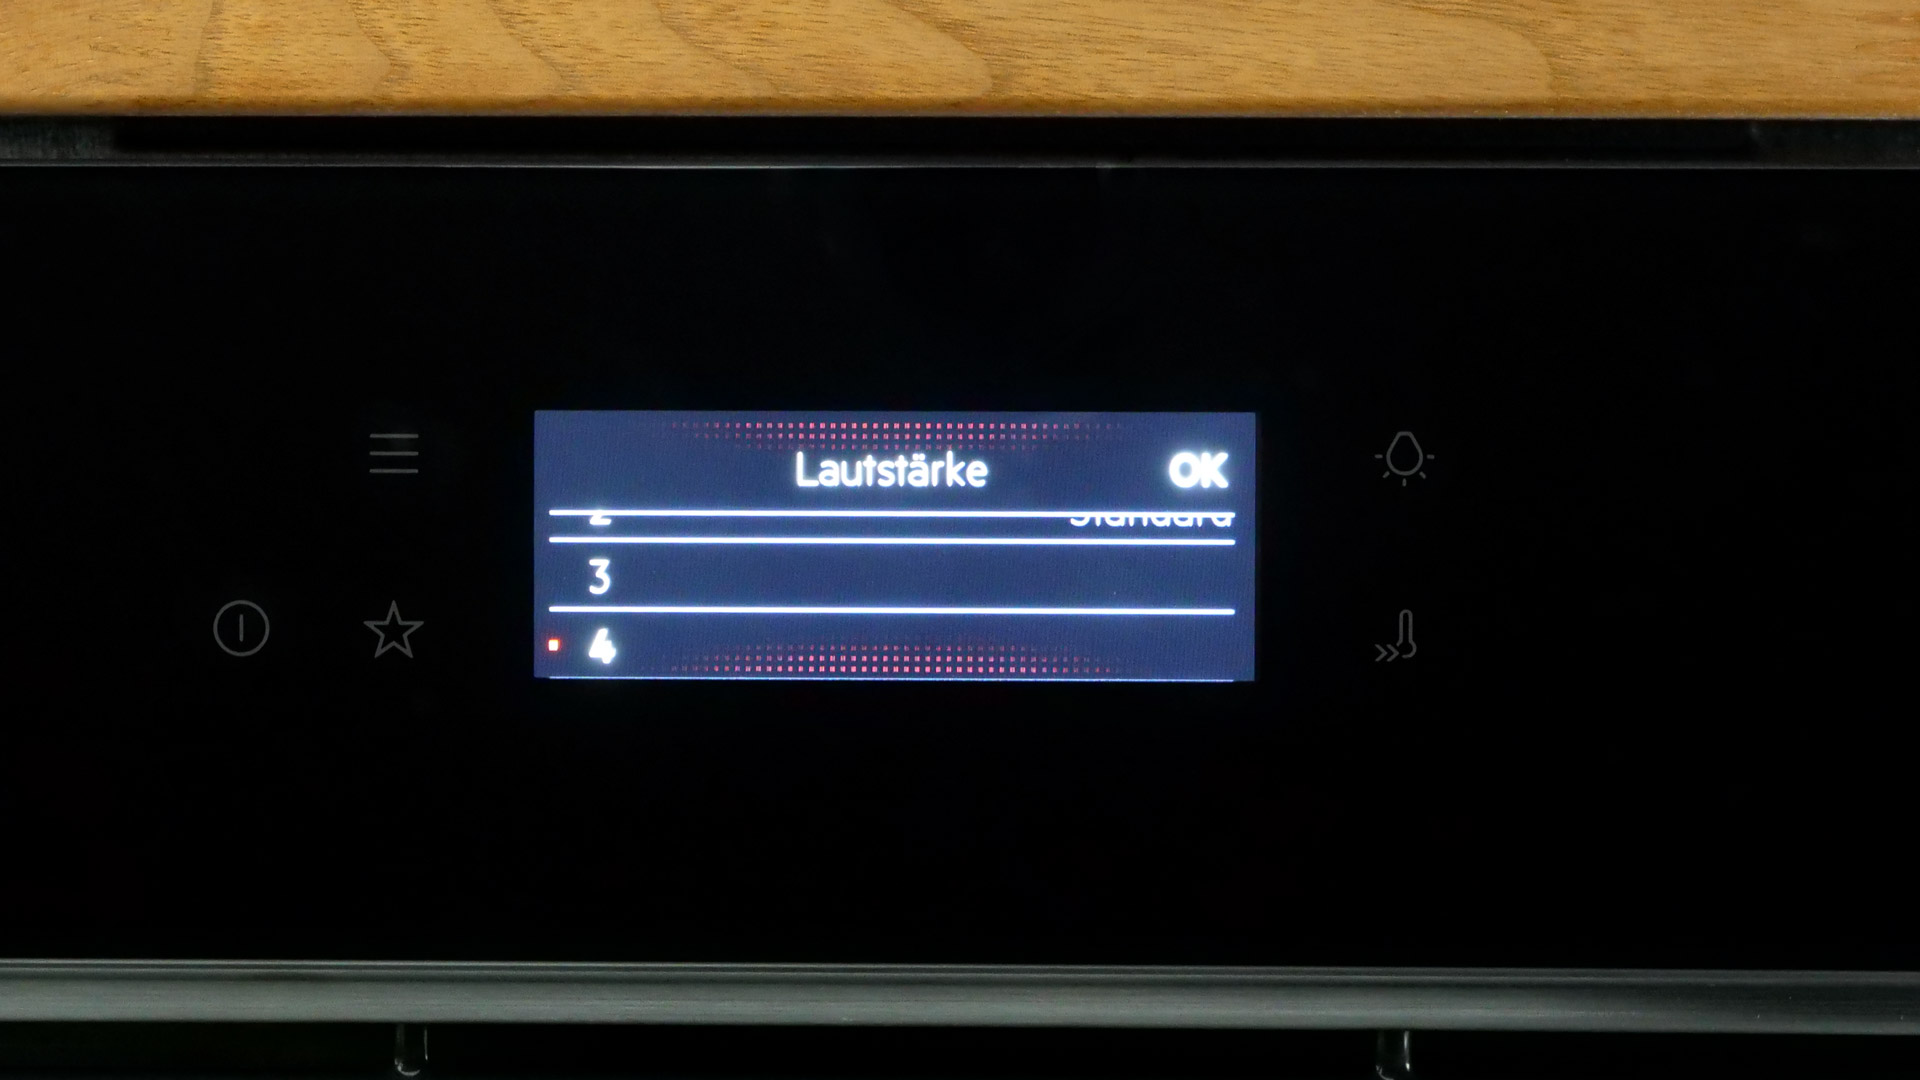
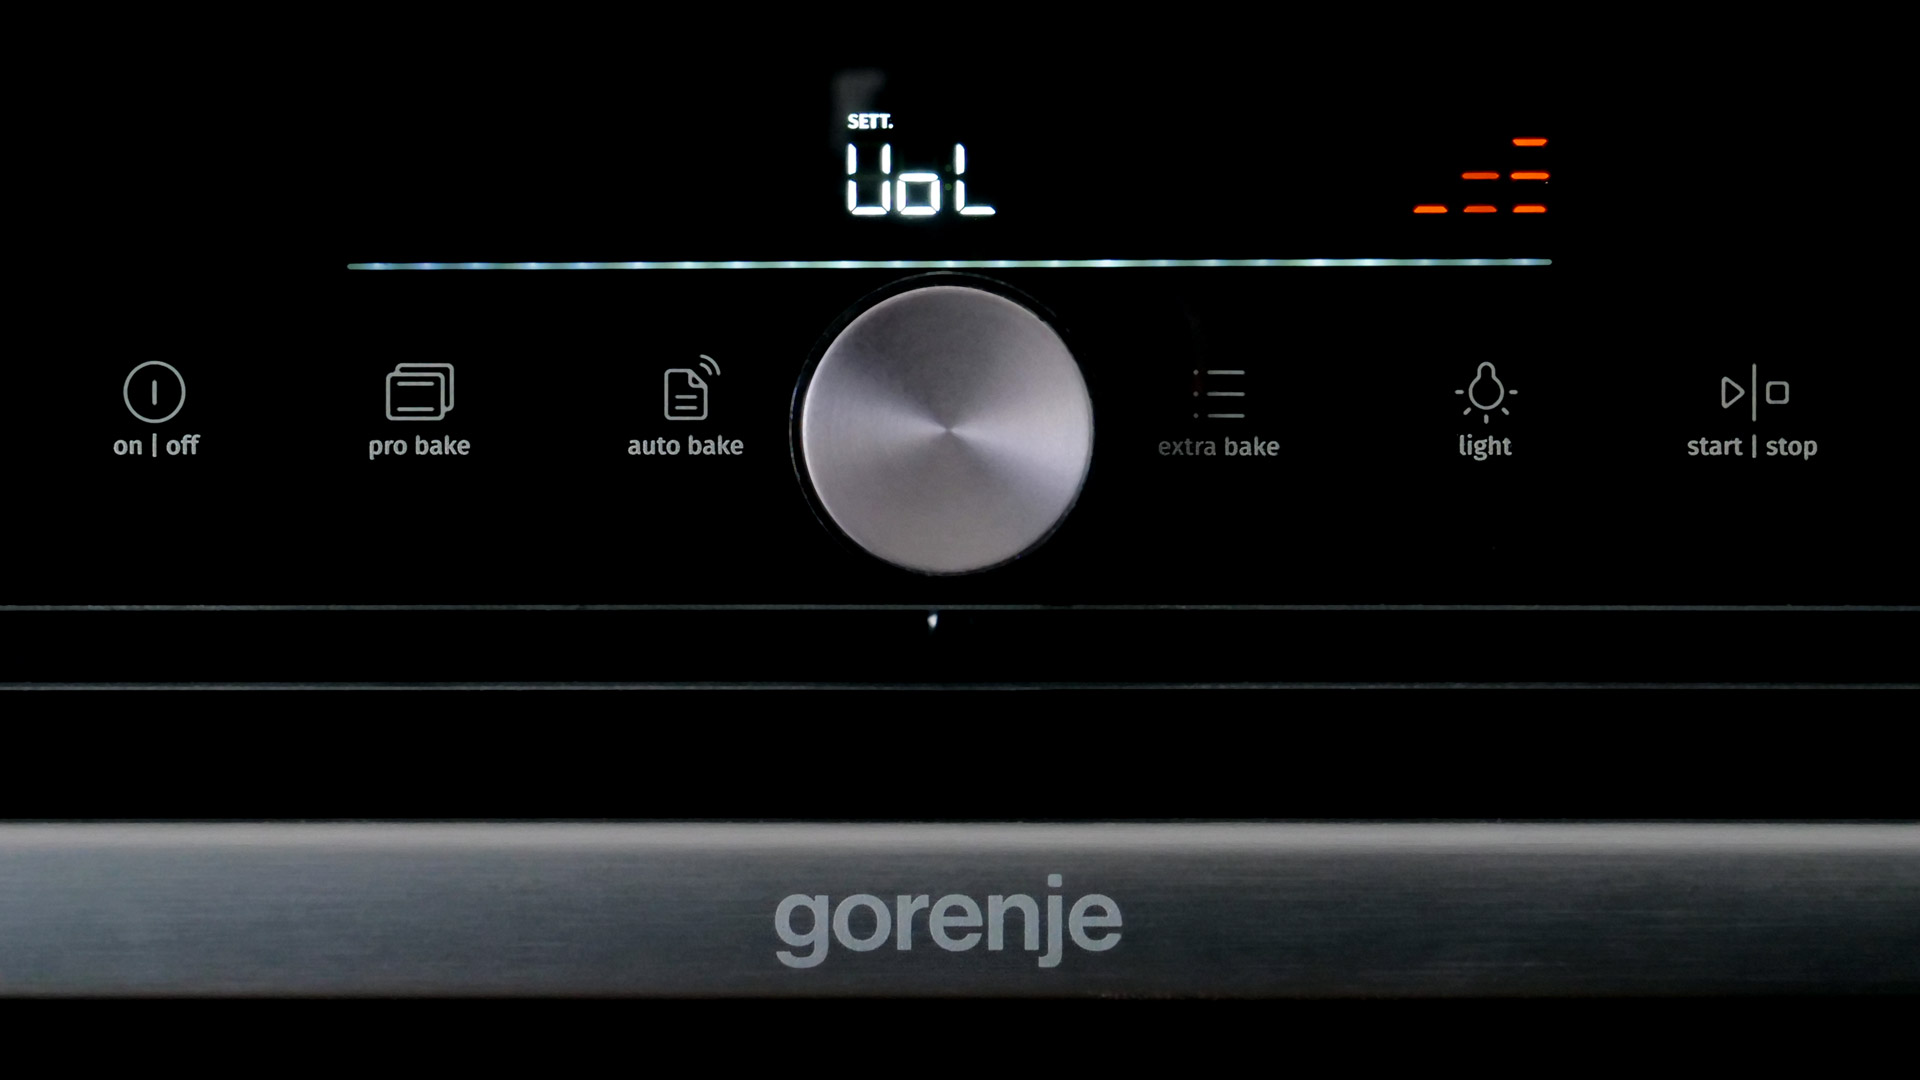
The GO66E PIZZA350C is not silent during use, but emits sounds, for example while cooking programs, cooking parameters, etc. are being changed. How loud or quiet these sounds should be is fully adjustable. The only point of criticism is that this menu is anything but intuitive to access, even if the abbreviation appearing here (VOL) does seem plausible: the sounds can ultimately be set to a sound pressure level of ≈ 39.0 – 44.6 dB from ≈ 1 m in front of the model. This allows the sounds to be adapted to different situations at any time, for example making them much quieter if you want to use a cooking program in the evening without annoying anyone in other parts of the household.
Safety
 The model’s thermal insulation
The GO66E PIZZA350C can also be used completely safely, as it is very difficult to burn yourself on the outer parts of the model during normal use. Even using the maximum temperature setting of 350 °C made the model warm only in some areas after ≈ 30 min: for example, we measured a temperature peak of ≈ 42.6 °C on the door, which is anything but significant. The touch panel can also be used safely during cooking: here, the maximum was only ≈ 32.6 °C.
 The temperatures of the handle
If the door has to be lowered at the end of a cooking program, this can be done without any problem: only temperature peaks of ≈ 28.1 °C are regularly reached here, which means nobody will burn themselves on the handle provided here. Admittedly, after a cooking process at maximum temperature has ended, a lot of heat can billow out – but that is a safety risk associated with cooking itself and therefore affects all models to the same extent.
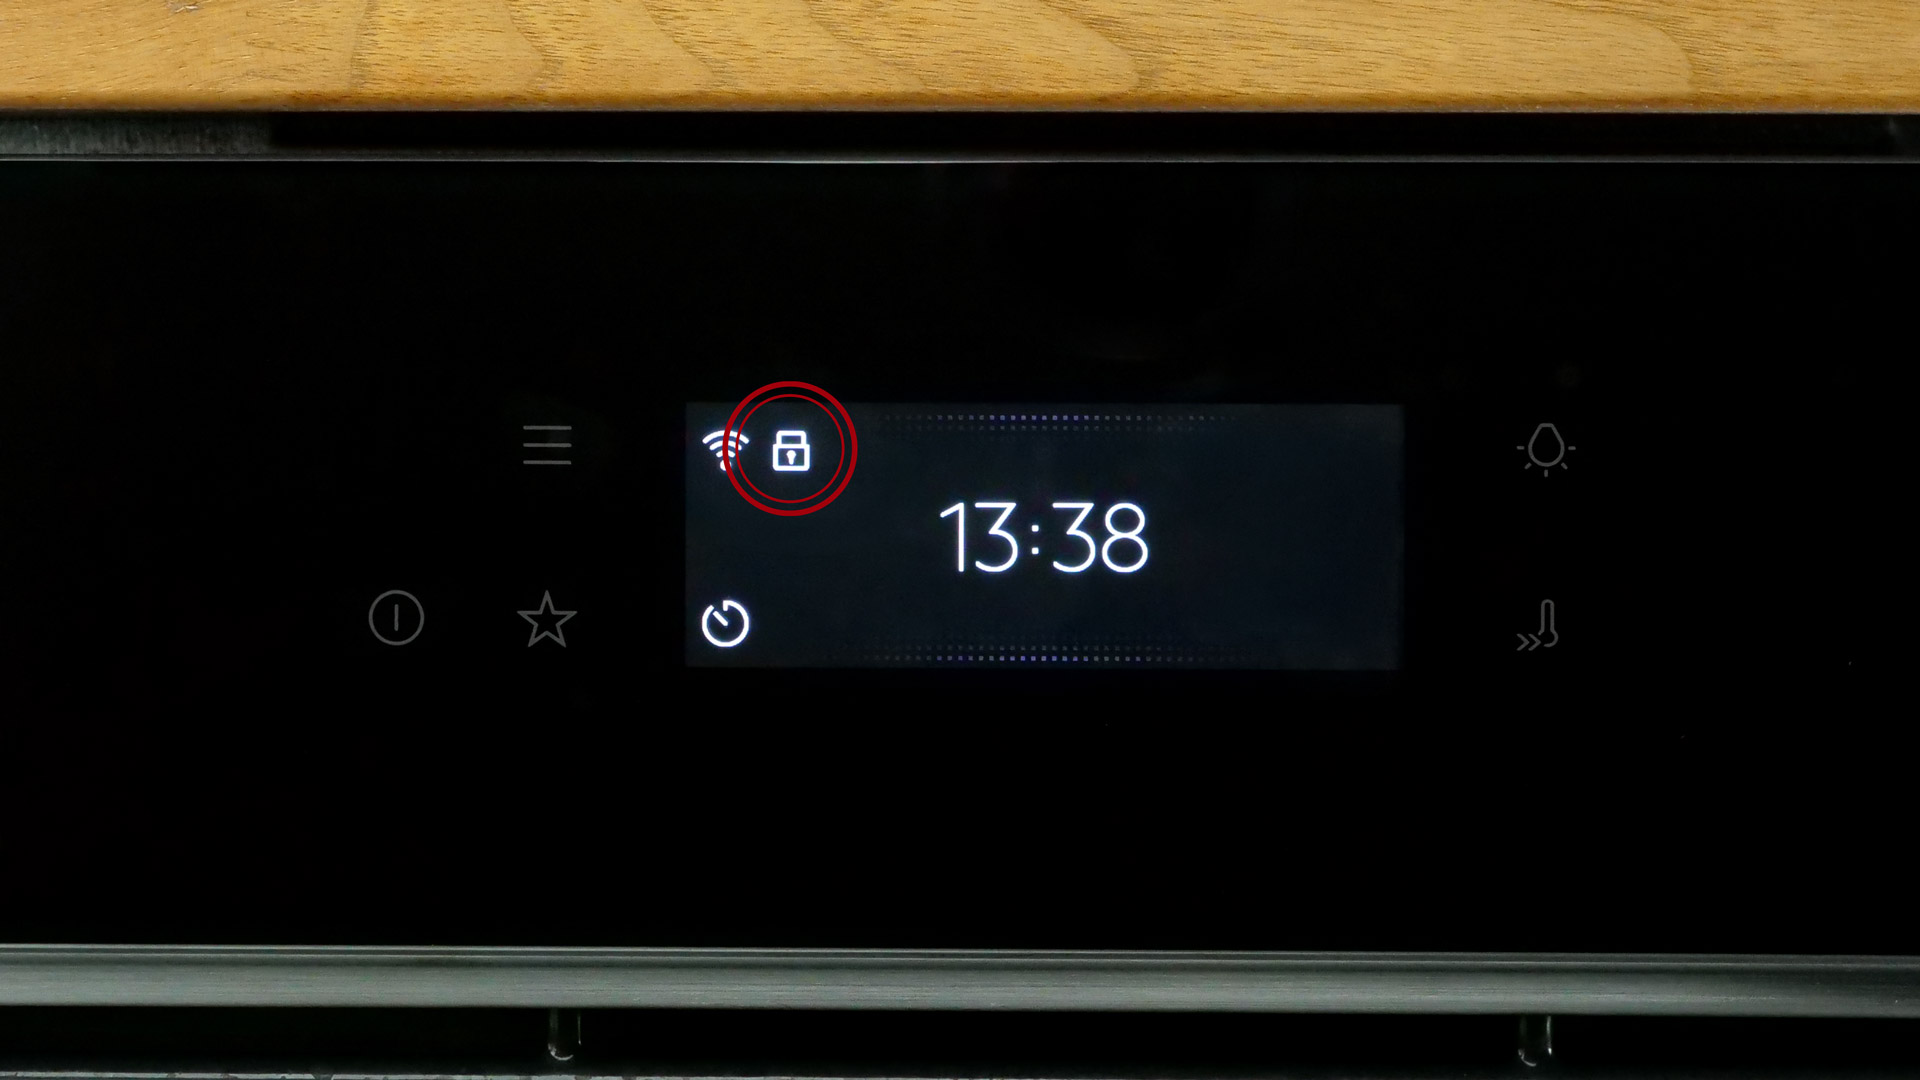
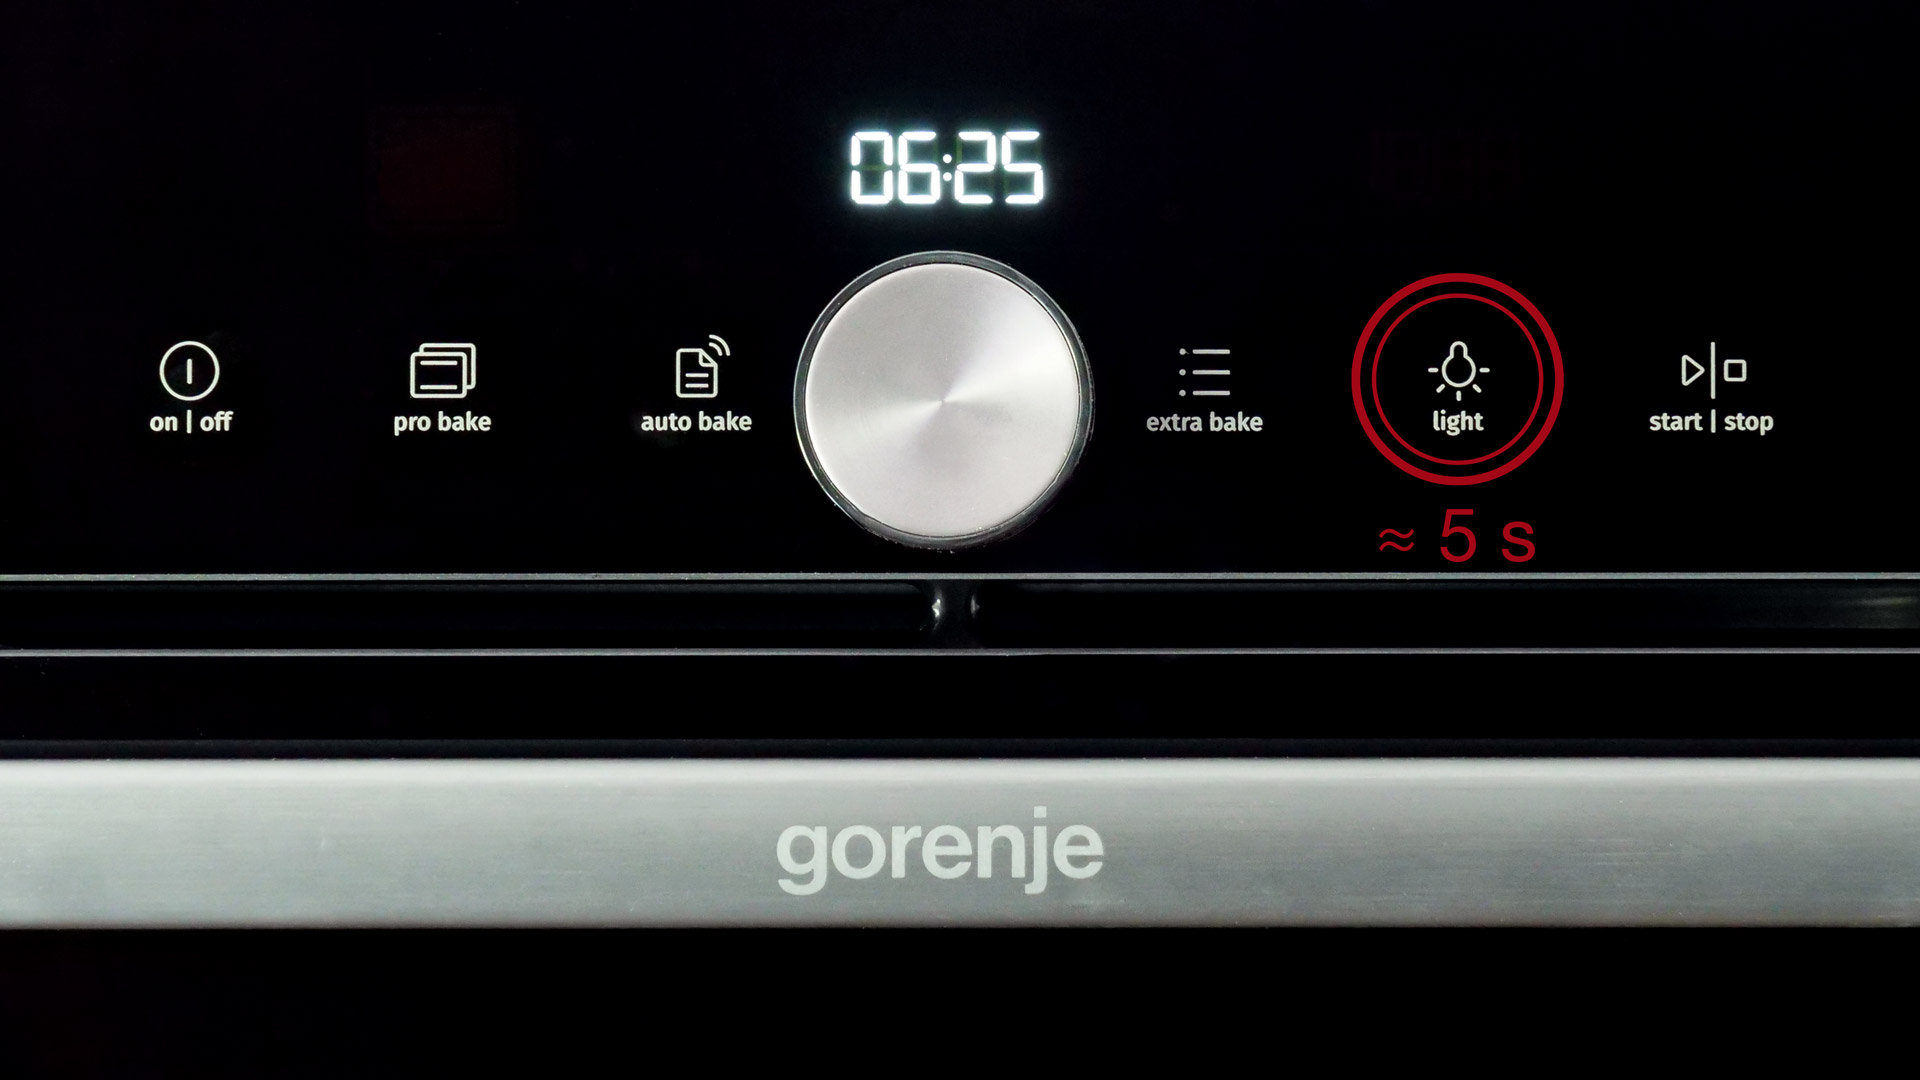 The touch-panel lock
Finally, the touch panel can also be locked so that nobody can then select a cooking program, change cooking parameters & more, and so on. Once the lock has been activated while the model is carrying out a cooking process, that cooking process continues; after cooking has ended, however, the lock has to be switched off again. What can be criticized is that switching it on and off has to be done via the part of the touch panel associated with the lamp in the oven cavity; that is really anything but intuitive.
Cleaning
 The cleaning program
We were always able to clean the GO66E PIZZA350C completely without any problems after use. One of the reasons is certainly that all corners of the oven cavity are easily accessible from the front. If you want to enjoy very effective deep cleaning, the special PYROLYSIS cleaning program can also be used because the temperatures prevailing in this mode make it possible to burn away many traces of cooking effectively, turn them into ash, and finally wipe them away within only ≈ 1 min once the temperature of the oven cavity has dropped to a moderate level. PYROLYSIS is very effective, though its use is really only sensible in some situations: sweet marinades and the like can also be wiped effectively from the interior surface of the oven cavity with a soft cloth, warm water, and suitable dishwashing liquid.
 Preparing the cleaning program
Another essential point is this: because the temperatures in the oven cavity become so enormous during PYROLYSIS, all parts of the accessory bundle must be removed from the cavity beforehand. This includes especially any trays, etc. that may still be in the cavity: the temperatures would otherwise damage the enamel. The metal side rails must likewise be removed.
The instruction manual
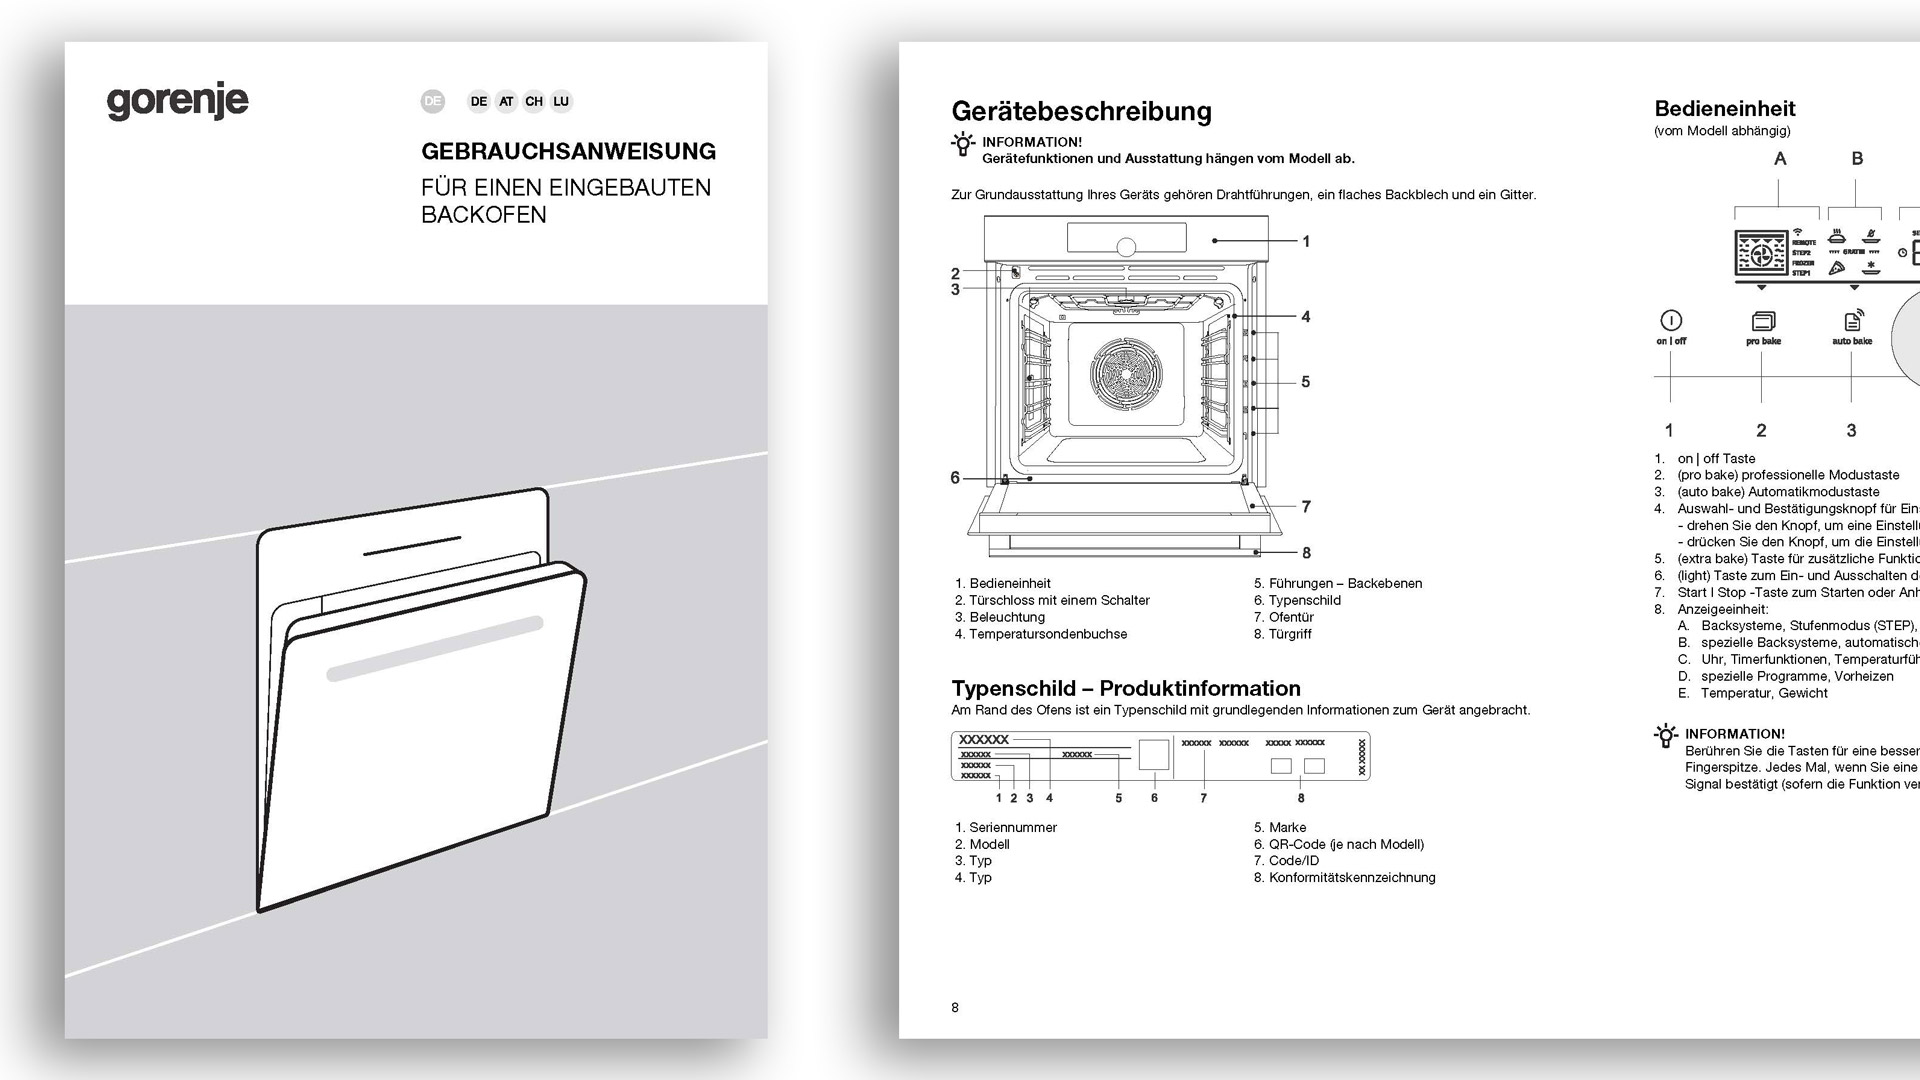 Tips & tricks in the instruction manual
The instruction manual of the GO66E PIZZA350C is of very appealing quality: everything you need to know about using the model and its various cooking programs is presented by the German-language part of the instruction manual in a very plausible style. There are also many black-and-white graphics that illustrate a large part of the text and significantly improve understanding.
The notes on the various cooking programs of the GO66E PIZZA350C are valuable: they present the essential features of each program so that it is easier to assess when it makes sense to use which cooking program. The same also applies to the automatic programs, i.e. the cooking programs in which the model already sets all the essential cooking parameters on its own: here, for example, Gorenje explains where each tray has to be inserted. All of this is implemented in a very clear style making use of many tables, which is why the instruction manual can be used without difficulty.
Power & noise
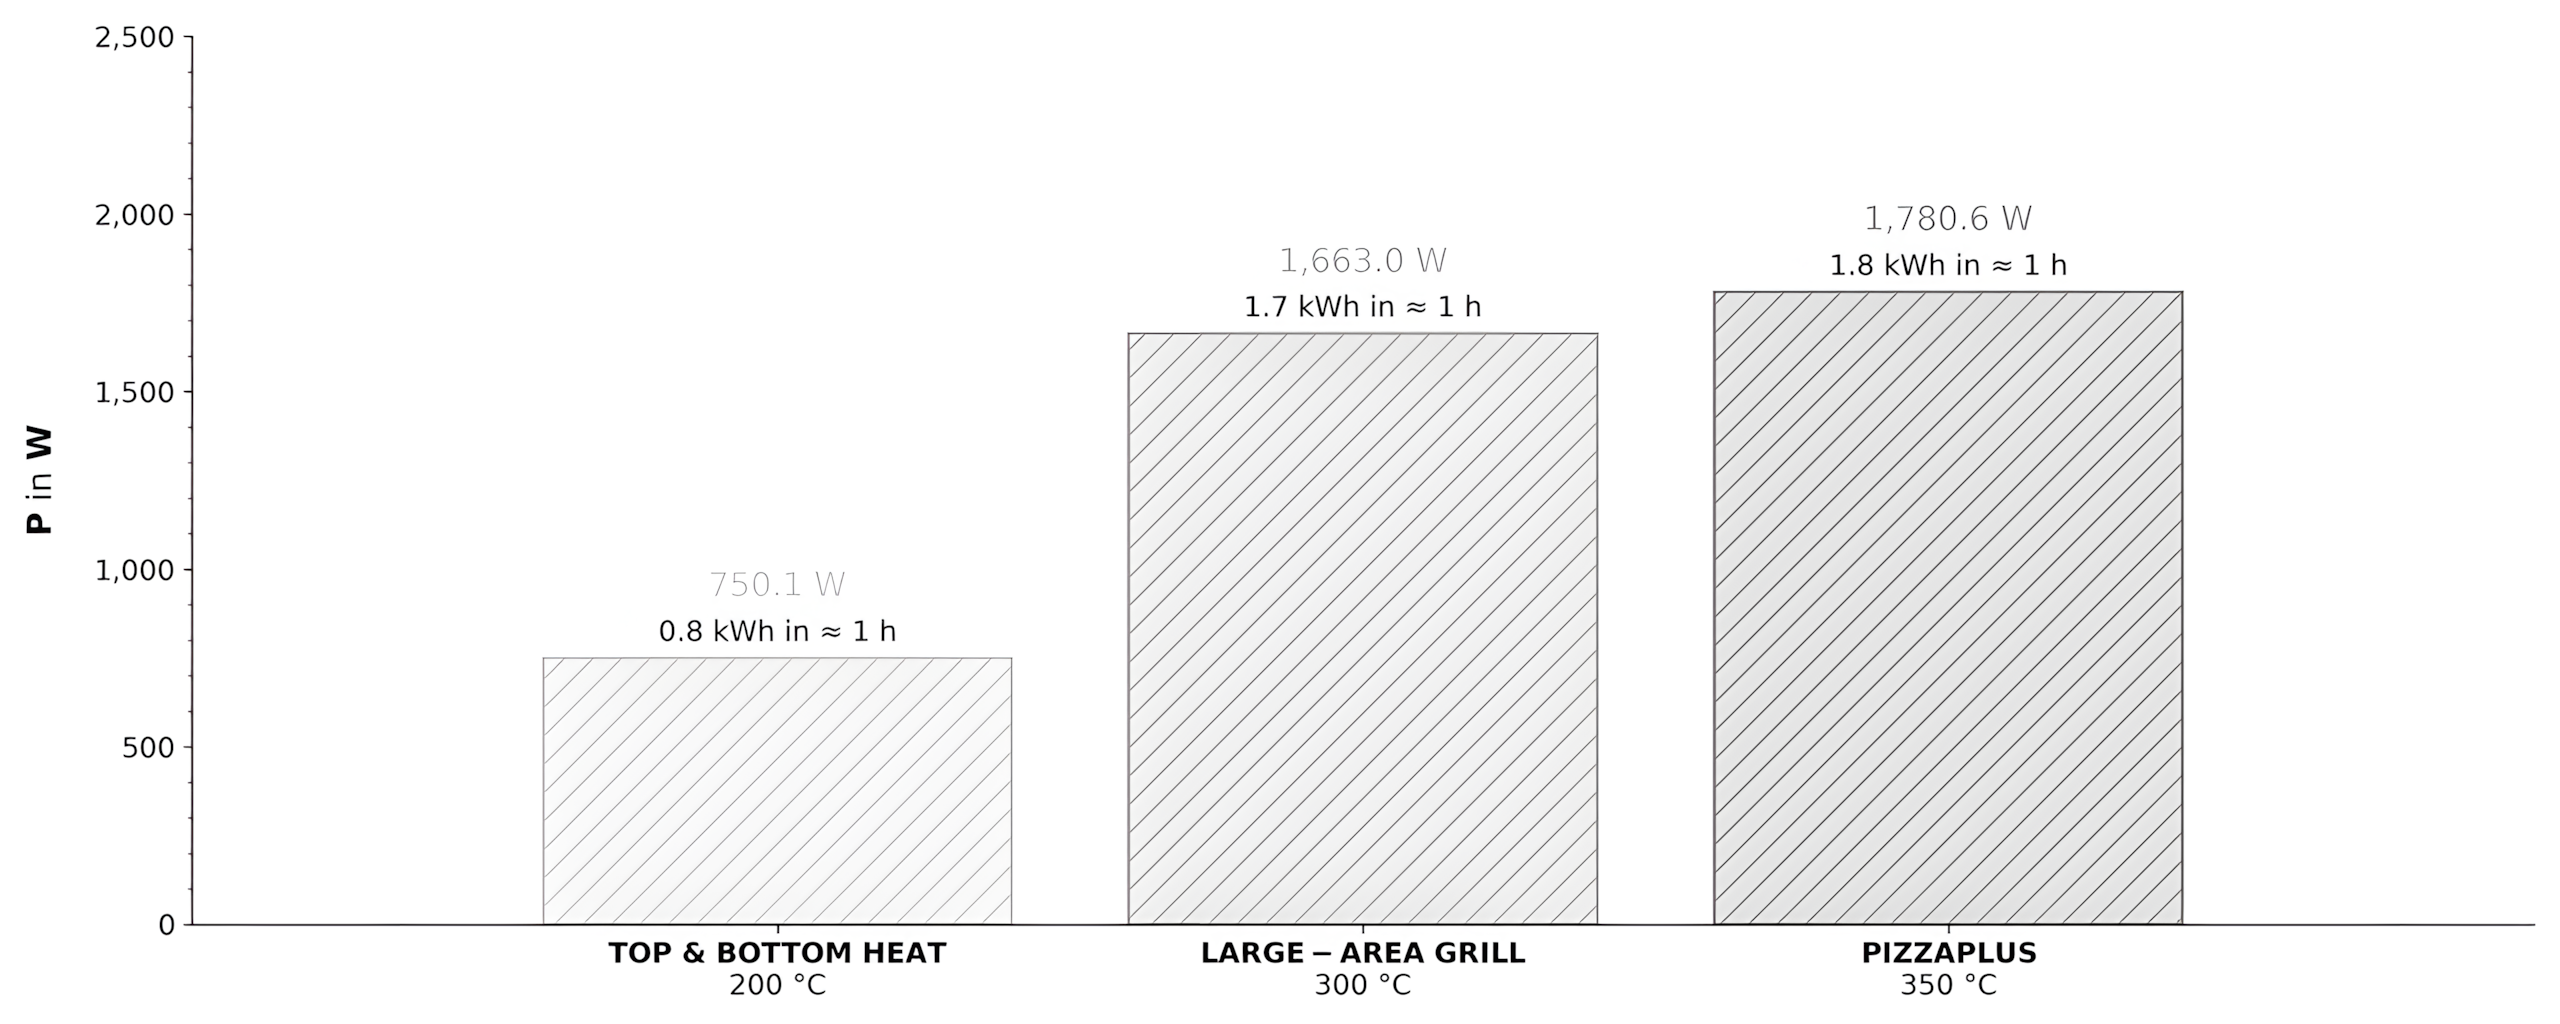 Power consumption in different cooking programs
During use of the GO66E PIZZA350C, we measured entirely acceptable power consumption. However, this always depends on the cooking parameters used, above all the cooking mode and the temperature the model is supposed to reach in the oven cavity. We measured that during a cooking process lasting ≈ 1 h in the TOP AND BOTTOM HEAT mode with a temperature setting of 200 °C, you need to budget for consumption of ≈ 0.75 kWh (≈ €0.20), whereas in the LARGE-AREA GRILL mode with the maximum temperature setting of 300 °C grill level it is ≈ 1.66 kWh (≈ €0.45). The PIZZAPLUS cooking mode with a temperature setting of 350 °C is different: after ≈ 30 min of preheating (≈ 1.03 kWh and ≈ €0.28), the pizza only has to remain in the oven cavity for ≈ 3:30 – 7:00 min before it can be served. Per pizza, this therefore amounts to only ≈ 0.10 – 0.21 kWh and ≈ €0.03 – 0.06, depending on how heavily it is topped with vegetables, meat, fish, etc.; with high-moisture vegetables, for example, you should rather plan for ≈ 7:00 min or perhaps even more.
How much does baking pizza in the Gorenje GO66E PIZZA350C cost me?
Would you like to know how much electricity you would consume by baking pizza regularly in this model and what electricity costs would be associated with it? Then you can use our electricity-consumption calculator! You only need to adjust all essential parameters to your personal requirements, for example by setting how many times per week you would bake pizza, how many pizzas you would serve each time, and how lightly or strongly you would like to brown the pizzas while baking. At the end, the electricity-consumption calculator displays everything essential in a clear table.
Here you can choose how intense the browning of the pizzas should be. The browning result achieved in practice is linked to the duration of the respective baking process, so lighter browning results in lower electricity consumption, while stronger browning results in higher electricity consumption.
If you want to bake several pizzas one after another during a single session, choose "full preheating phase only once per session". In that case, we include the electricity consumption of a full preheating phase only once per session and, starting with the second pizza, add only the electricity consumption of a reheating phase lasting approximately 2:30 minutes. After each pizza has been removed, the oven cavity must reheat until it reaches a temperature suitable for baking pizza again. If, on the other hand, you want to bake only a single pizza per session or plan to leave a great deal of time between individual baking processes, choose "full preheating phase per pizza" instead.
Here you can adjust the electricity price to the amount you are currently paying per kWh. As a general rule, our calculations are based on an electricity price of approximately €0.27 per kWh.
Electricity consumption & electricity costs
| Period | Electricity consumption in kWh | Electricity costs in € |
|---|---|---|
| Per week | – | – |
| Per month | – | – |
| Per year | – | – |
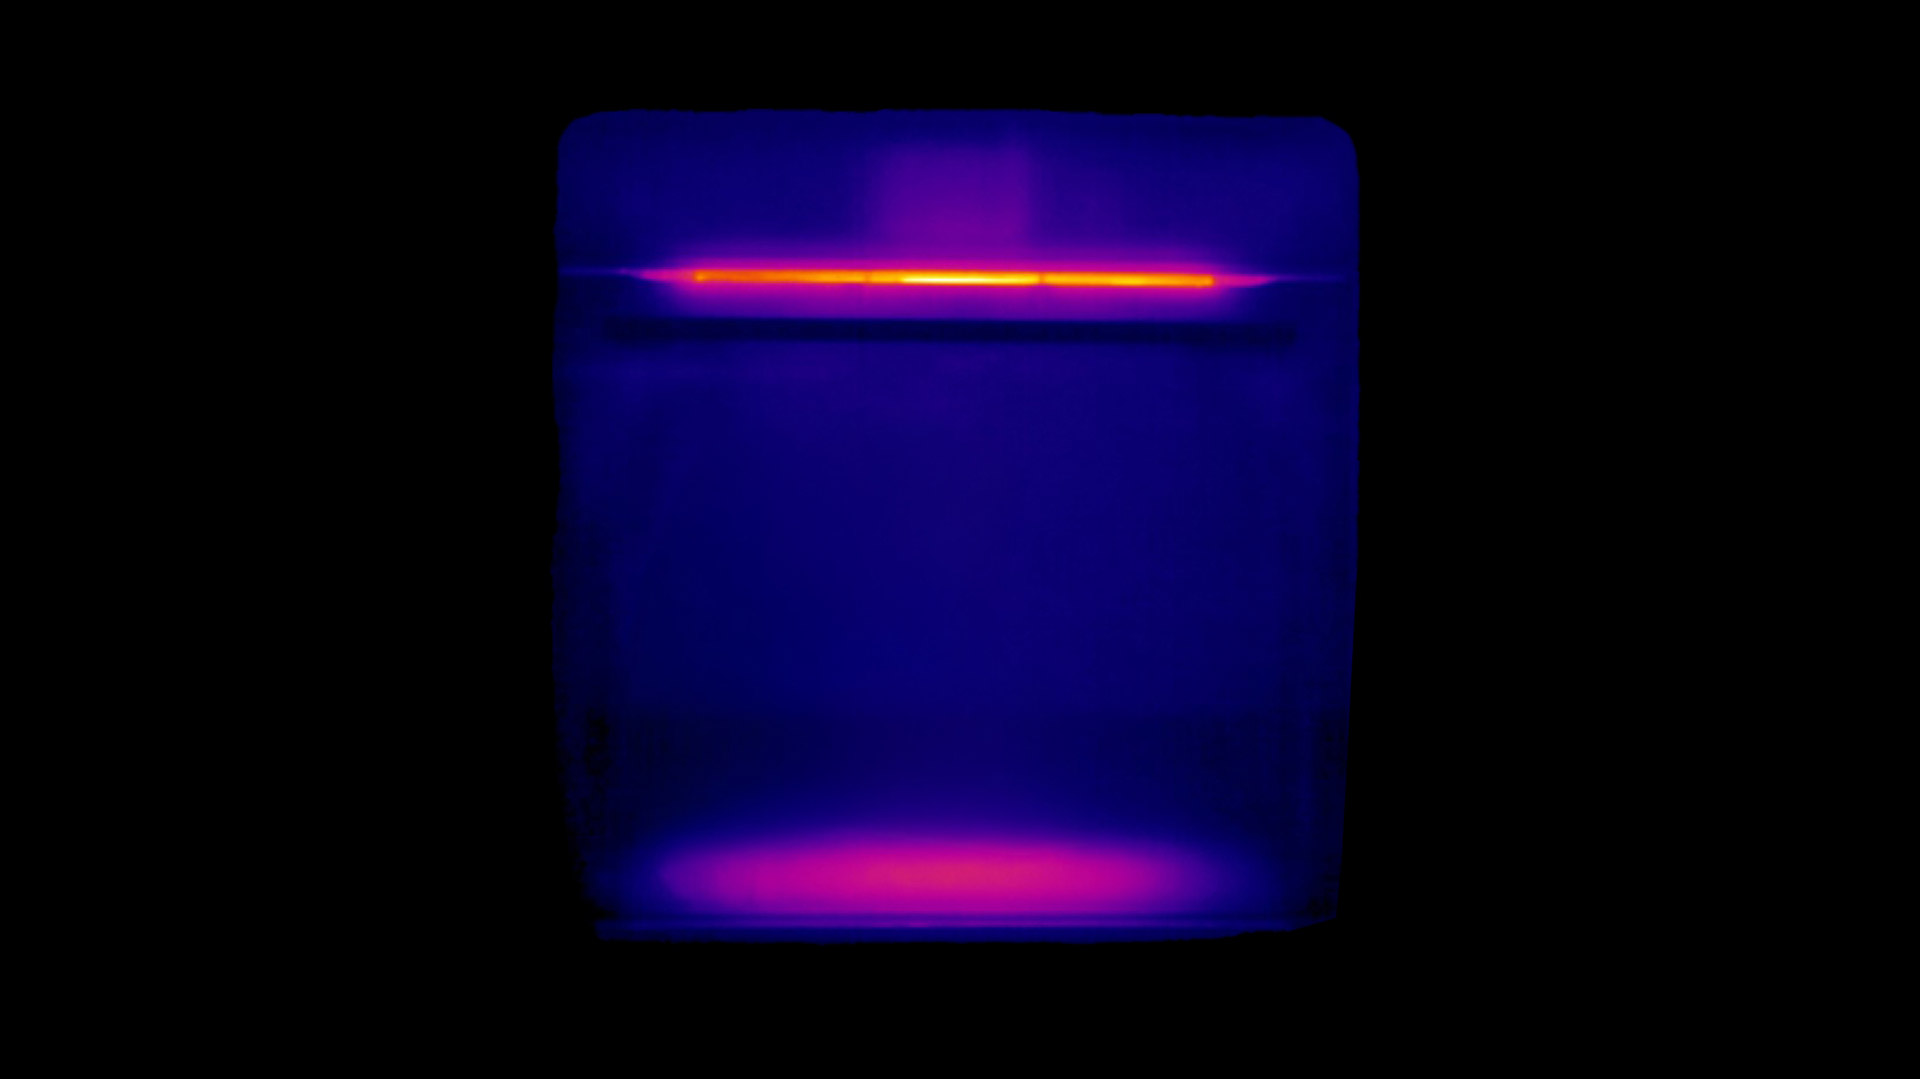
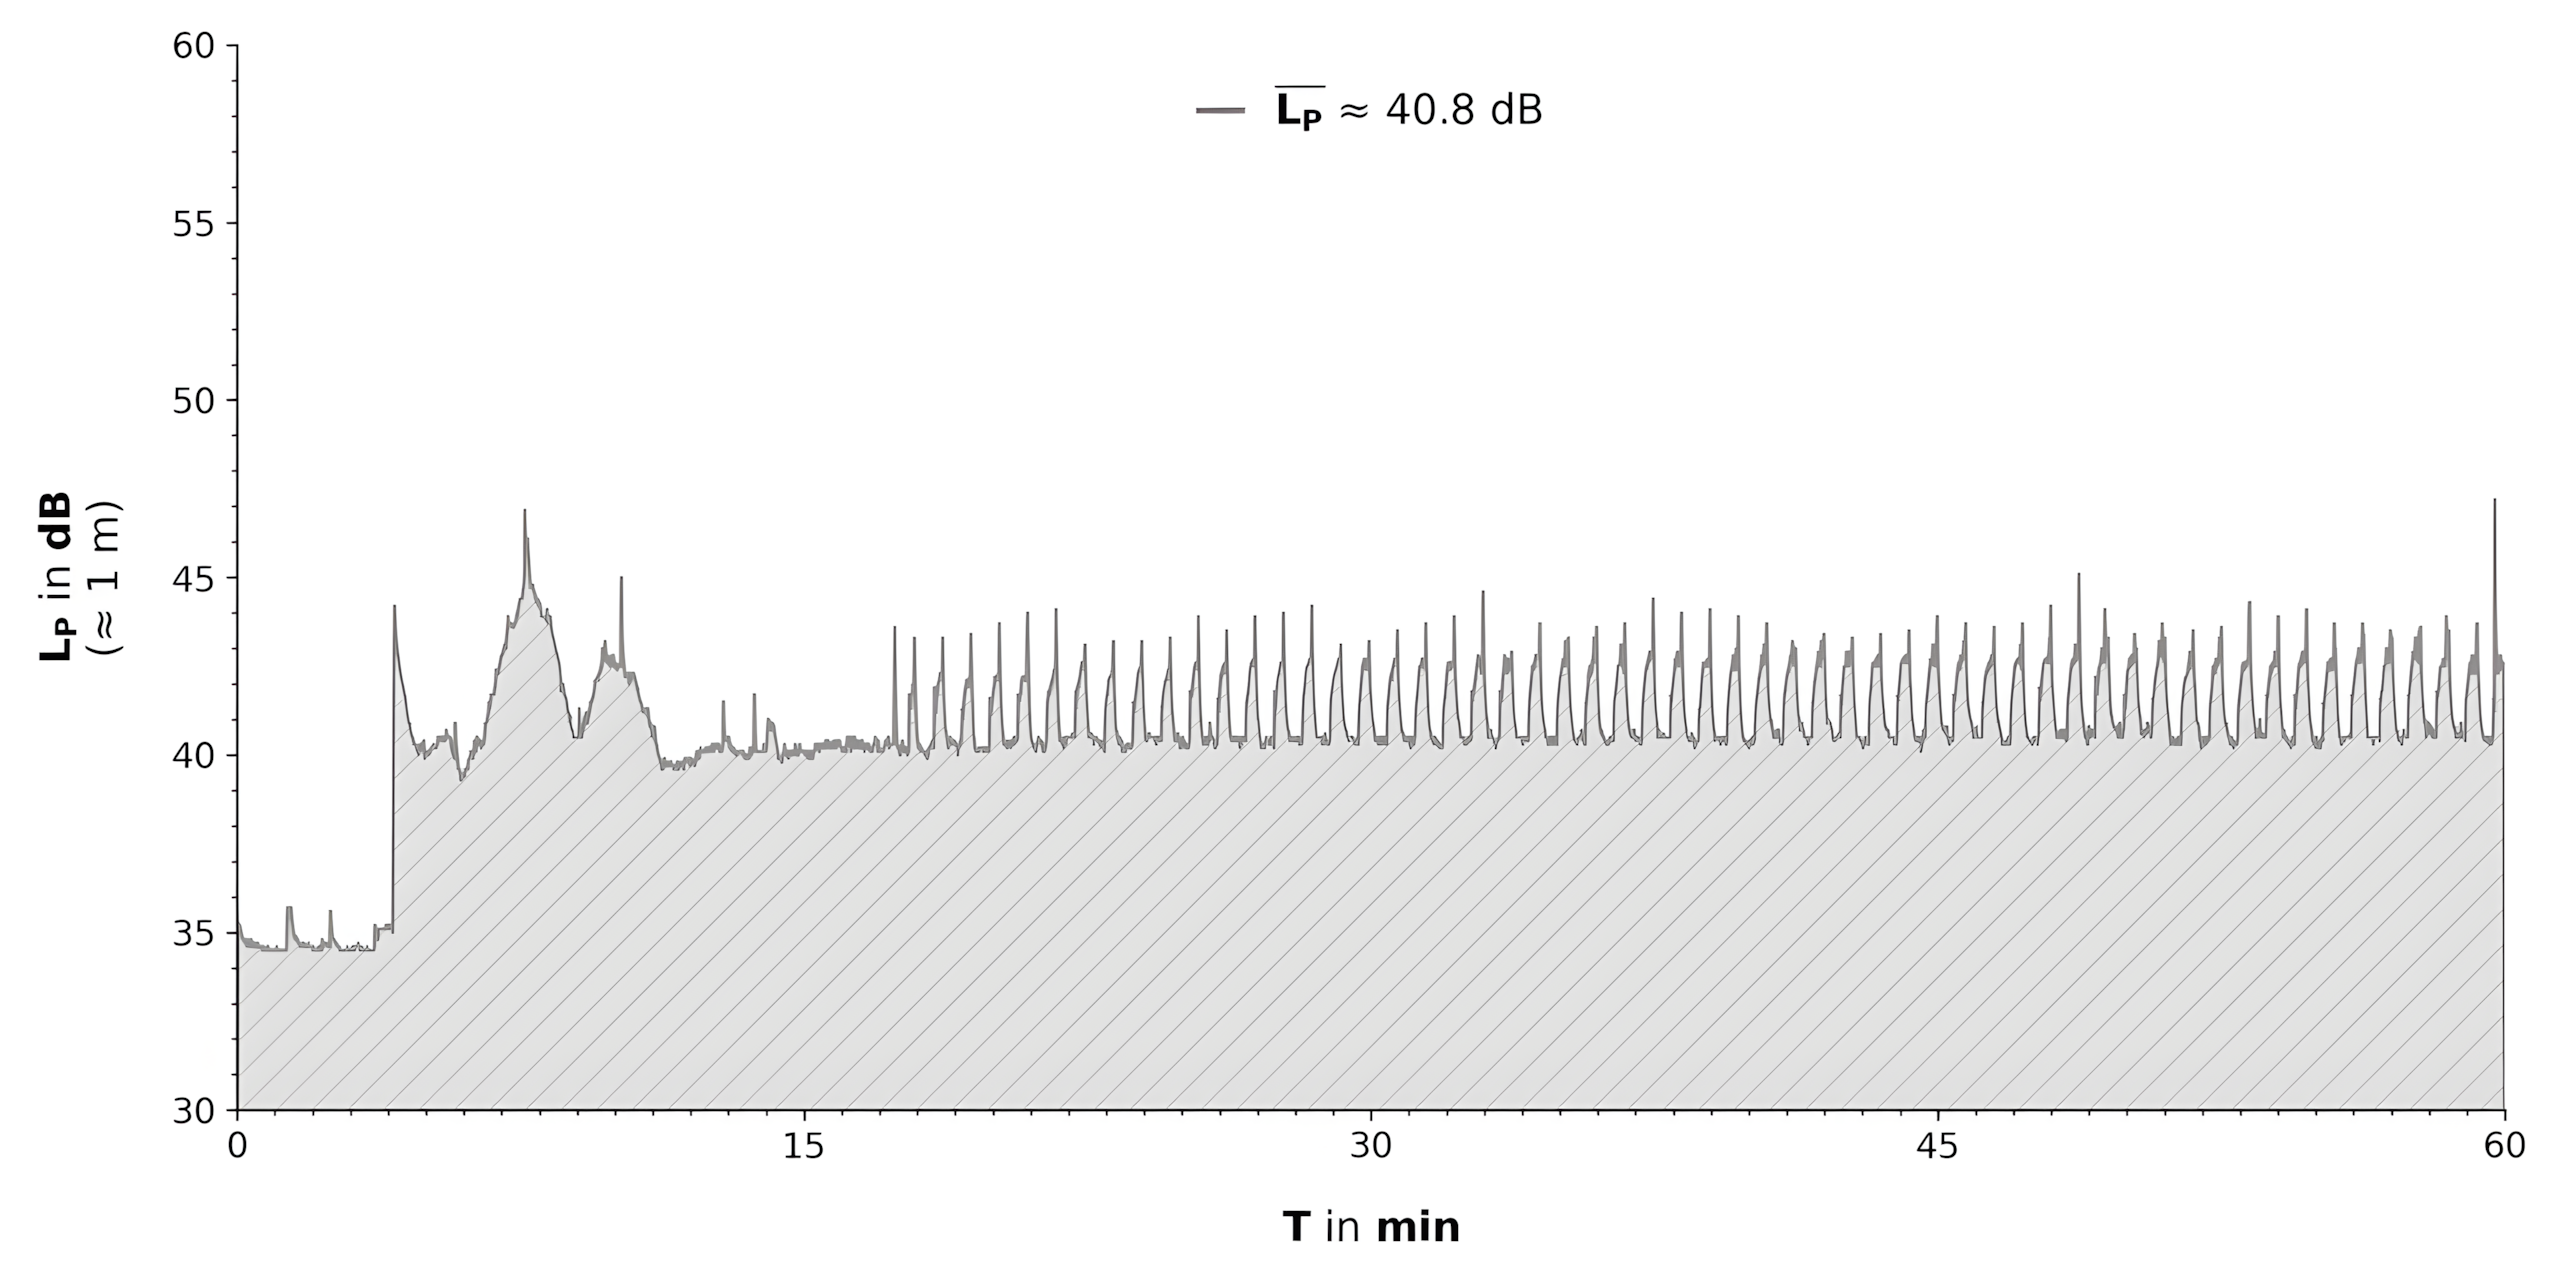 Noise emission in the special PIZZAPLUS program
The noise that can be heard from the GO66E PIZZA350C during cooking is for the most part very moderate. Yet the sounds can become much more substantial when cooking at maximum temperature, for example in the PIZZAPLUS mode: here, we measured a peak sound pressure level of ≈ 47.4 dB from ≈ 1 m away. The situation is different again in many other cooking programs: for example, during use of the TOP AND BOTTOM HEAT cooking program, the sounds amounted to a very quiet whisper. Here, we measured ≈ 37.3 dB, with partial peaks of max. ≈ 38.0 dB, again from ≈ 1 m in front of the GO66E PIZZA350C.
Speed & consistency
 Temperature curves in the TOP AND BOTTOM HEAT cooking program
The GO66E PIZZA350C can preheat at a very solid pace, especially after selecting the RAPID PREHEAT FUNCTION: we measured this by way of example in the TOP AND BOTTOM HEAT cooking mode with a temperature setting of 200 °C. The temperature peak of ≈ 216.9 °C was reached after ≈ 9 min. What is essential, however, is that the RAPID PREHEAT FUNCTION has to be switched on separately before the cooking process is started; this is basically easy to do, but unfortunately not really intuitive.
Here we illustrate how the temperatures in the oven cavity are distributed during cooking in the TOP AND BOTTOM HEAT mode with a temperature setting of 200 °C and how stable they are during a cooking process lasting ≈ 1 h. We measured that the temperature remains stable in all parts of the oven cavity: after preheating had ended, the temperatures differed by only max. ≈ 6.9 °C; during preheating, the maximum difference was ≈ 42.5 °C. That is enormous, but during preheating it is basically entirely irrelevant.
 Temperature curves in the GRILL cooking program
The temperatures in the GRILL cooking mode are likewise stable to a completely sufficient degree: they continue to decrease after the temperature peak has been reached, so that after preheating we measured a fluctuation of only ≈ 13.1 °C. This is no problem at all in grilling practice, especially because the temperatures in this cooking mode and at the maximum grill level are very substantial (max. ≈ 330.9 – 340.8 °C, depending on the respective oven-cavity position).
Baking performance
Just as we already illustrated elsewhere, here too we show how the various parts of the accessory bundle perform, those that are intended to round out use of the pizza program. After that, we present what the various pizzas looked like at the end of the individual baking processes in the GO66E PIZZA350C, together with our impressions of them.
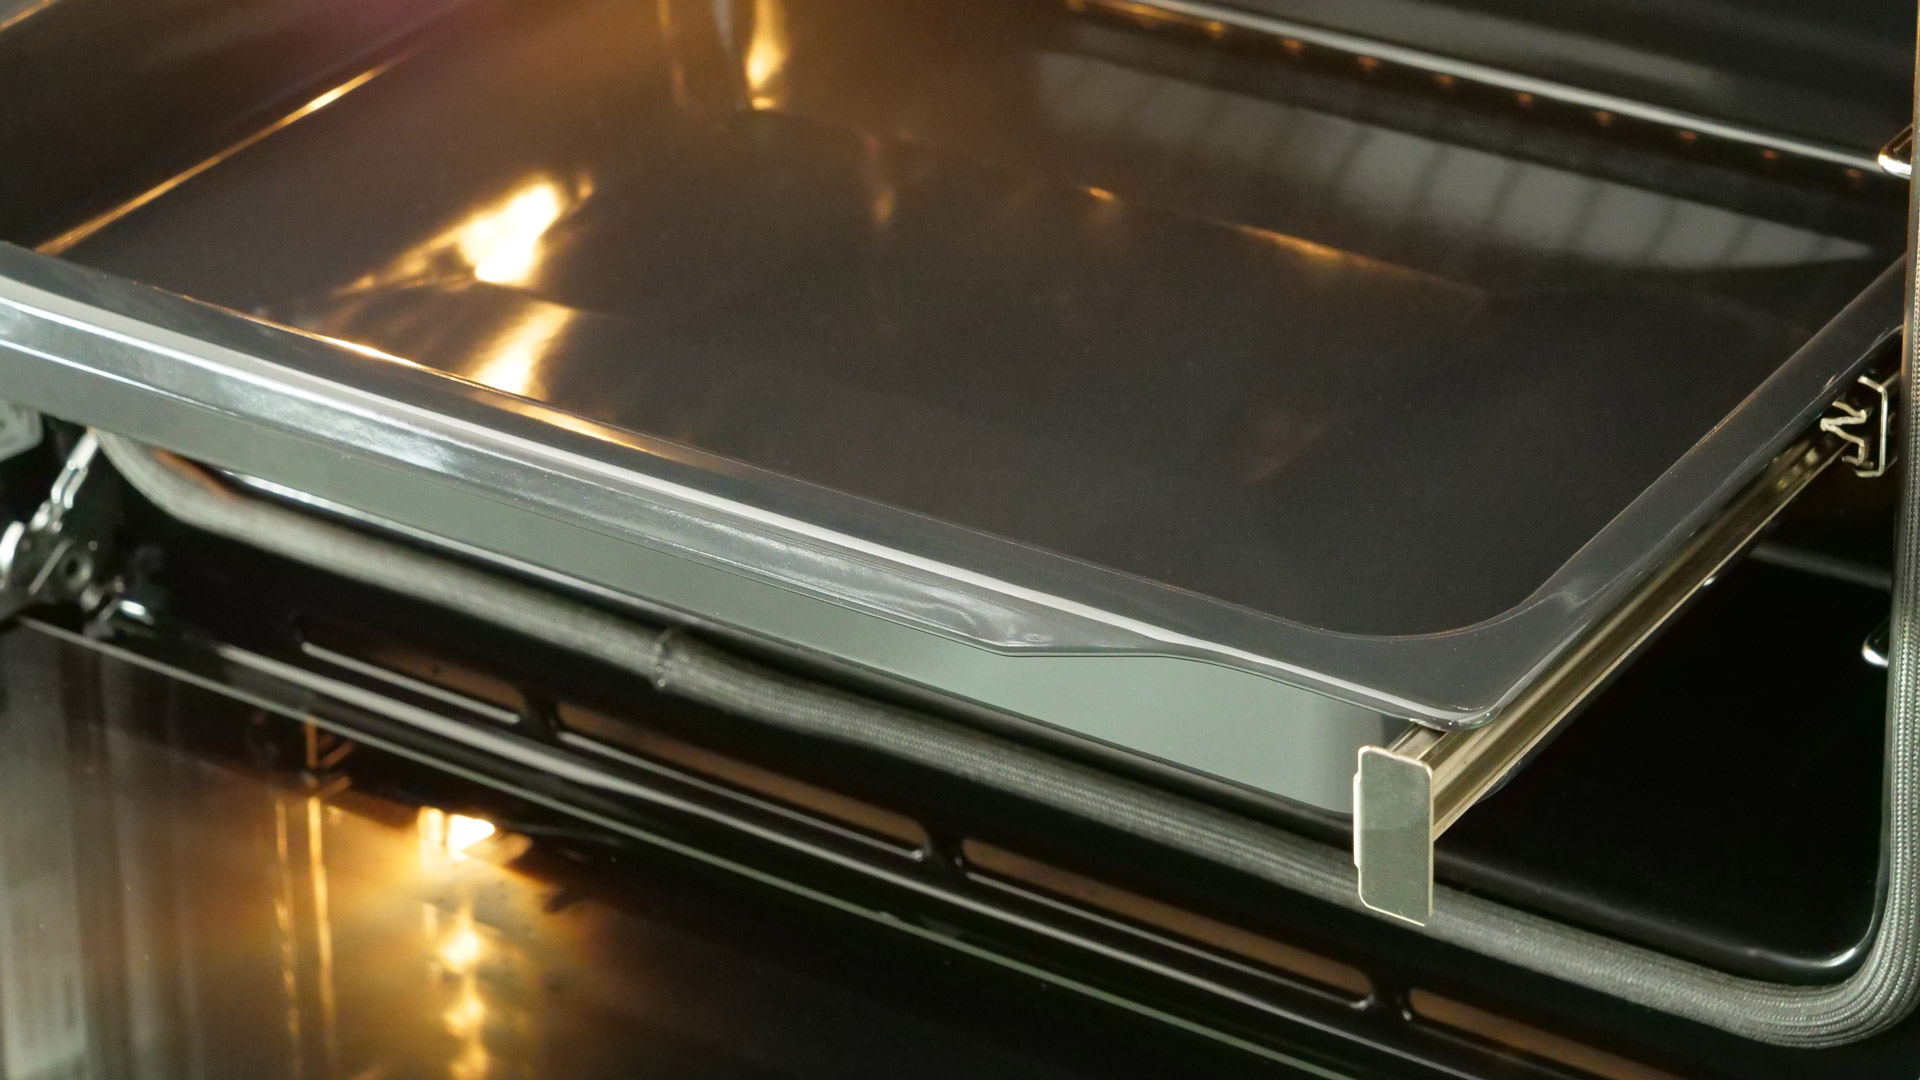
 The metal pizza plate
The GO66E PIZZA350C has been given by Gorenje a metal pizza plate that is much heavier than one would assume from the outside (≈ 2.4 kg, mmax of the pizza plate). Even so, it can be gripped securely at its sides and then slid into the oven cavity. This must be done before preheating the pizza program so that the metal can absorb the enormous temperatures. After that, all that remains is to place the pizza on top of it. The size of ≈ 45.8 × 39.3 cm (Wmax × Hmax of the pizza plate) is advantageous because, in principle, all imaginable pizzas can be baked wonderfully on it, even if they happen to be larger.
The metal plate is much lighter than the one provided by the model from AEG. Even so, it left an impression, as the pizza base regularly became very crisp in the end. The browning performance was also very appealing: by the end of the pizza program, a large part of the pizza base showed very even golden browning.
 The pizza peel
Finally, the GO66E PIZZA350C also comes with a metal pizza peel. This is valuable because it allows the pizza to be slid completely safely into the very hot oven cavity without the hands having to come close to it. Before use, the front metal section has to be connected to the handle, which can be done in max. ≈ 1 min. Even if the quality could be improved in some respects, the pizza peel is nevertheless very stable. The size of ≈ 31.8 × 31.7 cm (Wmax × Dmax of the pizza peel) is still sufficient even if you want to serve pizzas in an American, i.e. very expansive style.
Using this pizza peel is essential: after all, the pizza is meant to be placed in the oven cavity in a fast, simple, and above all safe way, precisely over the metal plate mentioned above. After the preheating phase of the pizza program, temperatures of max. ≈ 317.3 °C prevail in the oven cavity, which means the metal plate is also extraordinarily hot. Without the pizza peel, the pizza could never be placed over the metal plate at such speed without there being a very high probability of burning yourself on the model. What is surprising is that no holes at all have been added to the metal, which means the metal should be dusted with plenty of semolina before lifting a fresh pizza onto it; otherwise, the softer base of a fresh pizza can unfortunately stick noticeably to the metal.
What is much more important than the equipment, however, is this: how attractive were the pizzas we baked over the past few weeks with the GO66E PIZZA350C? One point in advance: in every case, we tested the baking processes in the relevant pizza programs, in the case of the fresh pizza therefore at a maximum temperature of ≈ 317.3 °C in the oven cavity. After the end of the preheating phase associated with the appropriate pizza program, we left the fresh pizza in the oven cavity for ≈ 3:30 min, while the other pizzas remained for a full ≈ 7:00 min, as expressly recommended by Gorenje in the instruction manual.
 Pizza Salame | initial temperature of ≈ -18 °C
The GO66E PIZZA350C left a very solid impression here, because the base of the pizza, for example, was crisp and crunchy all around by the end – though some testers felt it was already rather dry. Another point of criticism is that it lacked color in many areas, meaning the browning performance was only mixed. The situation with the cheese was very similar: while much of the cheese melted exemplarily, it was still very pale in the end; microscopic black spots, on the other hand, could be seen only in some places, for example on the upward-facing edge of the salami. All in all, the quality was quite attractive, but the pizza as such was truly no masterpiece.
 Fresh Pizza Margherita | initial temperature of ≈ 20 °C
The originally ≈ 20 °C warm fresh pizza in Neapolitan style turned out much nicer: the texture became more appealing in all parts, as could be seen, for example, in the occasional black spots in the style of a leopard pattern. The pizza rims became very voluminous and did not lack moisture either: on the inside, they were still wonderfully soft (“chewy”). The pizza base was very similar: through use of the metal plate, it became completely stable and crisp and crunchy. Within the ≈ 7:00 min in the oven cavity, the mozzarella transformed into a white-brownish mass from which only darker traces stood out in some areas; the flavor was superb. It is pleasing, in turn, that all parts of the pizza really looked similar, which is understandable: after all, the temperatures in the oven cavity are very stable when the pizza program is used at maximum temperature; the fluctuation of ≈ 13.5 °C recorded during the full baking process proved irrelevant.
 Pizza Margherita without gluten & more | initial temperature of ≈ -18 °C
This pizza could be served from the GO66E PIZZA350C in acceptable quality: while the base of the pizza was fully stable at the end of the pizza program, it lacked moisture – it had already become quite brittle, just like the upper parts of the pizza rim. The tomatoes, for example, turned out much more impressive: thanks to the substantial temperatures, they developed a truly wonderful flavor; the dark traces that could be seen especially on parts of the pizza rim were merely an external flaw and thus not associated with any loss of flavor. The mozzarella also turned out appealing: all the parts of the pizza topped with it ultimately took on a nice, though still rather light, golden-white color.
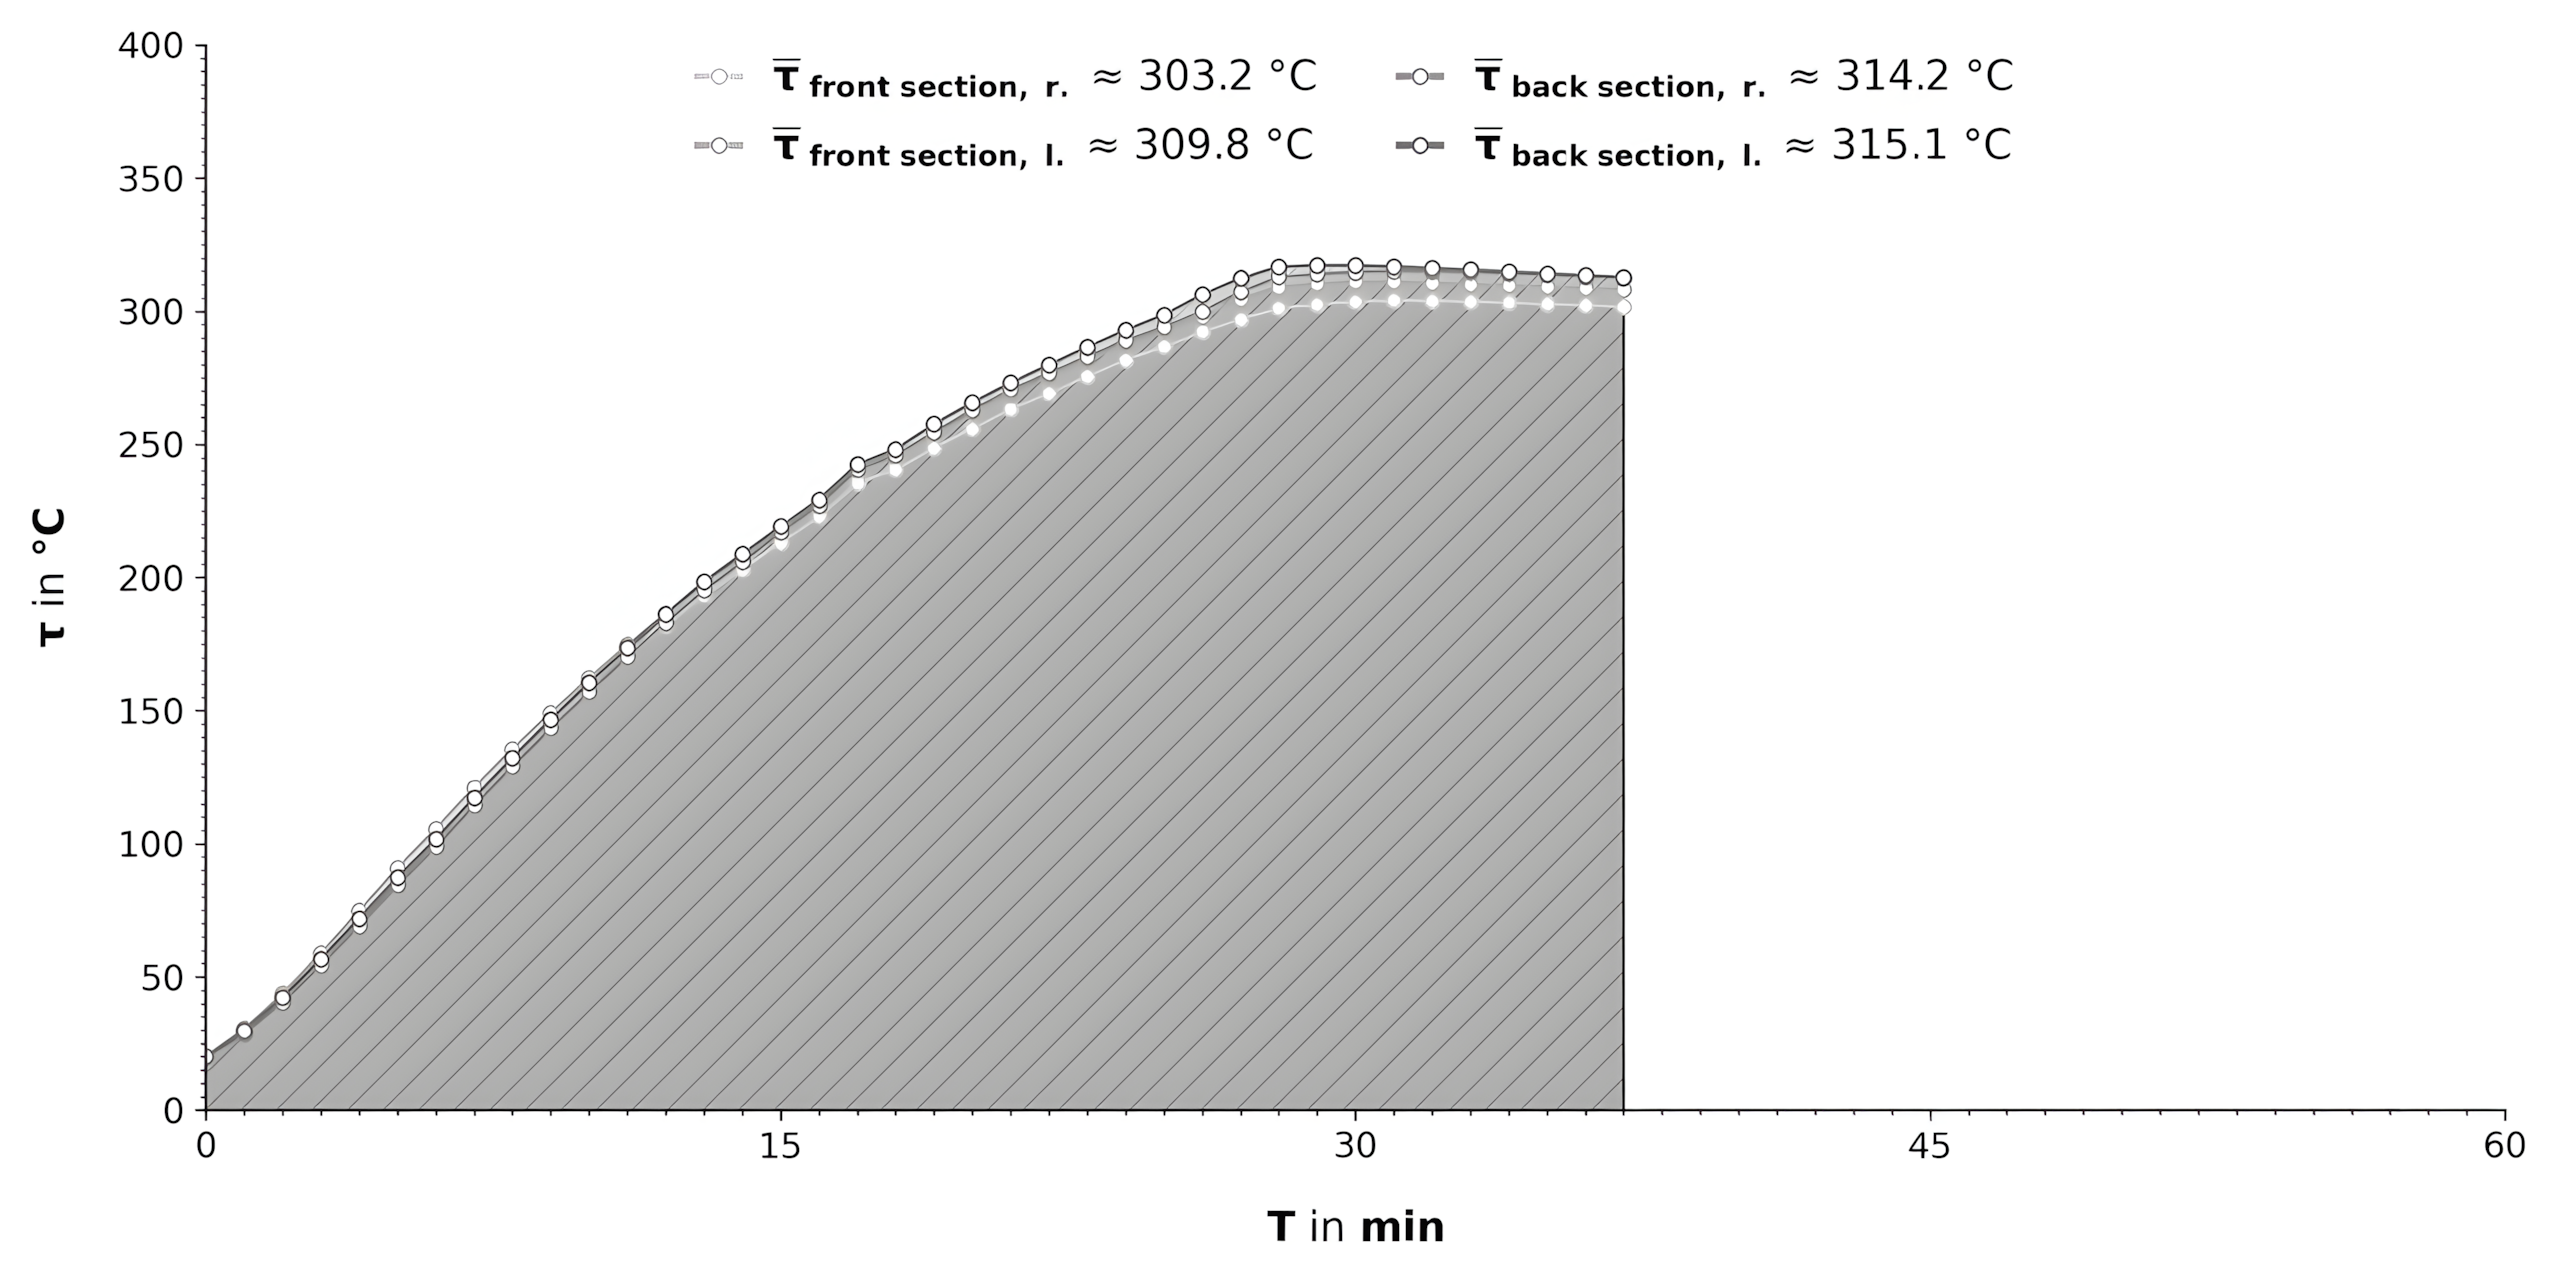 Temperature curves in the special PIZZAPLUS program
During use of the pizza program, the temperatures in the oven cavity are truly very stable, as this graph shows very clearly. The enormous temperature peaks of max. ≈ 317.3 °C can also be read here, ensuring that by the end of the pizza program the pizza can become thoroughly crisp; even if the quality could still be improved in a few respects, the pizzas nevertheless provide a well-rounded pleasure experience and turn out far more enticing than in conventional cooking programs (such as TOP AND BOTTOM HEAT).
Bauknecht
BBI4S8HM1SK
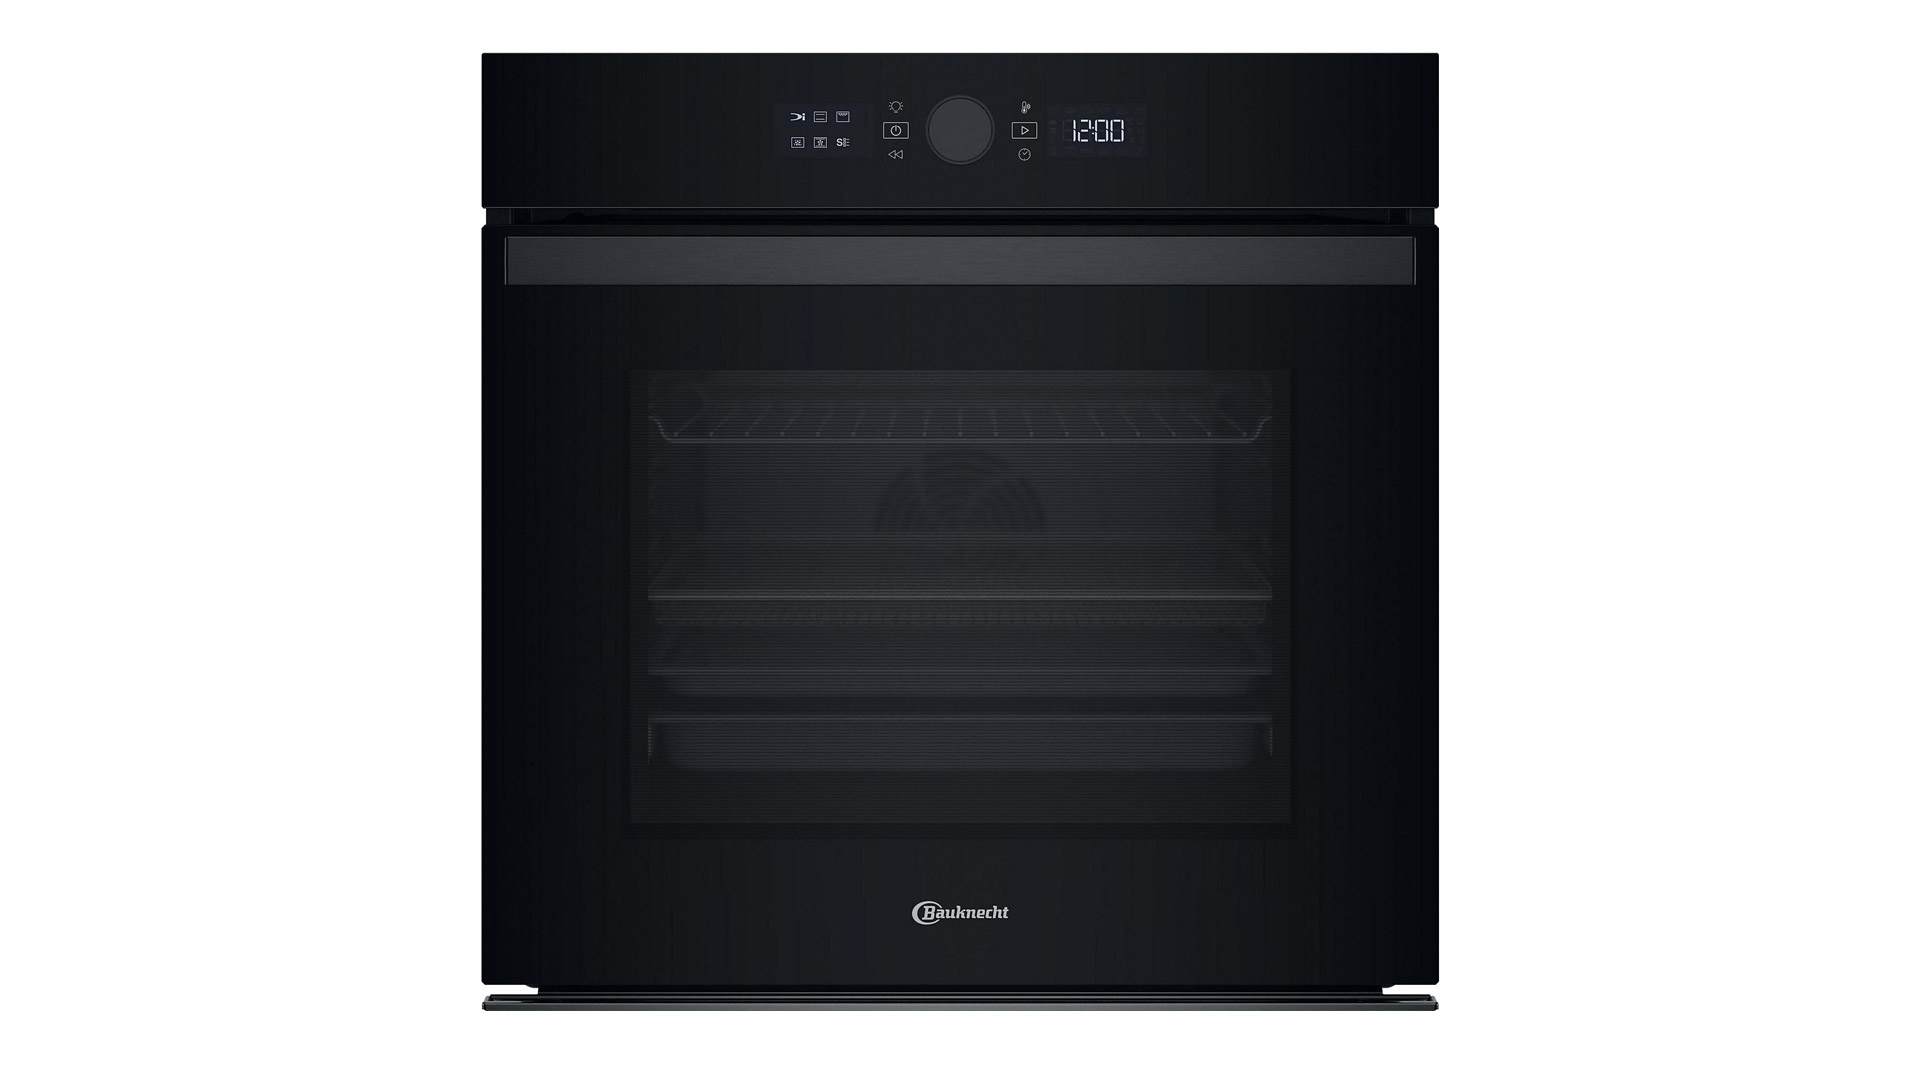
Key features
- Size of the oven cavity (Hmax × Wmax × Dmax): ≈ 36.6 × 46.8 × 42.6 cm
- Volume of the oven cavity (Vmax): ≈ 73.0 l
- Temperatures (tmin – tmax): 30–310 °C (depending on cooking program & more)
- Cooking programs: 8 (see the table)
- Automatic programs: 6 (see the table)
- Accessories: Air-fry cooking basket (1 ×); baking trays (2 ×); telescopic rails (2 ×); drip tray (1 ×)
Pros
- evenly distributed temperatures in all cooking programs
- solid cooking performance for vegetables, meat, and fish in all cooking programs
- very easy cleaning with water vapor
Cons
- baking performance for pizza could be improved in some respects (for example in terms of browning performance)
- does not come with special accessories for baking pizza
- limited range of cooking programs
- unfortunately, the screen displays only graphics, not the names of the respective cooking programs as well
Size, weight & more
Thanks to its size (≈ 59.7 × 59.5 × 56.4 cm, Hmax × Wmax × Dmax of the model), the Bauknecht BBI4S8HM1SK can be installed completely without difficulty. Its weight of ≈ 36.9 kg (mmax of the model) is also so moderate that the model can be carried into the house without much effort. This is advantageous, for example, if it has to be carried up a few flights of stairs.
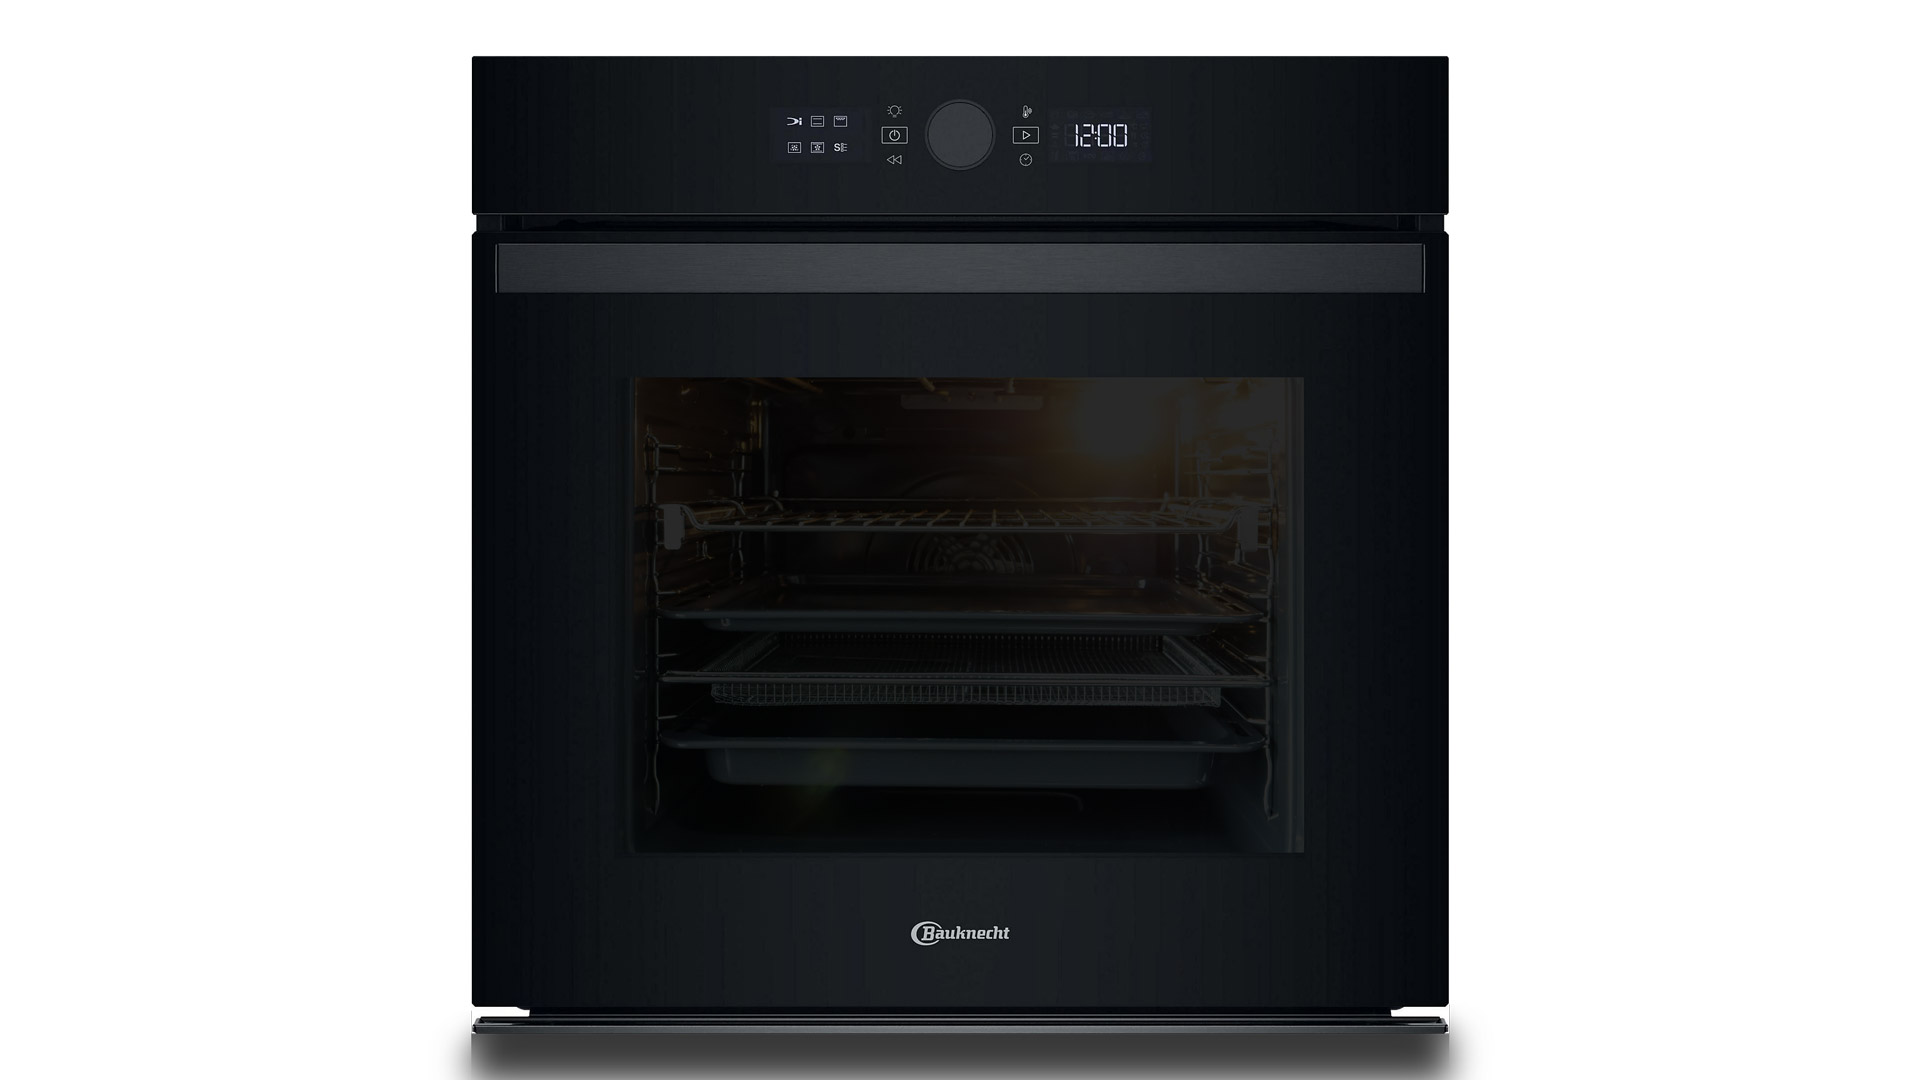 The model from the front
The glass occupying a large part of the door is very sturdy. However, because of its dark tint, the food can be seen only with difficulty during a cooking process, so that its status can only be guessed at. For this reason, the quite impressive size of ≈ 42.0 × 29.0 cm (Wmax × Hmax of the glass) is of rather secondary importance, because only silhouettes can be seen through the glass. The oven light is also not bright enough for the food to be seen clearly from all sides; for that reason, you basically always have to open the door if you want to inspect the quality of the food. The lamp can be switched on or off as desired via a part of the touch panel at the front.
The size of the oven cavity (≈ 36.6 × 46.8 × 42.6 cm, Hmax × Wmax × Dmax of the oven cavity) is respectable: the usable volume of ≈ 73.0 l is entirely sufficient in cooking practice and comparable, for example, to that of AEG (≈ 72.0 l). There is plenty of room inside the oven cavity for preparing larger foods such as frenched racks. But it is also possible to place impressive quantities of other foods (for example vegetables) inside without them covering one another. Even when several consumers live in the household, the Bauknecht BBI4S8HM1SK can be used sensibly.
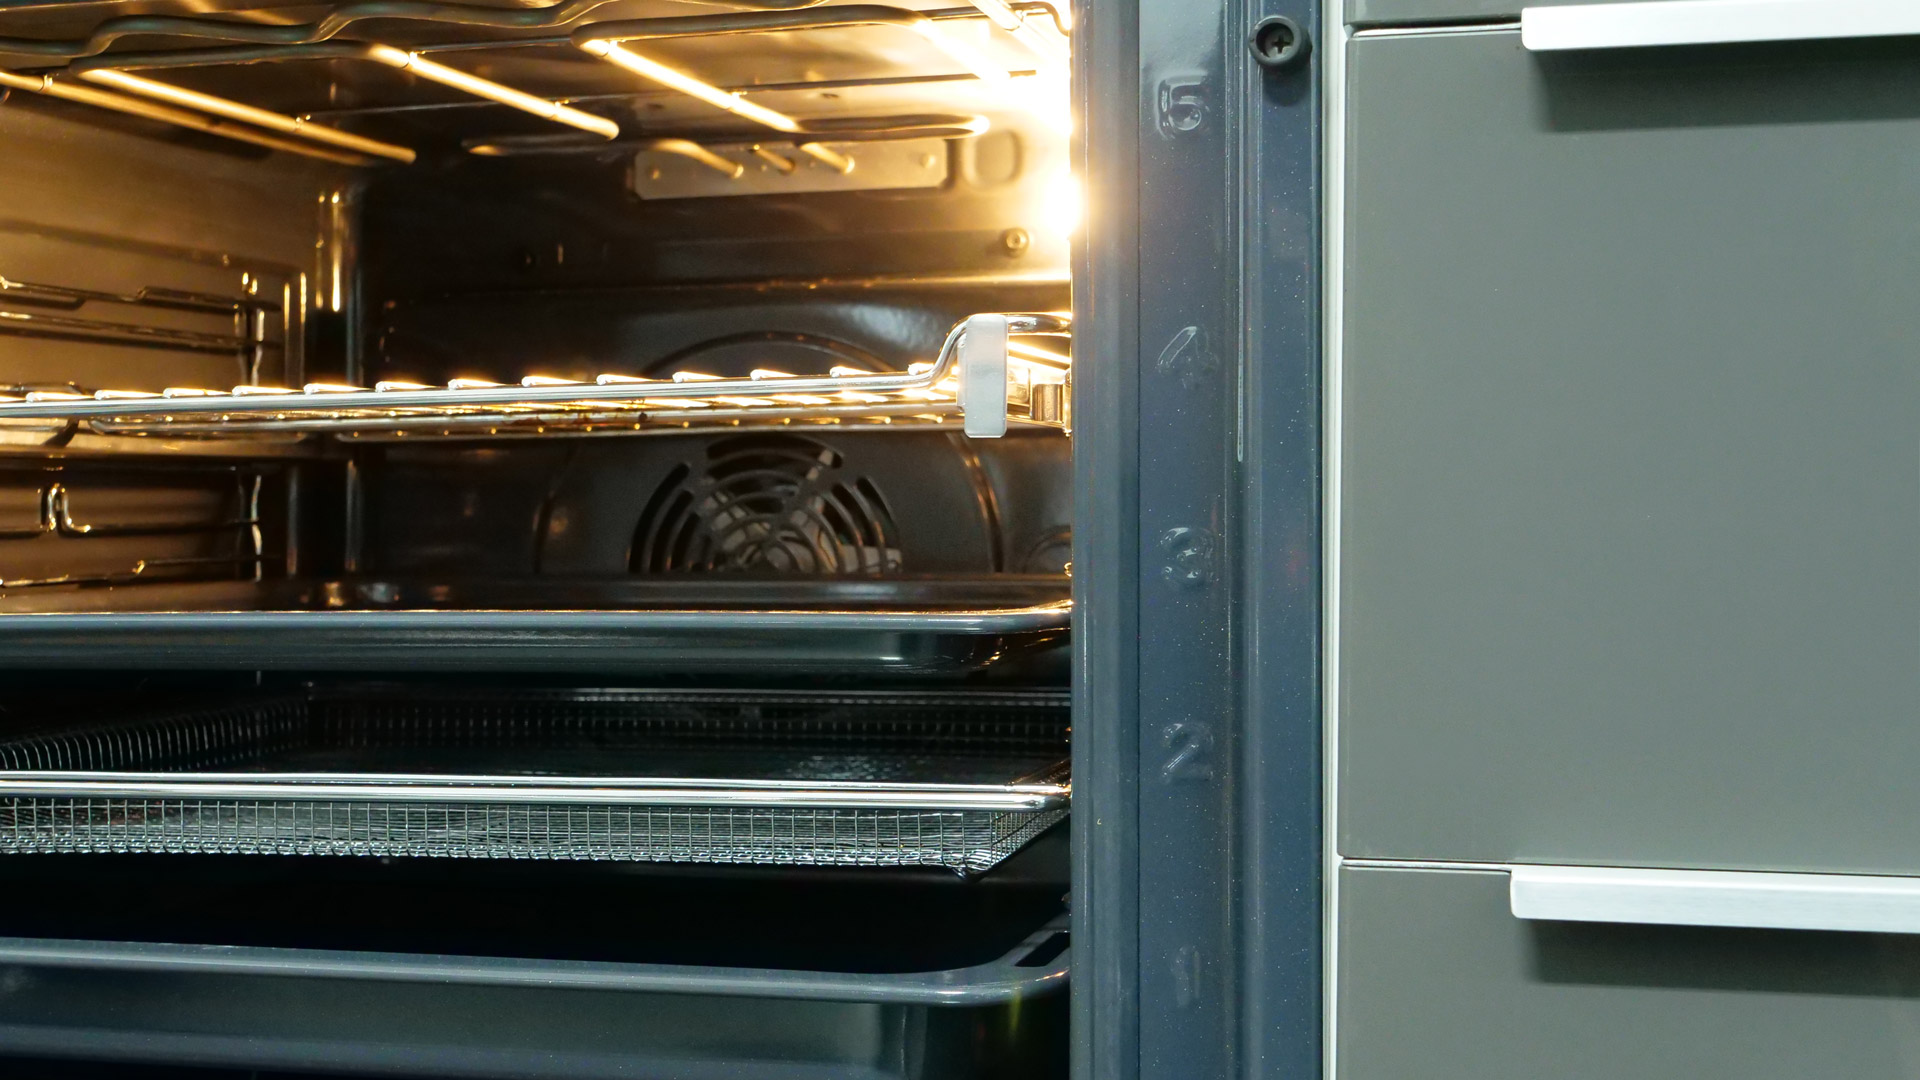 The shelf levels
Like the other models, the Bauknecht BBI4S8HM1SK also offers a handful of different shelf levels. Food can therefore always be placed without difficulty on the level that makes sense in light of the cooking program, cooking parameters, etc. The instruction manual, for example, illustrates very clearly on which level which foods should be placed.
Numbers (1, 2, 3, etc.) have been added to the front metal part of the oven cavity, and they can be clearly seen from the front. This is nice because the cooking notes in the instruction manual regularly recommend the use of the 1st level, the 2nd level, the 3rd level, and so on. Thanks to these numbers, the levels referred to in the cooking notes can be identified with certainty.
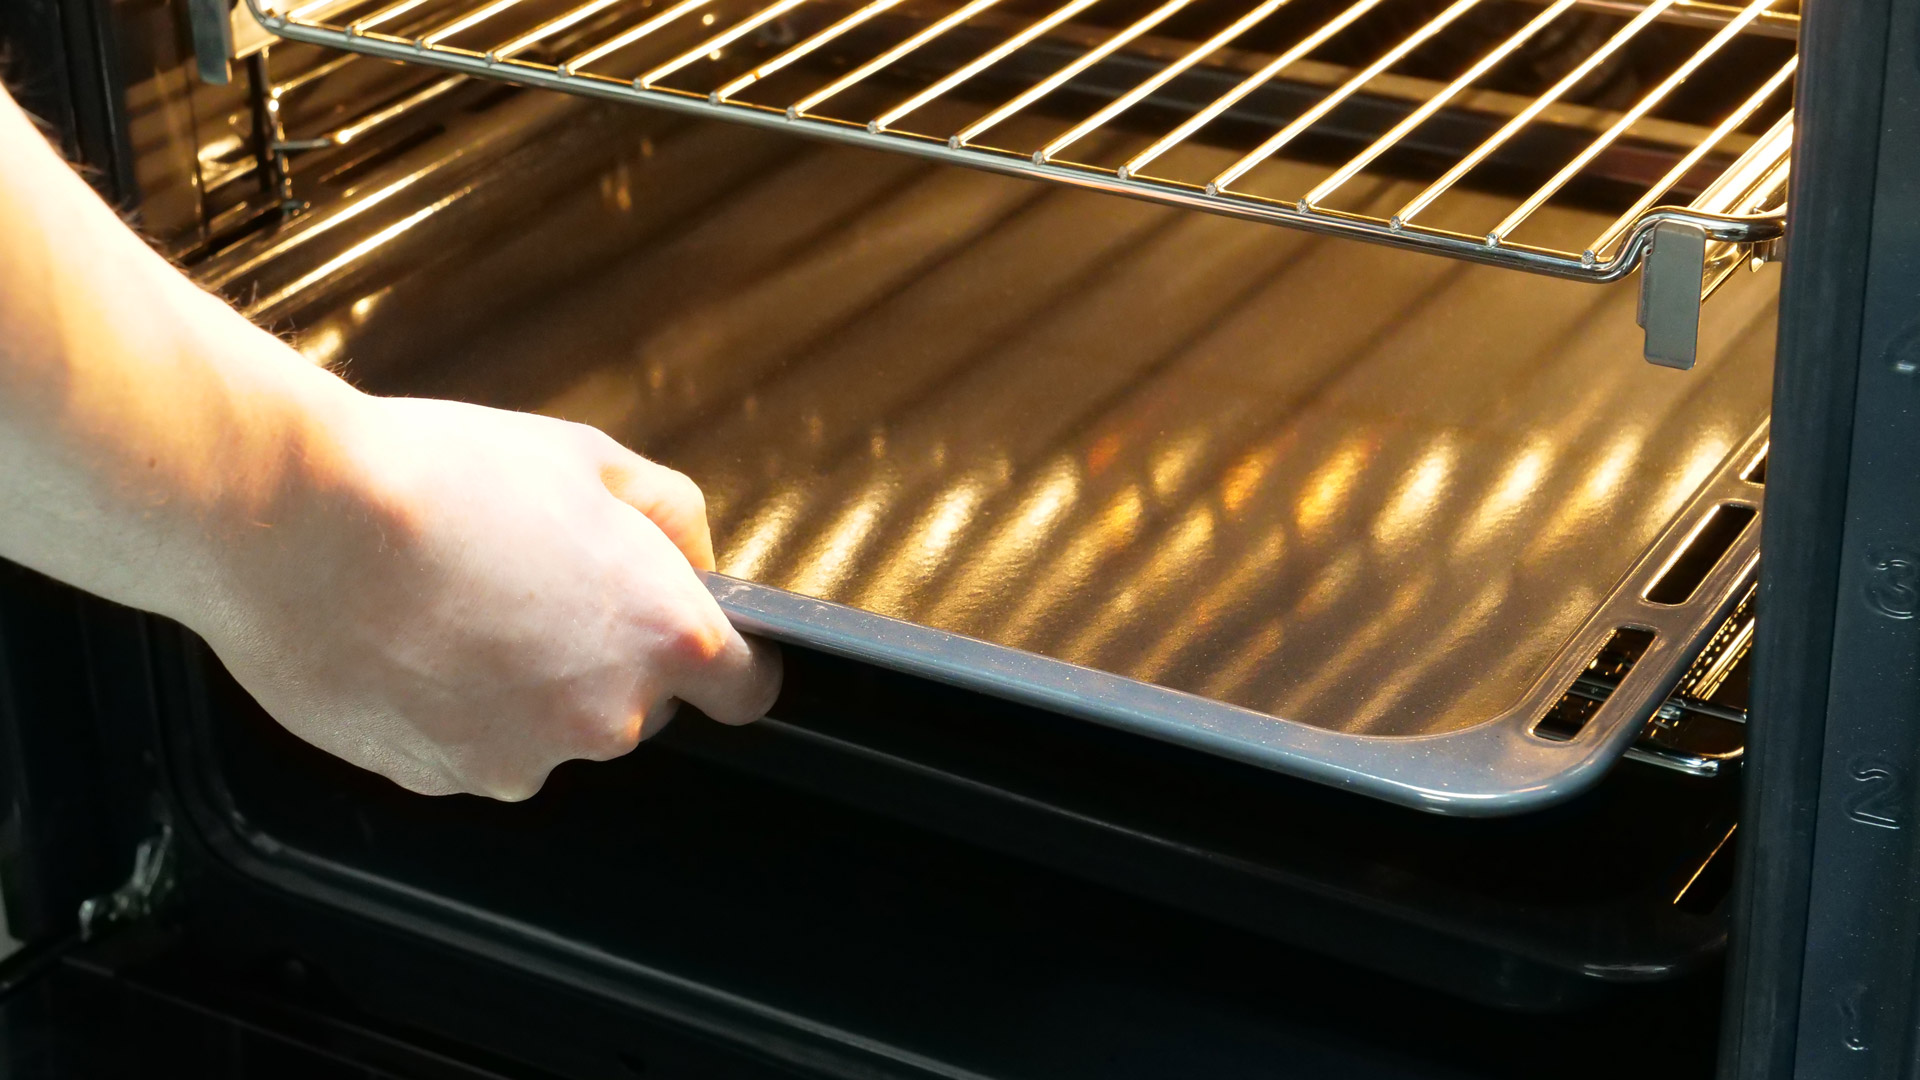 How trays & more slide
Even though the quality of the mechanism provided here is basically very appealing, it can still happen that the trays catch during the sliding movement. In that case, you generally just have to push them forward with a little more pressure until they are fully inside the oven cavity; we never perceived a real obstacle here.
The use of the special air-fry basket, which only this model includes, also proved somewhat laborious: the angle has to be exactly right if you want to slide it into or out of the oven cavity.
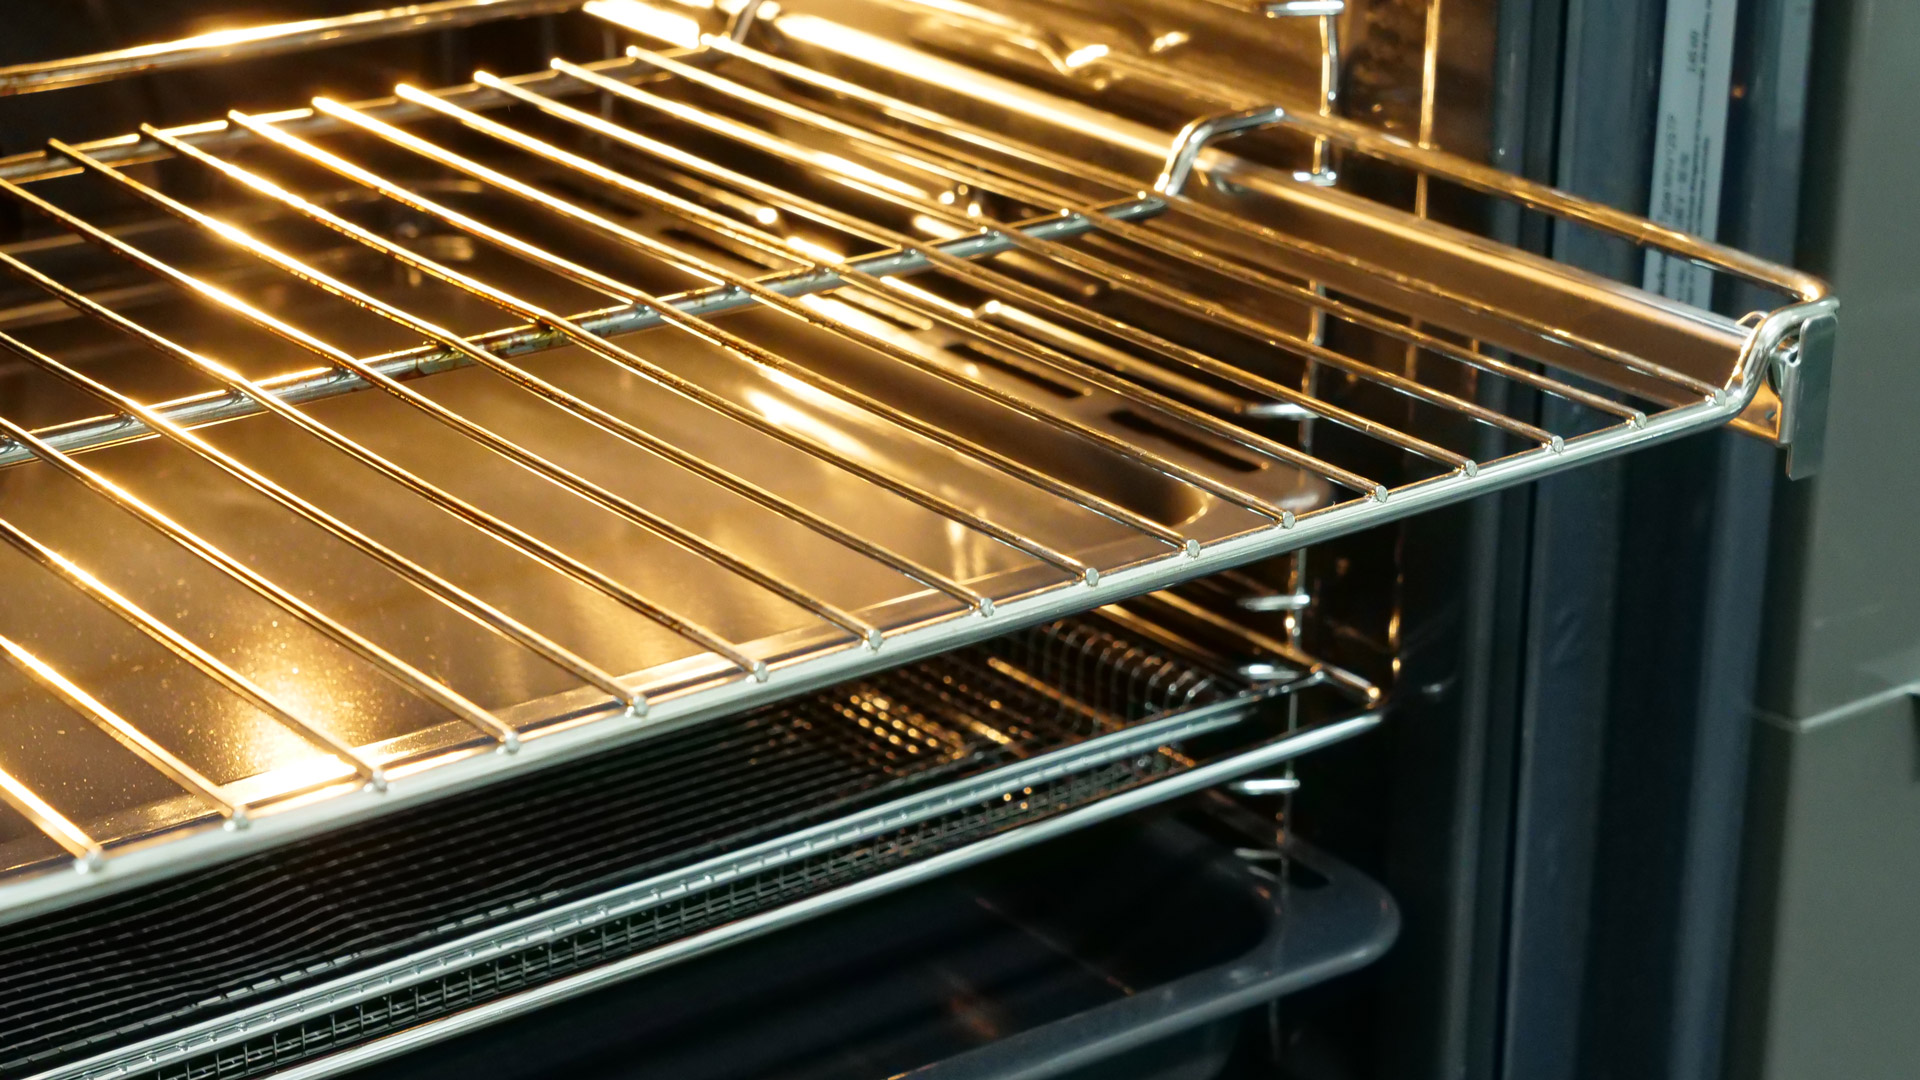 The telescopic rails
The use of the Bauknecht BBI4S8HM1SK is also made safer in some respects by the telescopic rails provided here: they are completely stable, which means even very heavy foods can be placed fully inside the model and moved back and forth effortlessly thanks to the telescopic rails; only occasionally did we perceive the sliding movement here as somewhat stiffer.
The accessory bundle of the Bauknecht BBI4S8HM1SK includes all the essential basics: here too, there is a double pack of baking trays and a versatile rack. The trays differ in the height of the tray rim: we are talking about heights of ≈ 2.1 cm and ≈ 4.2 cm. So it makes no difference whether you want to place meat, fish, and vegetable dishes in the oven cavity merely to ensure even cooking, or whether you want to prevent marinades, oils, etc. running off the food from soiling the bottom of the cavity. Both are easily possible with the appropriate tray. It is also pleasing that a special cooking basket can be used that ensures the food receives intense heat from all angles: convenience foods such as fries, drumsticks, and much more can thus be served in surprisingly solid quality, similar to what comes from a modern air fryer.
Operation
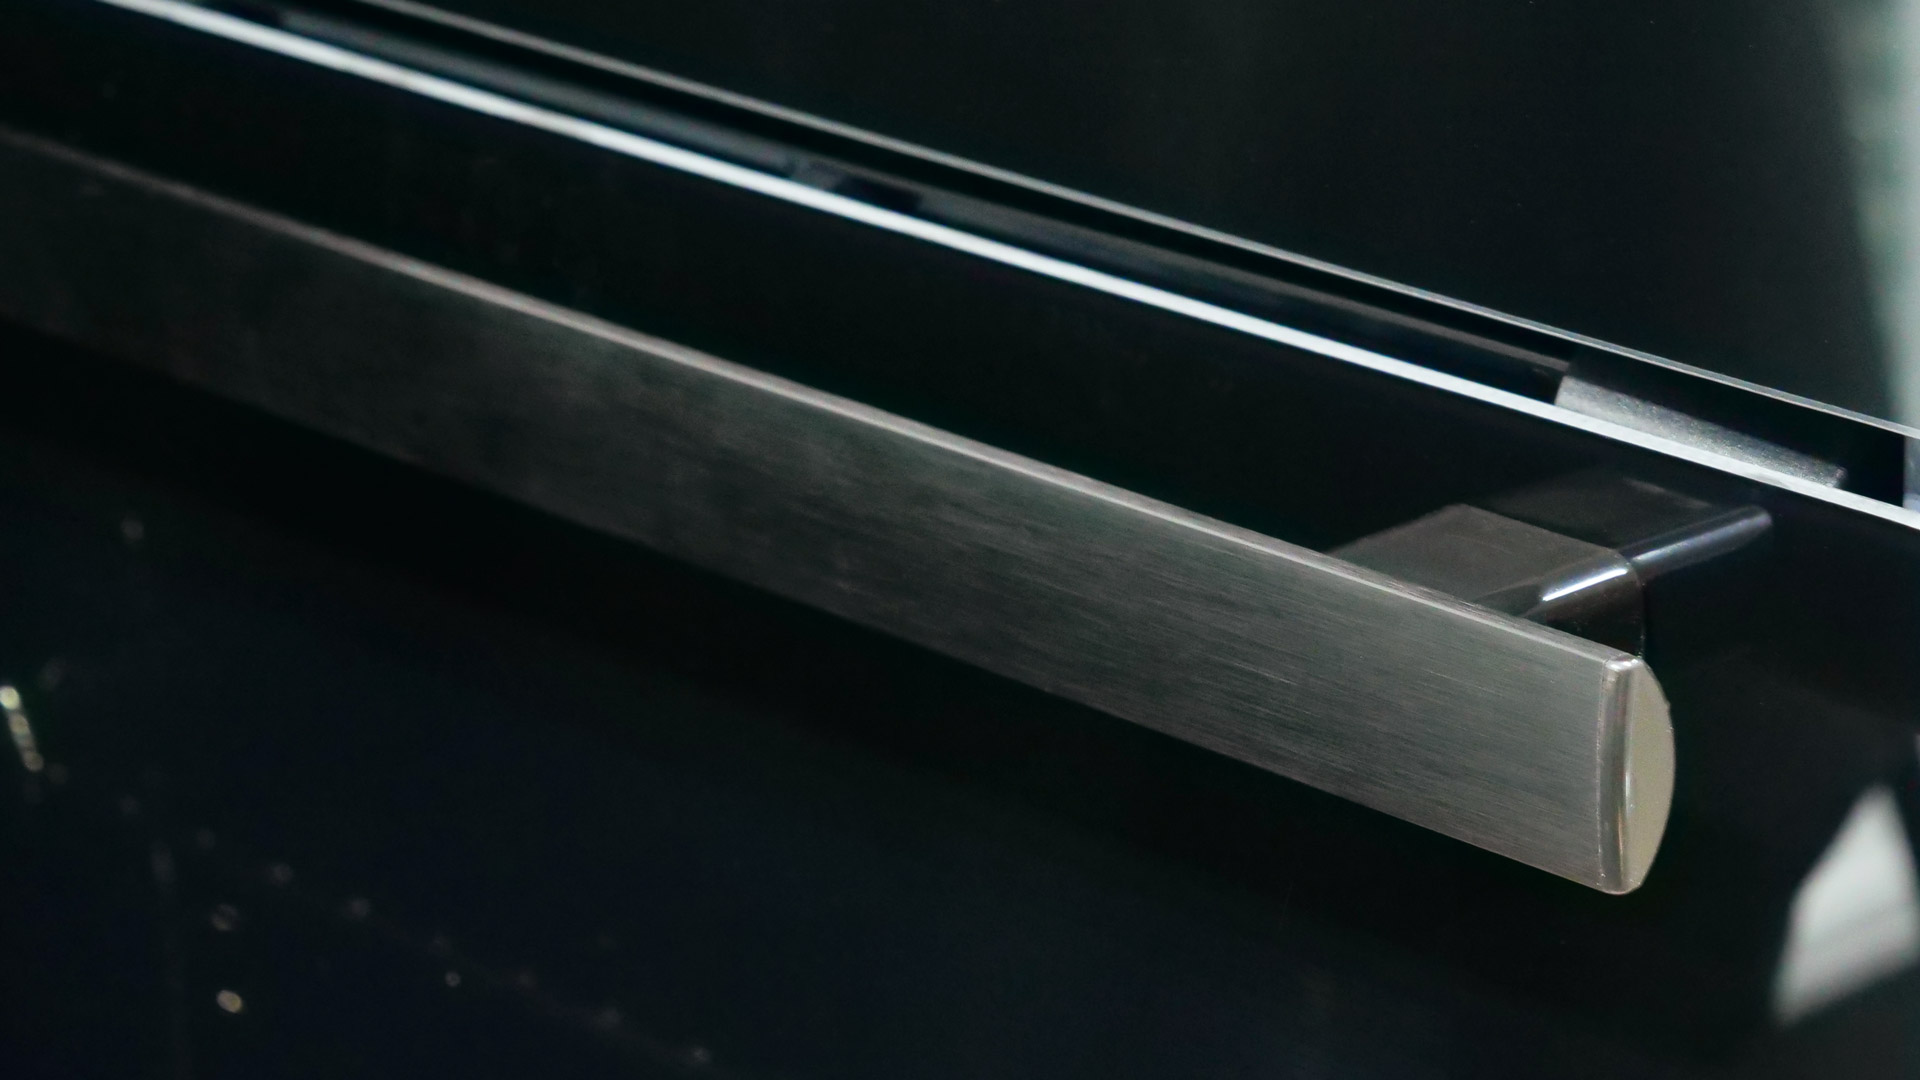 The door handle
Thanks to the hinges provided here, the door movement is exceptionally smooth; only when lowering the door can more resistance be felt. Even though the grip of the handle is secure all around, the metal can still press quite noticeably into the hand.
Thanks to a special hydraulic mechanism, the door can only be closed at a very moderate speed, so that even a more forceful closing movement cannot cause any damage to the materials, especially the front glass panel; the mechanism also still proved very reliable after several weeks of use.
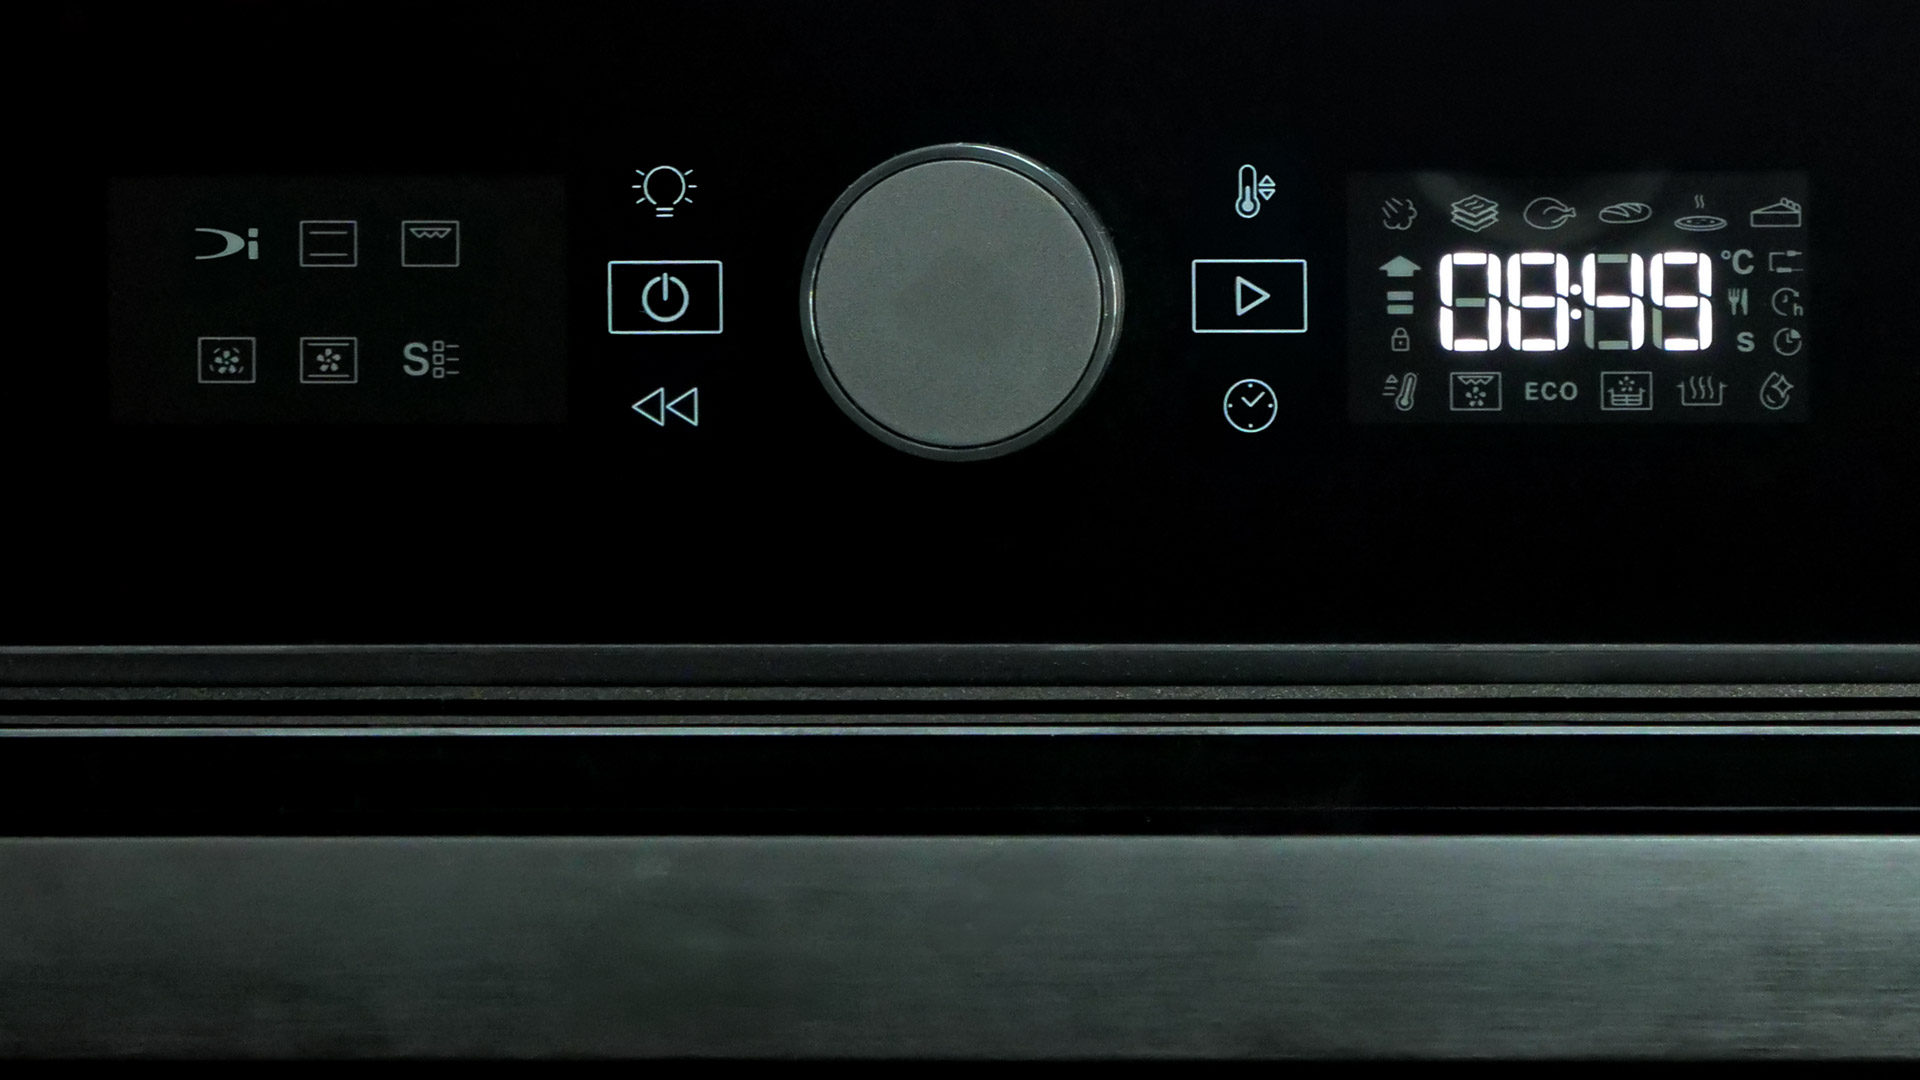 The touch panel
Part of the use of the BBI4S8HM1SK can be carried out via the front touch panel. In addition to the six touch controls, there is also a pair of screens arranged around the touch panel. One screen shows the graphics for the various cooking programs, while the other primarily displays the cooking parameters of the respective program. What could be improved is this: only graphics in lighter gray can be seen on the touch panel, and unfortunately many of them are only partially understandable – memorable texts making it clear how, for example, to access a certain menu would be much nicer. In addition, there is a rotary knob with which not only the respective cooking program can be chosen, but its cooking parameters can also be changed.
At ≈ 6.2 × 3.4 cm (Wmax × Hmax of the screens), the screens are of completely sufficient size. In principle, they can also be read from all angles in front of the BBI4S8HM1SK, even from more than ≈ 1 m away. Another reason is certainly that the respective graphics and cooking parameters stand out very nicely in bright white against the black of the screen. Reflections can regularly only be seen when the sun shines directly onto one of the screens.
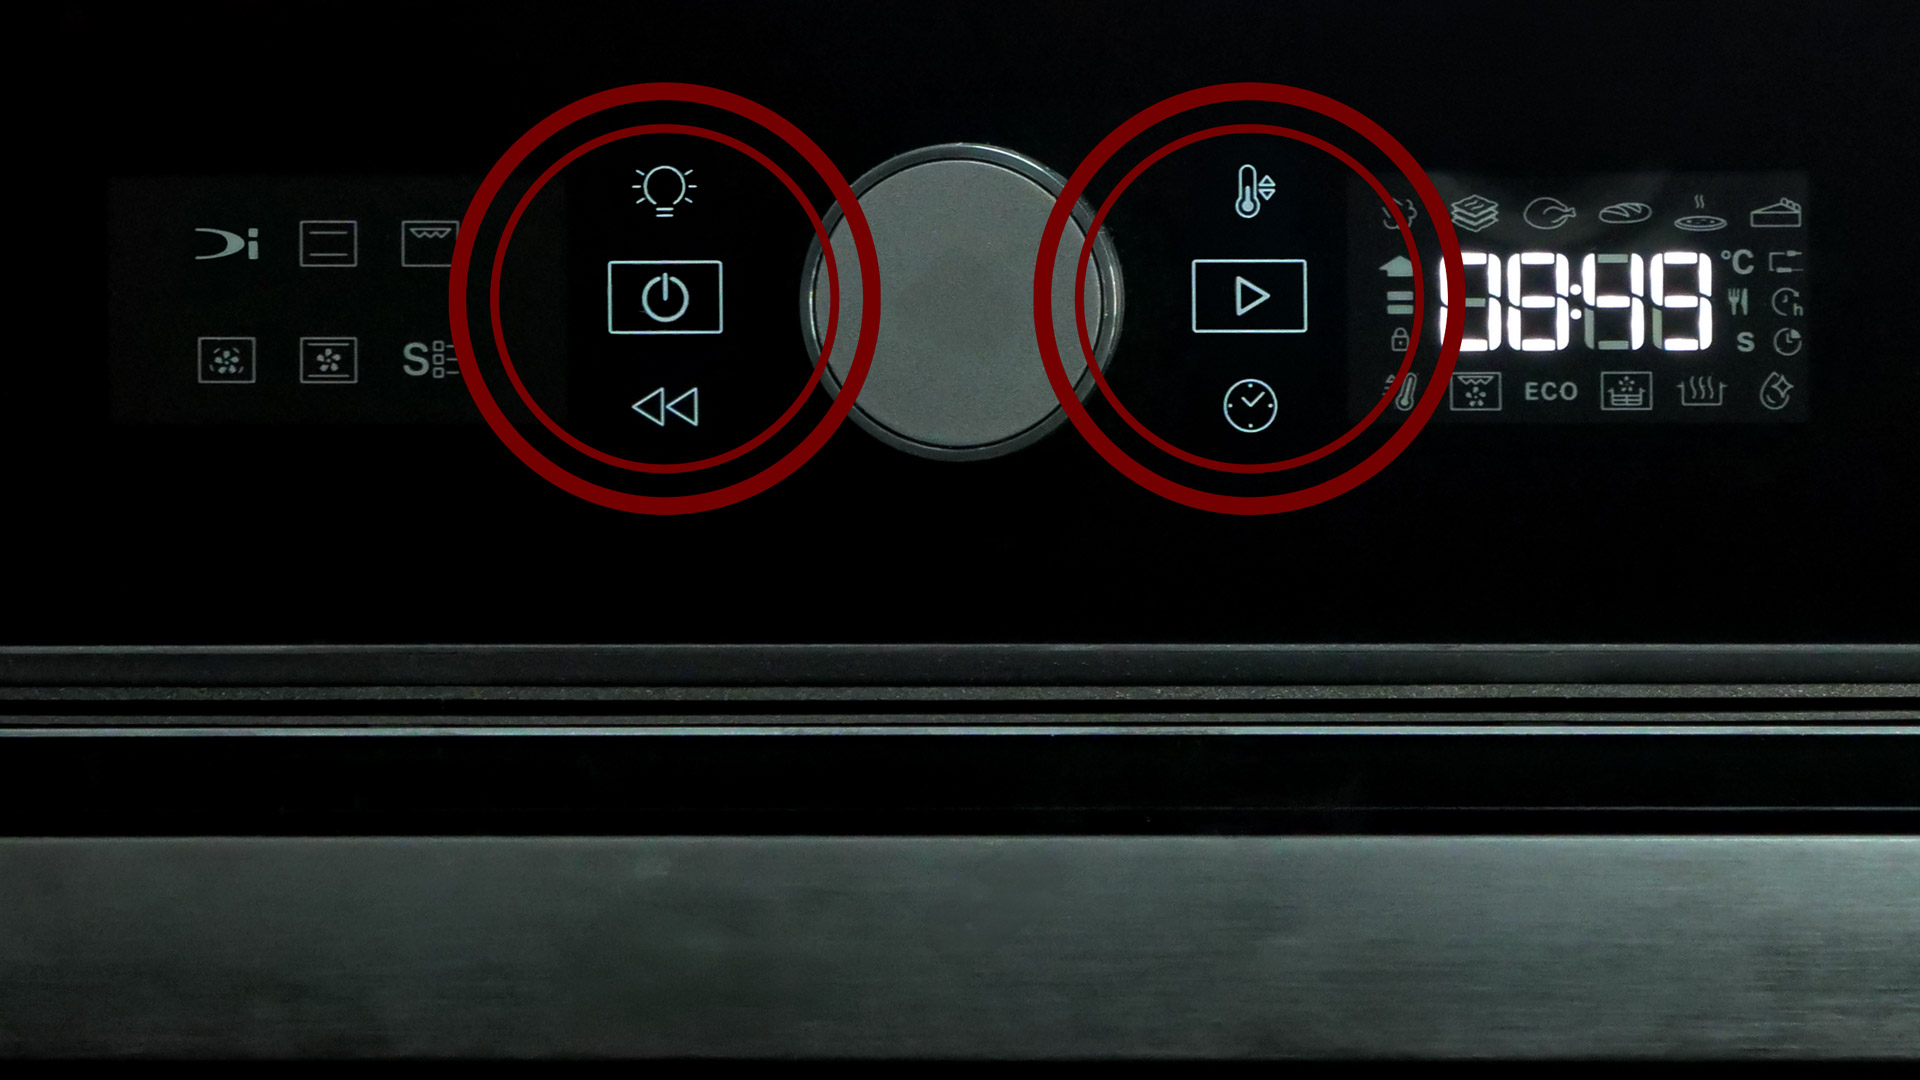 The different parts of the touch panel
The touch panel of the BBI4S8HM1SK is located around the rotary knob. During use, we were able to use the touch panel without real problems; but here too it can happen that a few gestures need to be repeated, meaning, for example, one of the touch controls has to be pressed several times. Precisely because the touch controls come from the factory with graphics only, use sometimes proves rather cumbersome.
This exact problem also arises when selecting the cooking program: the model illustrates it on the screen only in the form of graphics, some of which are difficult to understand. The graphics of the classic conventional cooking programs (for example TOP & BOTTOM HEAT) are still quite intuitive, whereas the other cooking programs can only really be guessed from the graphics (for example RISING/PROOFING). As a result, with this model too you regularly have to consult the instruction manual.
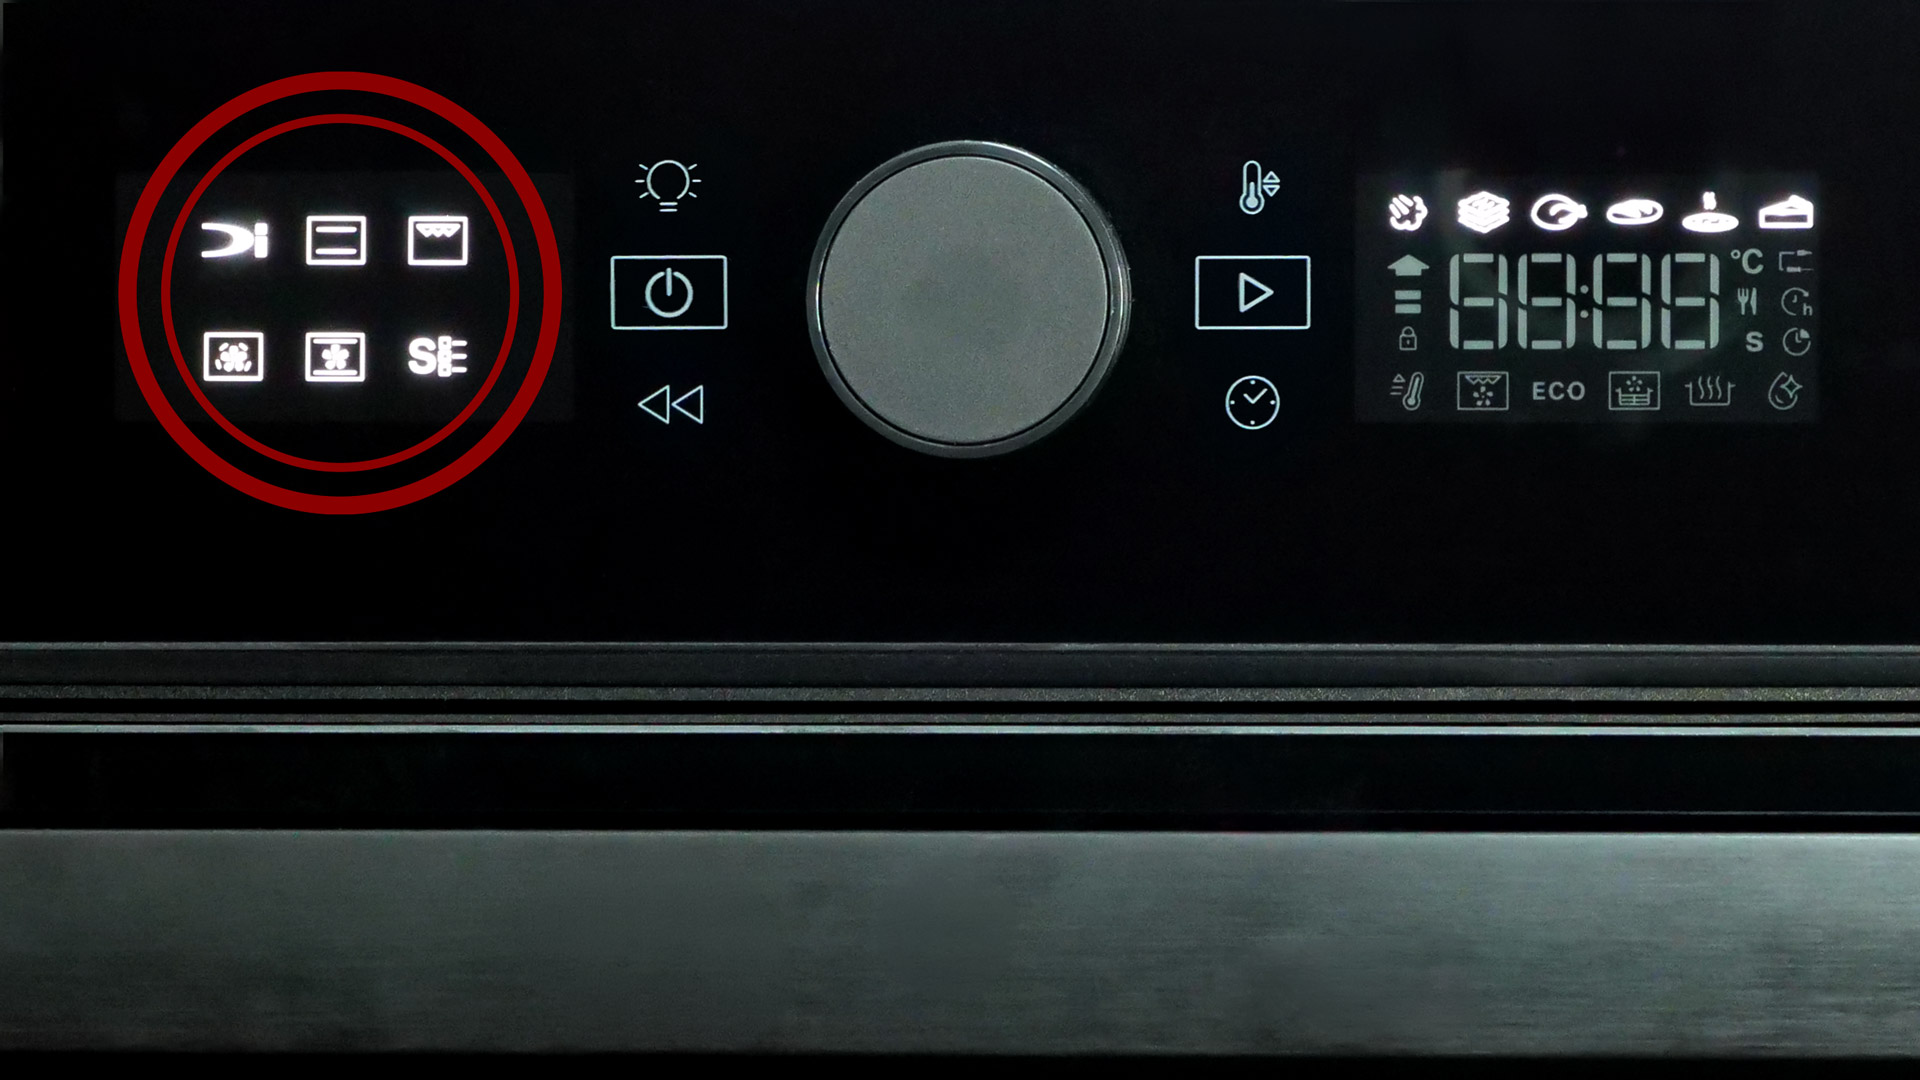 The cooking programs
The range opened up by the available cooking programs is much more limited than in the other models: there are 8 cooking programs in which you can choose the cooking mode and still have to adapt the cooking parameters yourself to the requirements of the respective food; 6 programs, in turn, are devoted to special types of food, such as the pizza program that is our main focus here (see the table).
Unfortunately, during a cooking process the current temperature in the oven cavity cannot be seen anywhere: via its screen, the BBI4S8HM1SK shows only what temperature it is supposed to reach next. This is very regrettable because it means it is also difficult to estimate when the preheating phase will be over – after all, during preheating the model merely shows a suitable graphic in bright white that switches on and off alternately.
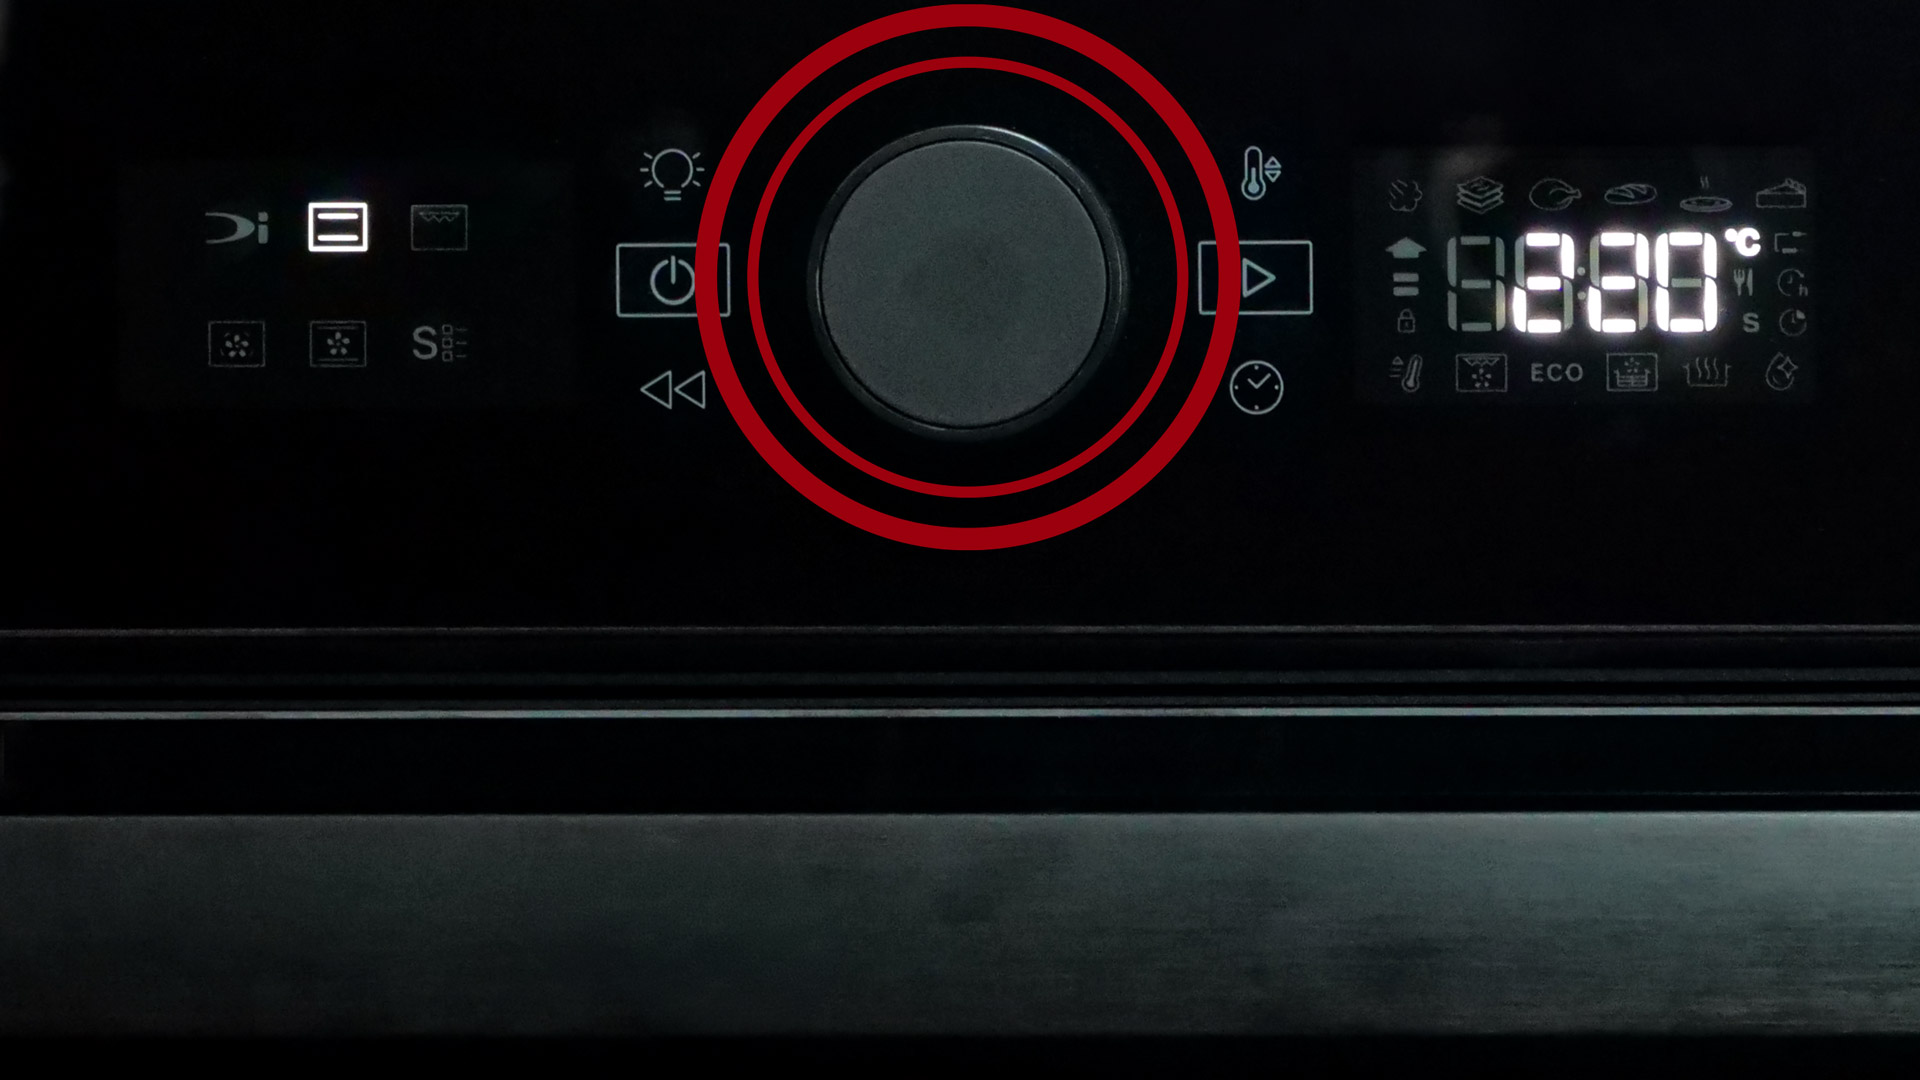 The rotary knob
Even more essential for using the BBI4S8HM1SK, however, is the rotary knob: besides the cooking program, all cooking parameters such as temperature can also be adjusted here. This can be done very precisely, because temperature steps of ± 1 °C can be achieved. What we do miss, however, is an intuitive adjustment of the temperature increments (for example ± 1, 5, or 10 °C) depending on the speed of the turning movement, as is the case with the model from Gorenje. That would make use at this point much faster and simpler.
The selectable temperature ranges vary depending on the cooking program. For example, the maximum temperature setting of 310 °C can be selected only in the pizza program, similarly to the models from AEG and Gorenje. It is a pity that the BBI4S8HM1SK offers only rather mixed power in some cooking programs: in the GRILL mode, for example, only max. ≈ 235.2 °C can be reached, which means that more demanding meat and fish products cannot be given a truly intense grilled aroma. What we, in turn, regarded as valuable were a few of the special programs such as AIR FRY/LUFTBRATEN: after all, this allows the model to be used like a modern air fryer, especially in combination with the previously mentioned air-fry basket. Here we were able to serve fries in exemplary quality with perfectly even golden browning.
 The automatic programs
The cooking programs devoted to individual types of food make cooking much easier in some respects, as they are regularly already associated with suitable cooking parameters such as temperature. But the graphics intended to illustrate these more specialized cooking programs are again only recognizable with difficulty – with the sole exception of the pizza program, which can easily be identified from the pizza graphic appearing on the screen.
The scope opened up by these more specialized cooking programs is anything but impressive. For example, in the PASTRIES/CAKES program, sweet treats such as cupcakes, scones, etc. can be baked. Yet the MEAT program, for example, is surprising, because it is supposed to be suitable for cooking all meat dishes, which in actual cooking practice is completely absurd, given that flank, rump, and sirloin steaks, for example, place completely different demands on the temperature in the oven cavity than pieces of chicken. This also becomes apparent in one of the tables in the instruction manual, albeit unfortunately only in a very difficult-to-understand style. Speaking of tables: the fact that you regularly have to consult the instruction manual to find out which part of the accessory bundle to use when cooking which foods, where it has to be inserted into the oven cavity, and so on is anything but gratifying. It is therefore very surprising that the model does not display all these notes on one of its screens after the respective cooking program has been selected.
 The timer
After selecting a cooking program, the timer can be used to set when the cooking process should end, for example in 00:30 h, in 01:00 h, or in 01:30 h: the scope opened up by the BBI4S8HM1SK is more than sufficient in cooking practice. In principle, all the other models also have such a timer; however, you do not have to set it and can instead interrupt the cooking process manually whenever you want.
After setting this timer, you can also preplan when the BBI4S8HM1SK should complete the cooking process, that is when the dish should be ready to serve (00:01 – 23:59 h). This START DELAY could be used completely without problems: you really only have to place the dish in the oven cavity beforehand and can then be sure at the end of the timer that it will be ready to serve wonderfully warm. Especially if, for example, you are expecting visitors in the evening and want to prepare everything essential in advance, the START DELAY is extremely valuable.
Just like the other models, the BBI4S8HM1SK also regularly emits tones, for example at the end of the preheating phase of a cooking program. They reach a peak sound pressure level of max. ≈ 45.2 dB from ≈ 1 m away, so they can certainly still be perceived from other parts of the household. What is very regrettable, however, is that this sound pressure level cannot be adjusted anywhere – unlike with the models from AEG and Gorenje, you always have to make do with the sound pressure level set by the factory. The range of options is rather limited here as well.
Safety
 The model’s thermal insulation
It is really quite difficult to burn yourself while using the Bauknecht BBI4S8HM1SK, because the front parts of the model become only warm even after ≈ 30 min of cooking at the maximum temperature of ≈ 310 °C: for example, the door showed a temperature peak of ≈ 45.4 °C, which is certainly warm but not associated with any risk. The same applies to the touch panel above the door: here, the maximum was ≈ 33.2 °C. Only after the door has been opened can the heat billow upward and make the touch panel much warmer. But this is the case with all models.
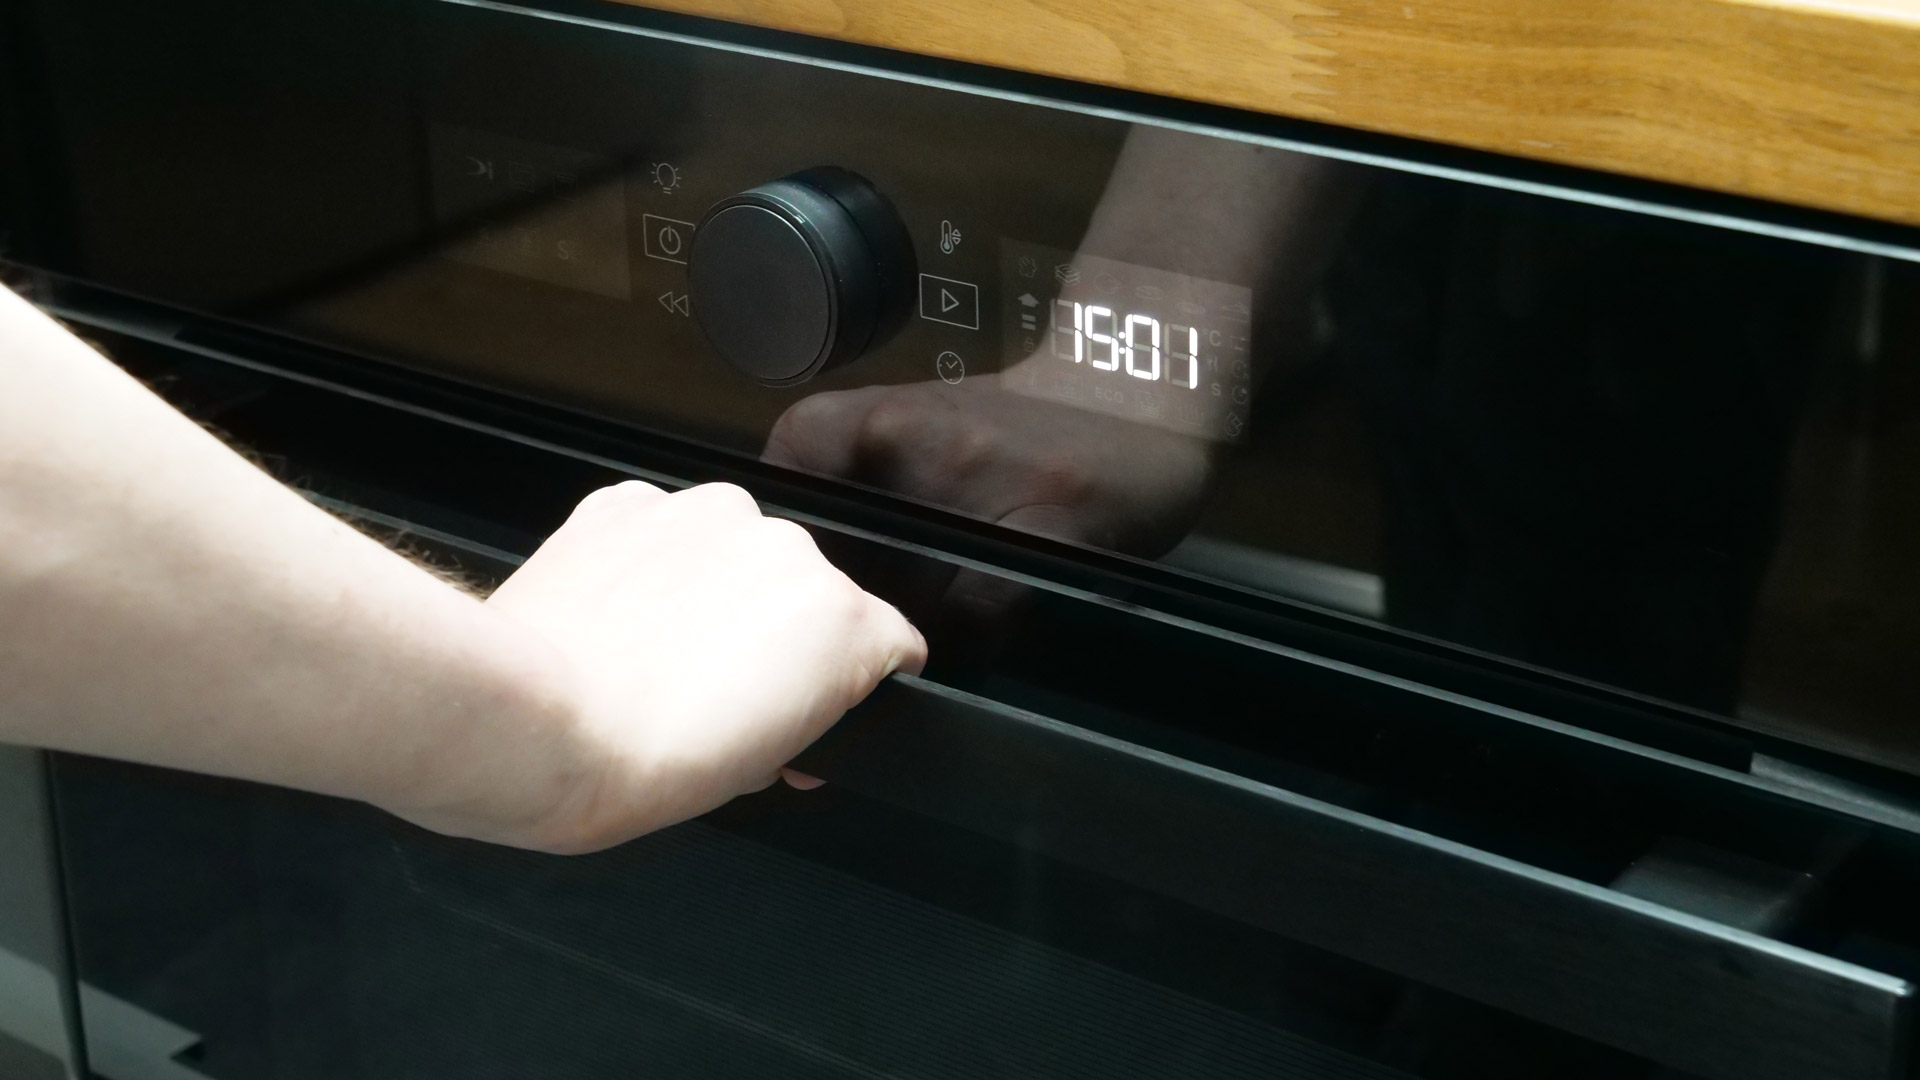 The temperature of the handle
Speaking of the door: the front handle also becomes only moderately warm during cooking (max. ≈ 28.3 °C), so nobody will burn themselves on the metal provided here.
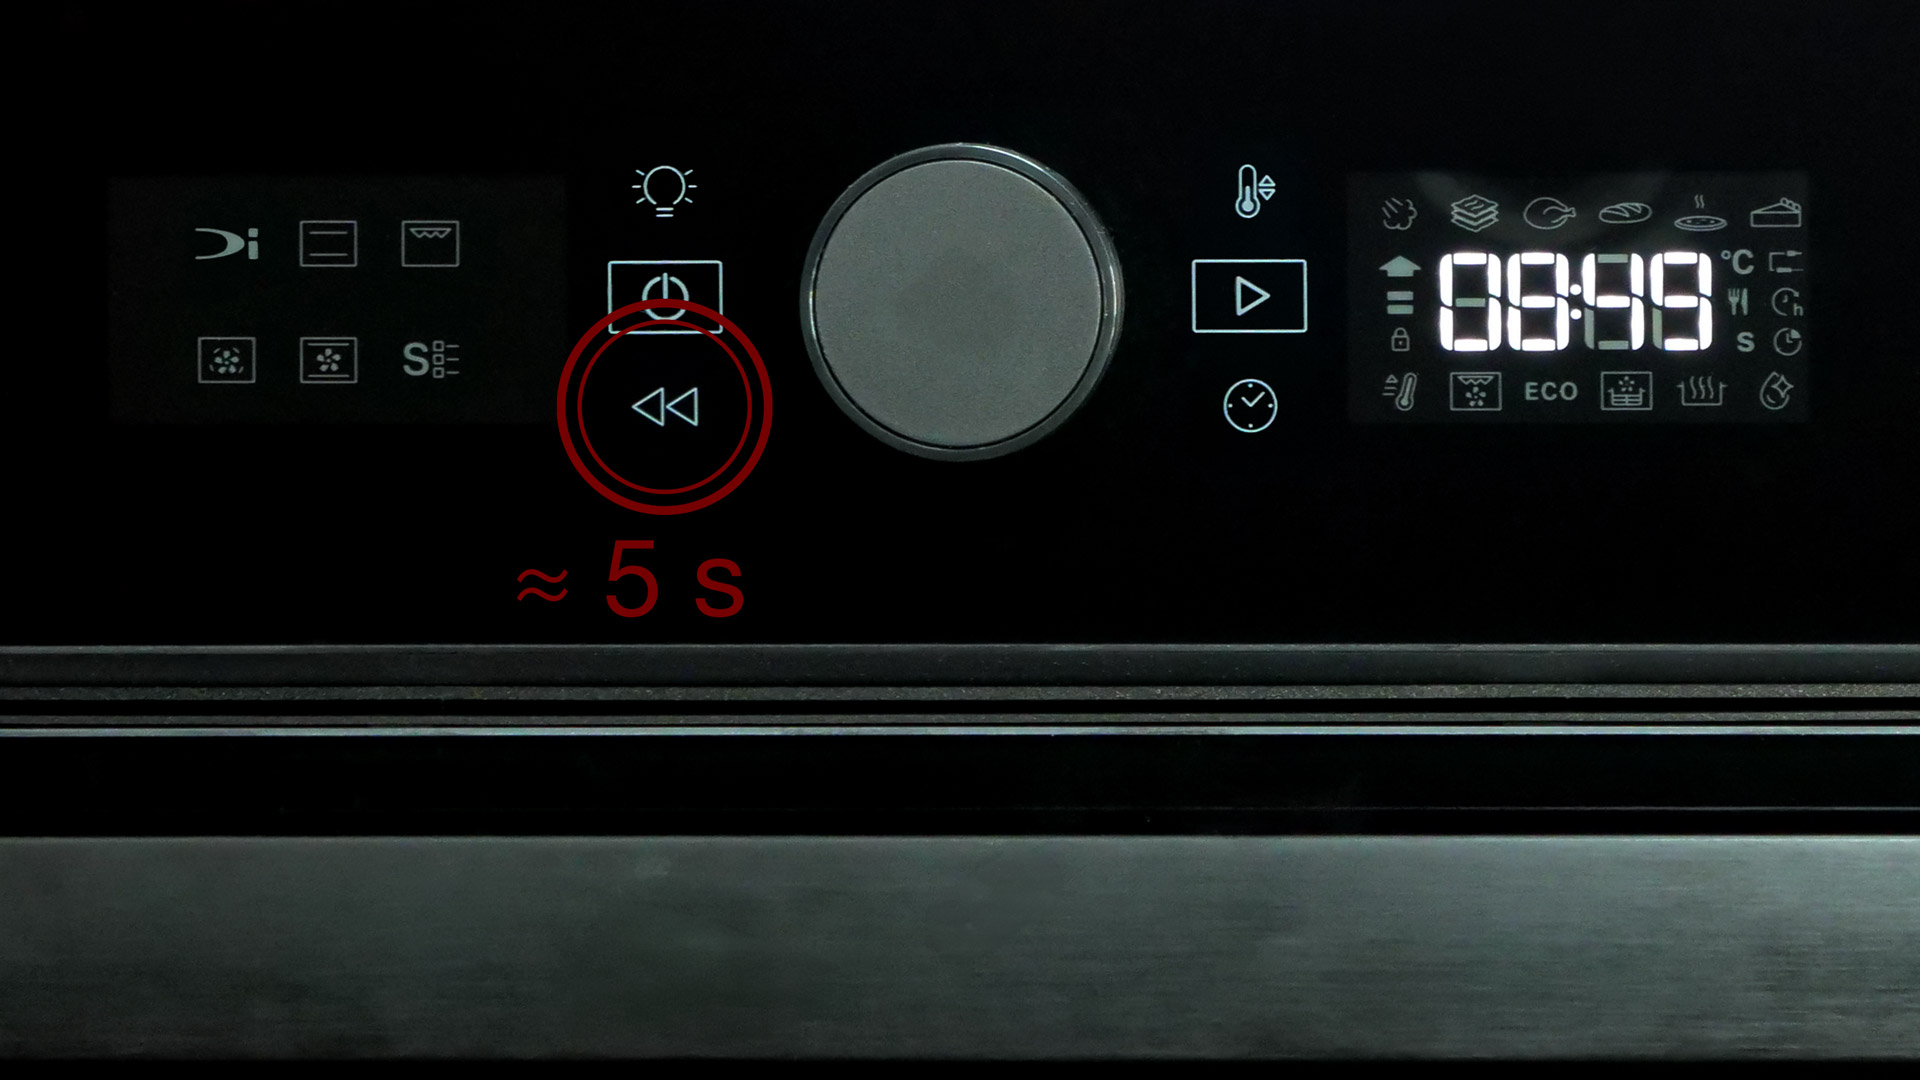 The touch-panel lock
If you want to prevent a cooking program from being switched on accidentally, the cooking parameters of the current cooking process from being changed, or the like, you can lock the model’s touch panel completely. The only point of criticism, similar to the model from Gorenje, is that switching the lock on and off is anything but intuitive: you have to use the part of the touch panel that is normally used to jump back within the menus provided here.
Cleaning
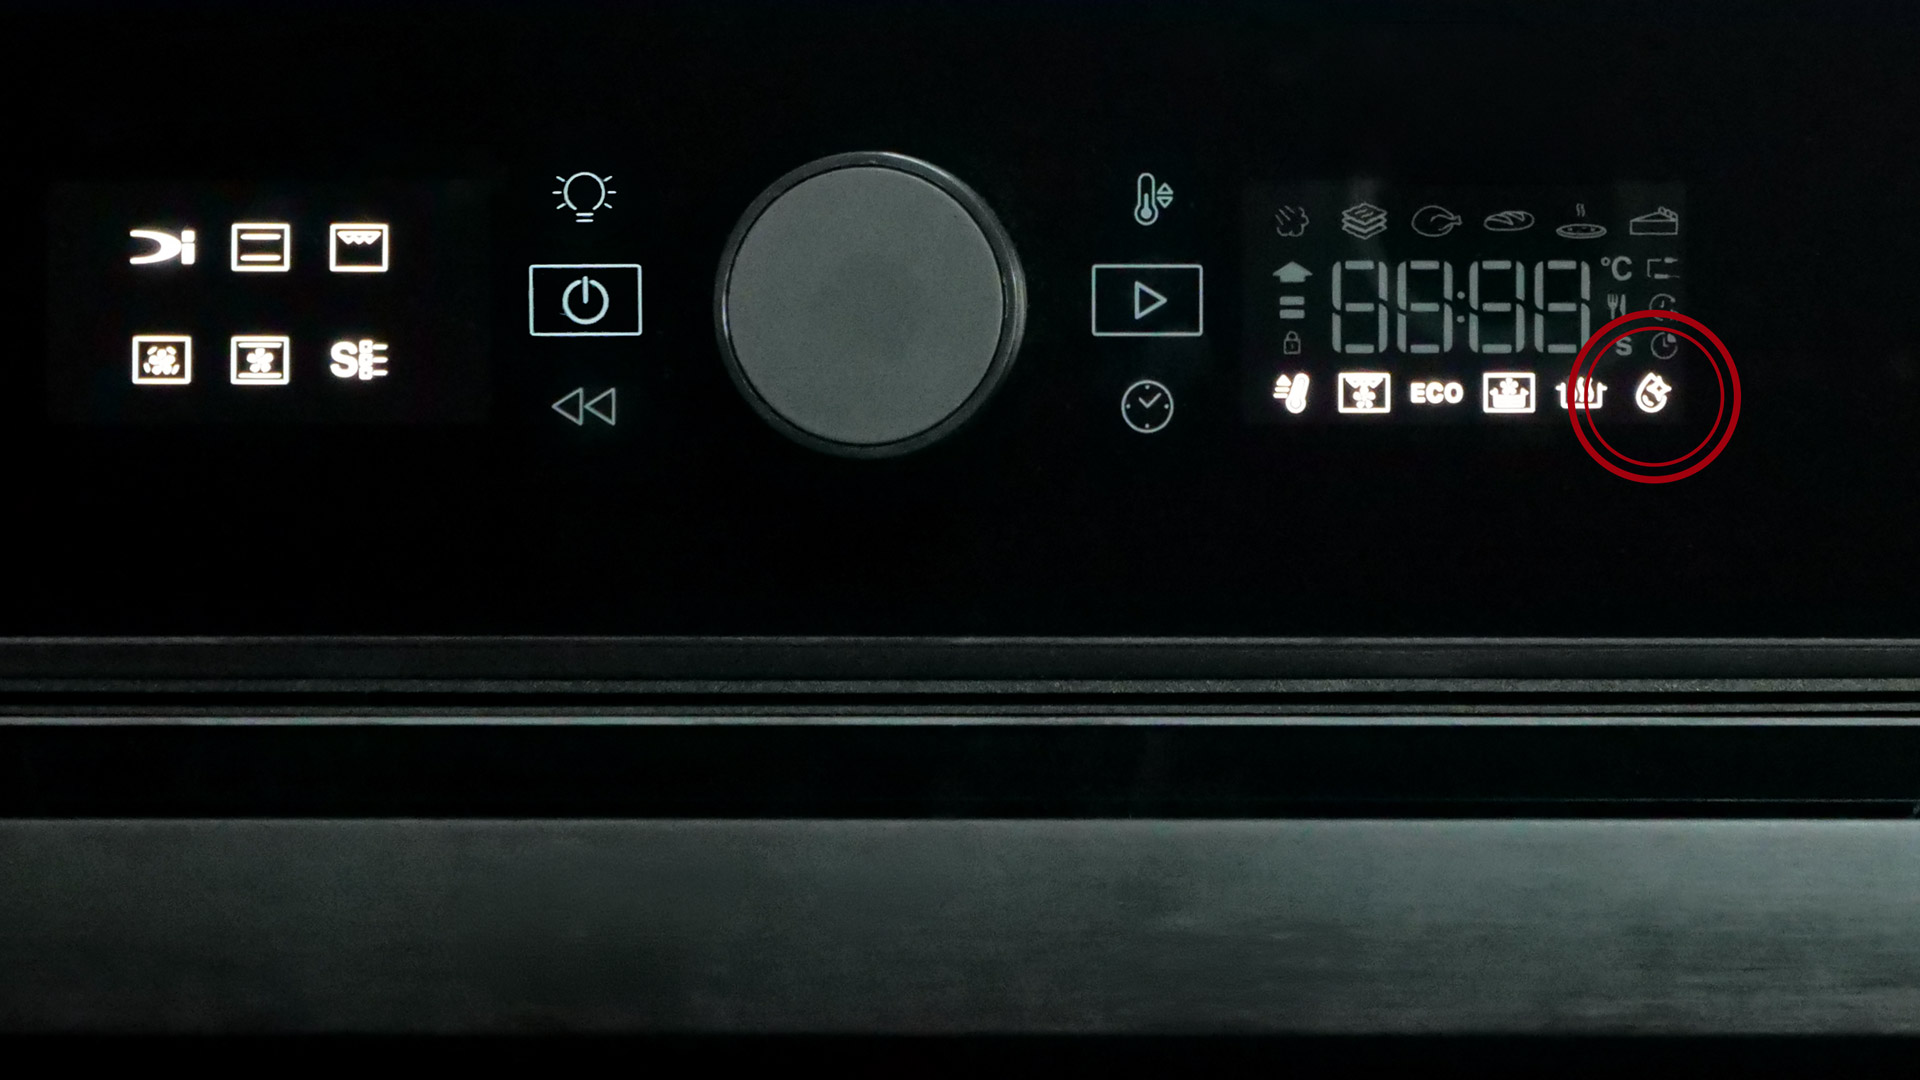 The cleaning program
Unlike the other models, the BBI4S8HM1SK features a special cleaning program that is intended to evaporate water and thereby loosen traces of cooking (SMART CLEAN). This is basically plausible: the water can, for example, soften juices, marinades, etc. and thus make it possible to wipe everything out of the oven cavity with a soft cloth, warm water, and suitable dishwashing liquid. In the end, this is indeed very easy. Real problems could be observed only with residues containing a lot of oil. But that is entirely tolerable, because the oven cavity can also be cleaned by hand without any significant amount of effort.
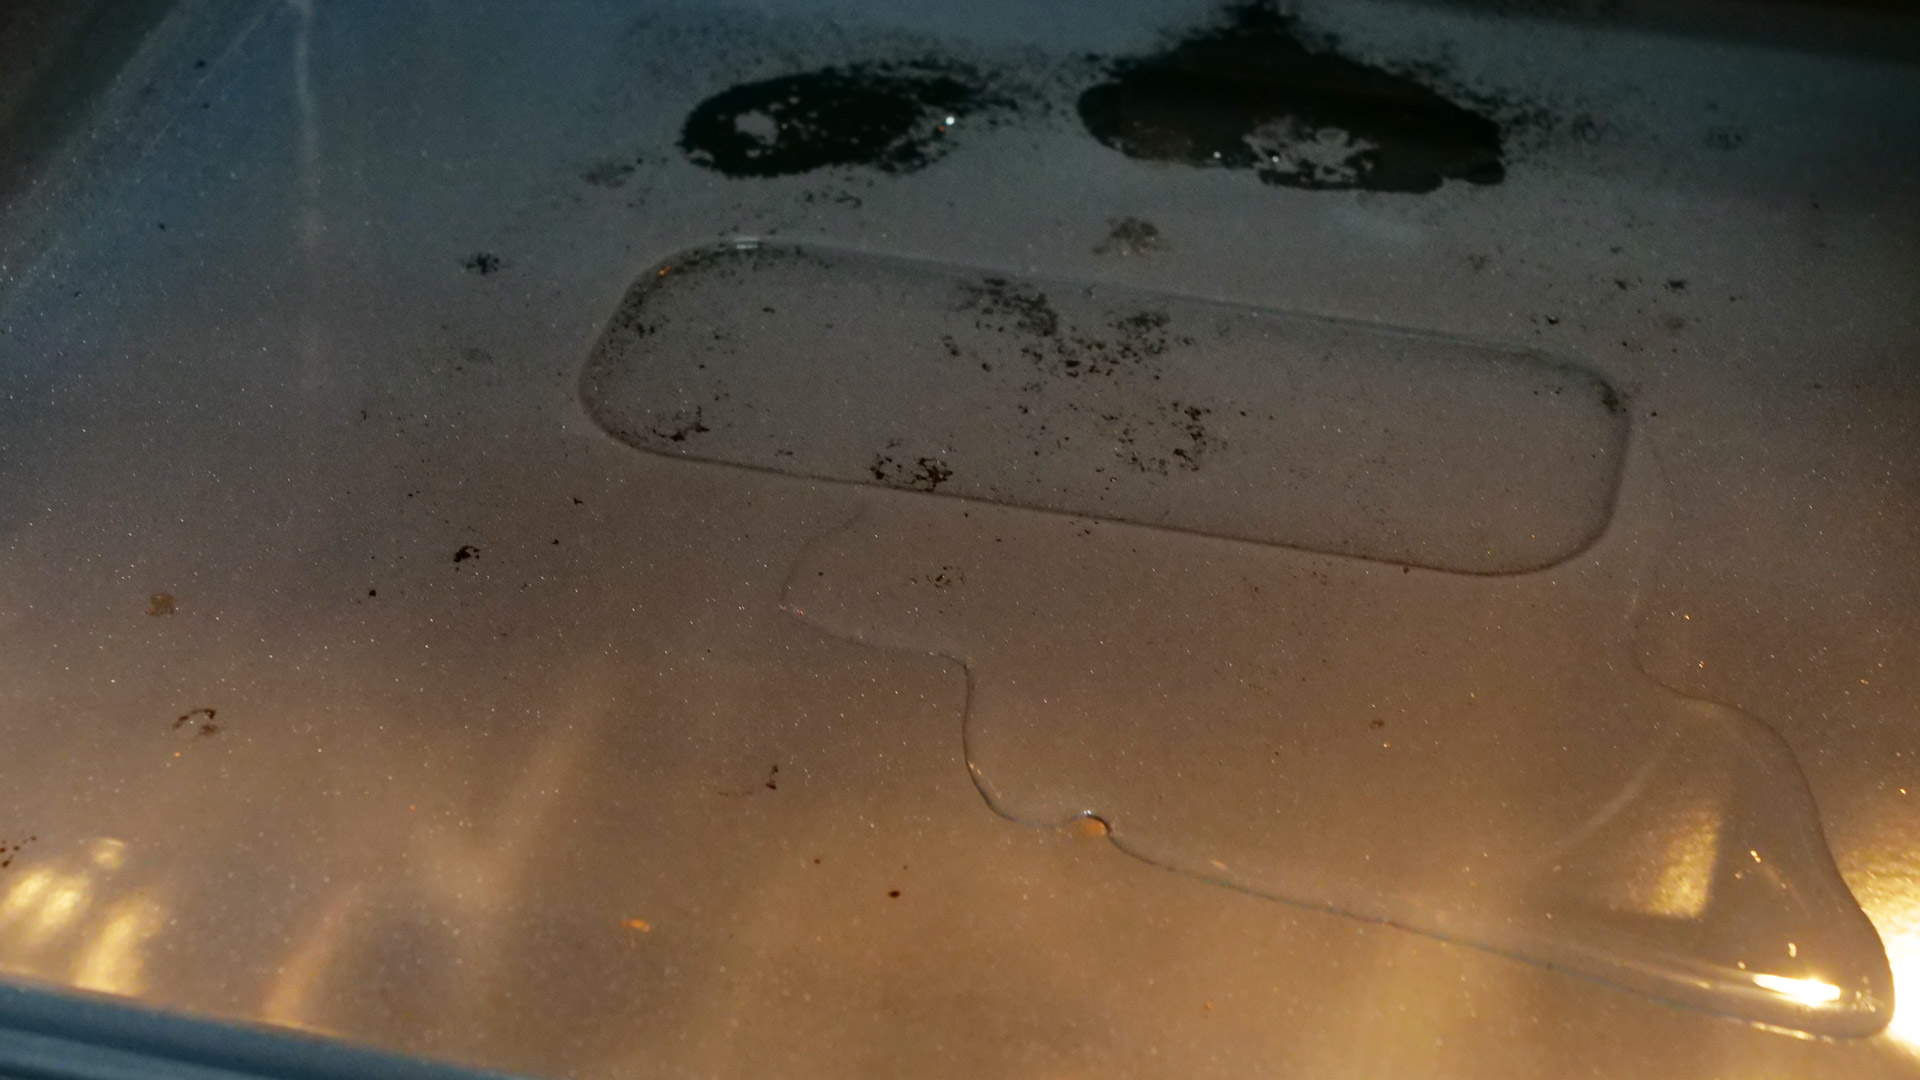 Preparing the cleaning program
What will certainly surprise some people is this: during the special cleaning program, the model is supposed to evaporate ≈ 200 ml of water. This water must first be spread over the floor of the oven cavity. This is basically easy to do, but in the end it can leave whitish traces if the lime content of the water is higher.
The instruction manual
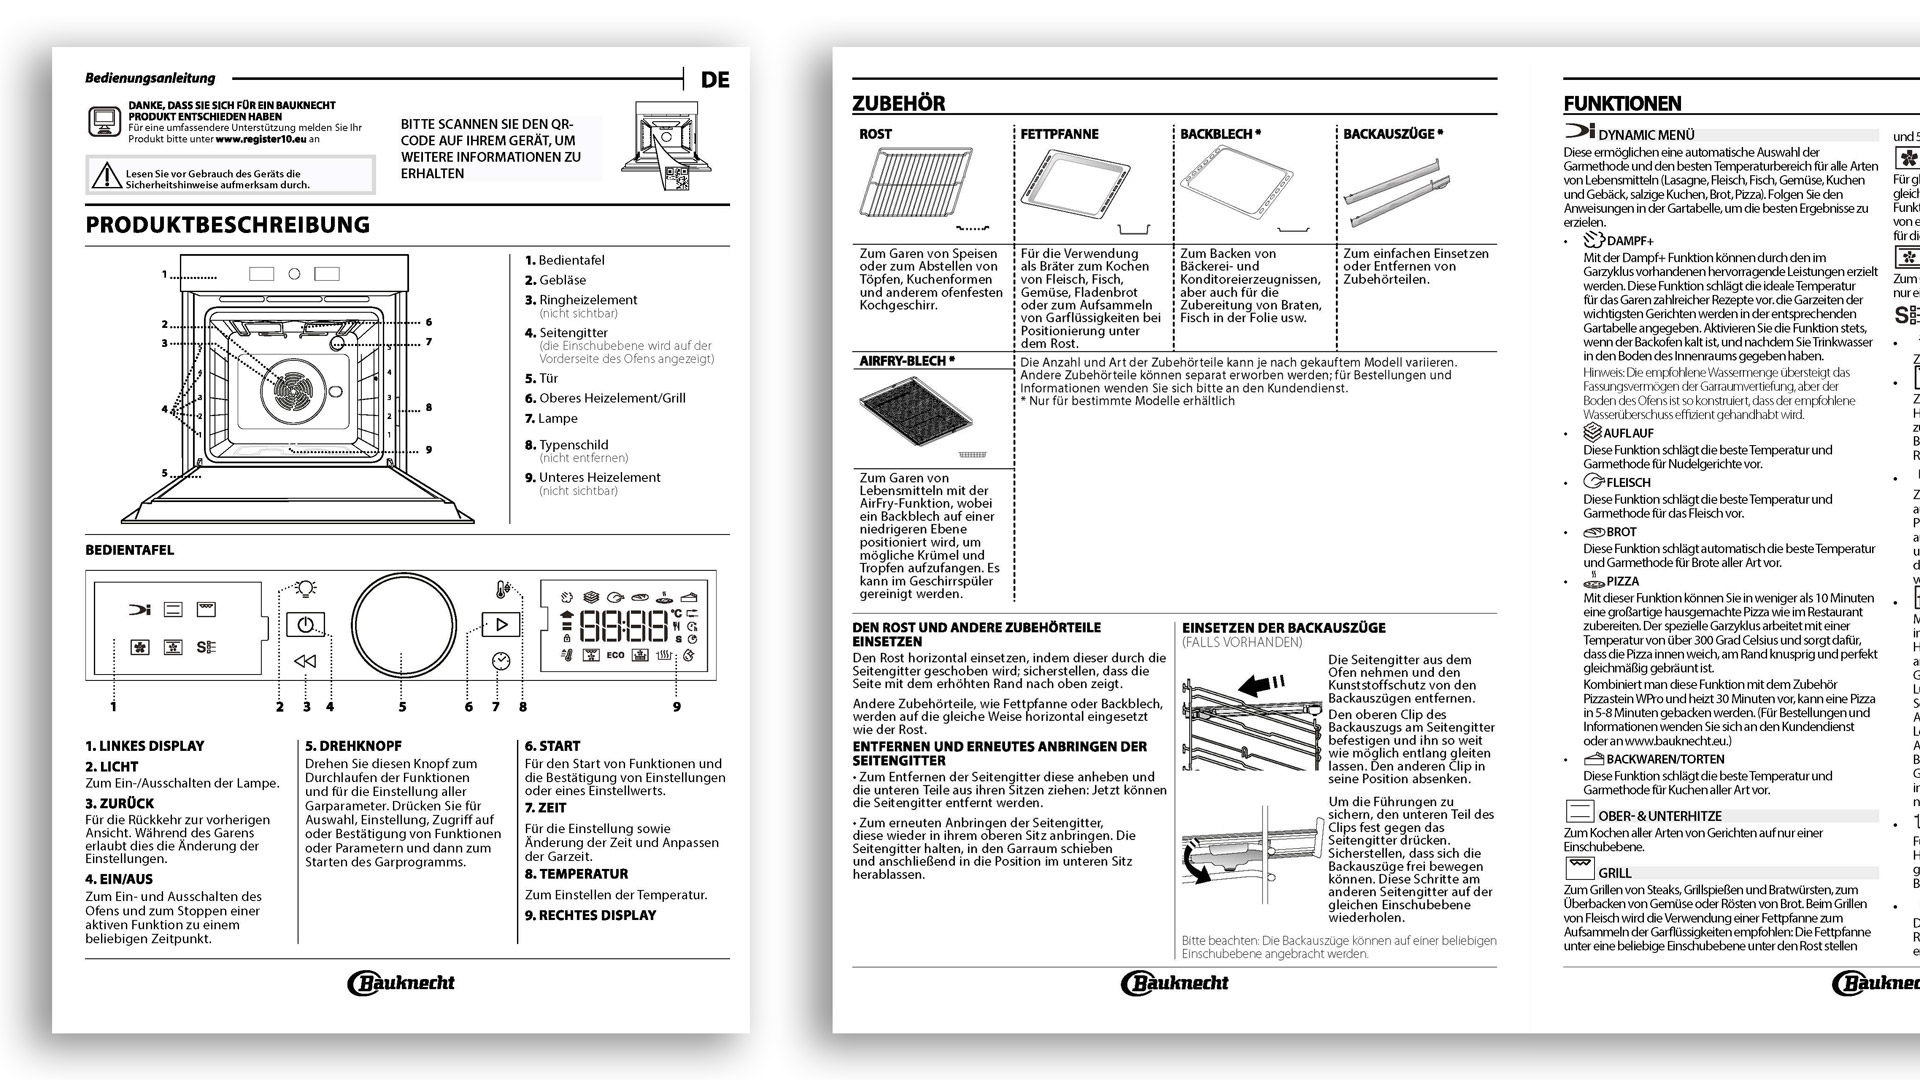 Tips & tricks in the instruction manual
The quality of the instruction manual provided here is basically acceptable: the various parts of the operating process are covered in understandable style. Also pleasing are the many black-and-white graphics illustrating, among other things, the model’s screen and making it clear how, for example, cooking programs, cooking parameters, etc. can be set.
The notes on the various cooking programs of the BBI4S8HM1SK are more or less valuable: only in some respects does it become truly understandable when to use which cooking program, when the choice of which cooking parameters makes sense, and so on. This can be seen very clearly in the pizza program: here, the manual speaks only vaguely of a cooking time of ≈ 5:00 – 8:00 min, without conveying what should be taken into account when choosing the respective cooking time (such as the type of pizza you ultimately want to serve). The cooking notes that appear at the end of the German-language section of the instruction manual are pleasing, on the other hand.
Power & noise
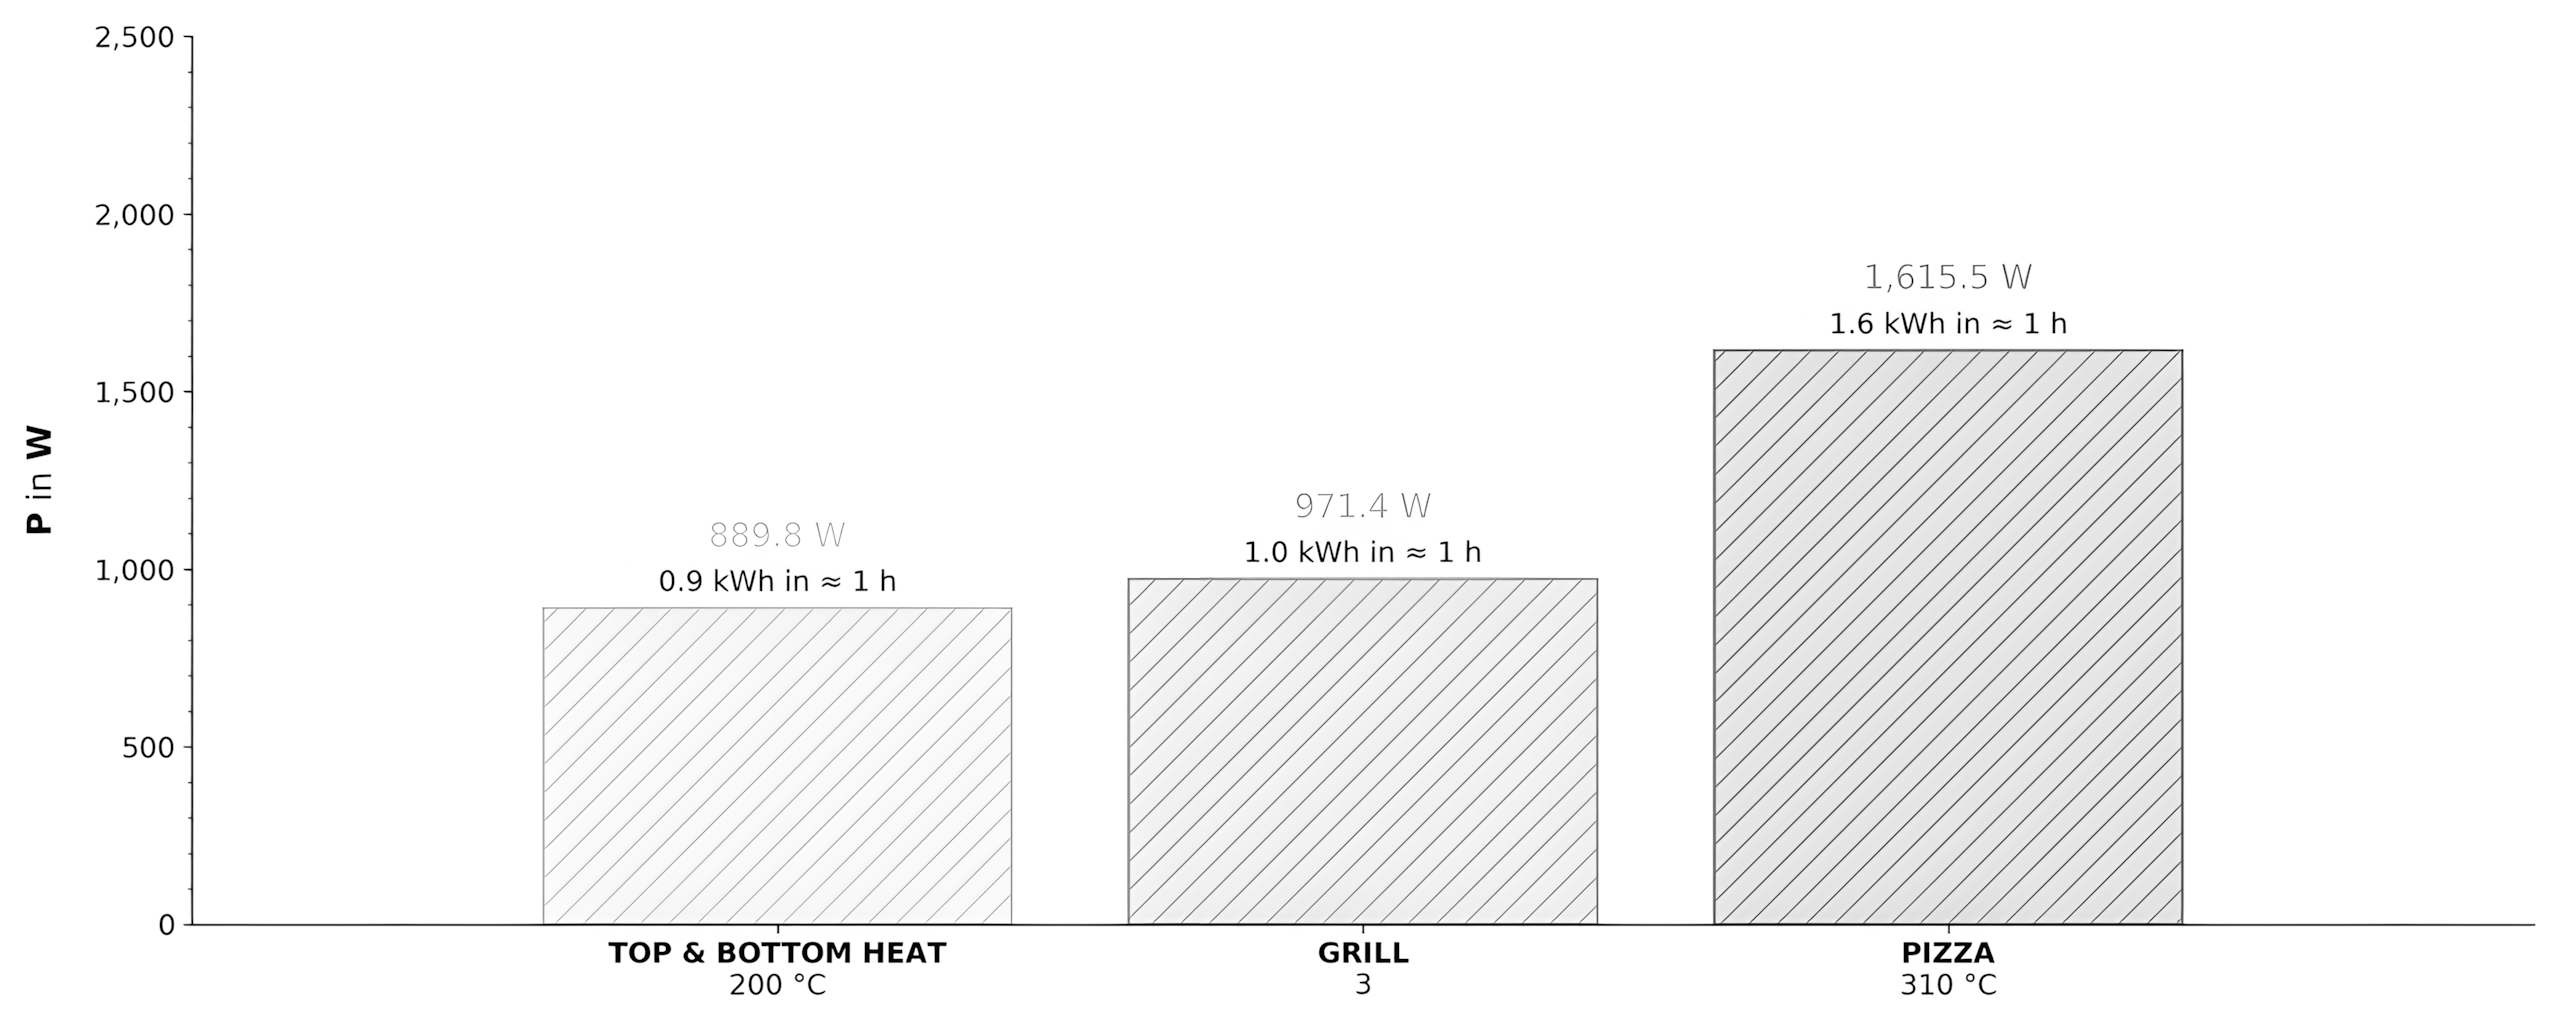 Power consumption in different cooking programs
The BBI4S8HM1SK can be used more or less economically. Consumption is moderate in a large share of all cooking programs, although here too – as with all the other models – the cooking parameters of the respective cooking program play a role (cooking mode, temperature, etc.). During a cooking process lasting ≈ 1 h in the TOP & BOTTOM HEAT cooking mode with a temperature setting of 200 °C, for example, we measured consumption of ≈ 0.89 kWh (≈ €0.24), and in the GRILL cooking mode at maximum temperature on grill level 3 we measured ≈ 0.97 kWh (≈ €0.26). The PIZZA program with a temperature setting of 310 °C is much more energy-intensive: here, use lasting ≈ 1 h would consume ≈ 1.62 kWh (≈ €0.44). After ≈ 23 min of preheating (≈ 0.62 kWh and ≈ €0.17), the pizza regularly has to remain in the oven cavity for ≈ 7:00 – 10:00 min. Baking one pizza is therefore associated with a still quite acceptable consumption of ≈ 0.19 – 0.27 kWh and ≈ €0.05 – 0.07 or – taking into account the electricity consumption of a full preheating cycle – ≈ 0.81 – 0.89 kWh and ≈ €0.22 – 0.24.
How much does baking pizza in the Bauknecht BBI4S8HM1SK cost me?
Would you like to know how much electricity you would consume by baking pizza regularly in this model and what electricity costs would be associated with it? Then you can use our electricity-consumption calculator! You only need to adjust all essential parameters to your personal requirements, for example by setting how many times per week you would bake pizza, how many pizzas you would serve each time, and how lightly or strongly you would like to brown the pizzas while baking. At the end, the electricity-consumption calculator displays everything essential in a clear table.
Here you can choose how intense the browning of the pizzas should be. The browning result achieved in practice is linked to the duration of the respective baking process, so lighter browning results in lower electricity consumption, while stronger browning results in higher electricity consumption.
If you want to bake several pizzas one after another during a single session, choose "full preheating phase only once per session". In that case, we include the electricity consumption of a full preheating phase only once per session and, starting with the second pizza, add only the electricity consumption of a reheating phase lasting approximately 2:30 minutes. After each pizza has been removed, the oven cavity must reheat until it reaches a temperature suitable for baking pizza again. If, on the other hand, you want to bake only a single pizza per session or plan to leave a great deal of time between individual baking processes, choose "full preheating phase per pizza" instead.
Here you can adjust the electricity price to the amount you are currently paying per kWh. As a general rule, our calculations are based on an electricity price of approximately €0.27 per kWh.
Electricity consumption & electricity costs
| Period | Electricity consumption in kWh | Electricity costs in € |
|---|---|---|
| Per week | – | – |
| Per month | – | – |
| Per year | – | – |
 Noise emission in the special PIZZA program
What is pleasing, in turn, is the noise emission that can be heard during cooking in this model: after all, the sound pressure level remains moderate for the most part even when the model is supposed to reach the maximum temperature setting of 310 °C. We meanwhile measured an average sound pressure level of ≈ 40.7 dB and occasional peaks of ≈ 47.1 dB from ≈ 1 m away. This resembles the model from Gorenje, though in that model the fan seems much louder from the end of the preheating phase onward.
Speed & consistency
 Temperature curves in the TOP & BOTTOM HEAT cooking program
The BBI4S8HM1SK can certainly keep pace with the speed of other models during preheating, for example the one from AEG: this can be illustrated using the TOP & BOTTOM HEAT cooking mode with a temperature setting of 200 °C. Here, the temperature peak of ≈ 208.7 °C was reached after a full ≈ 13 min; this can be reduced by a few minutes by selecting FAST PREHEATING.
What is also essential, however, is how uniform the temperature levels in the oven cavity are during cooking. The graph shows the temperatures in several parts of the oven cavity while we had the model carry out the TOP & BOTTOM HEAT cooking mode with a temperature setting of 200 °C. While the temperatures decrease again significantly after the end of preheating, they subsequently stabilize exemplarily. During the subsequent cooking process, they differed by max. ≈ 6.3 °C. This is even more stable than in the model from Gorenje.
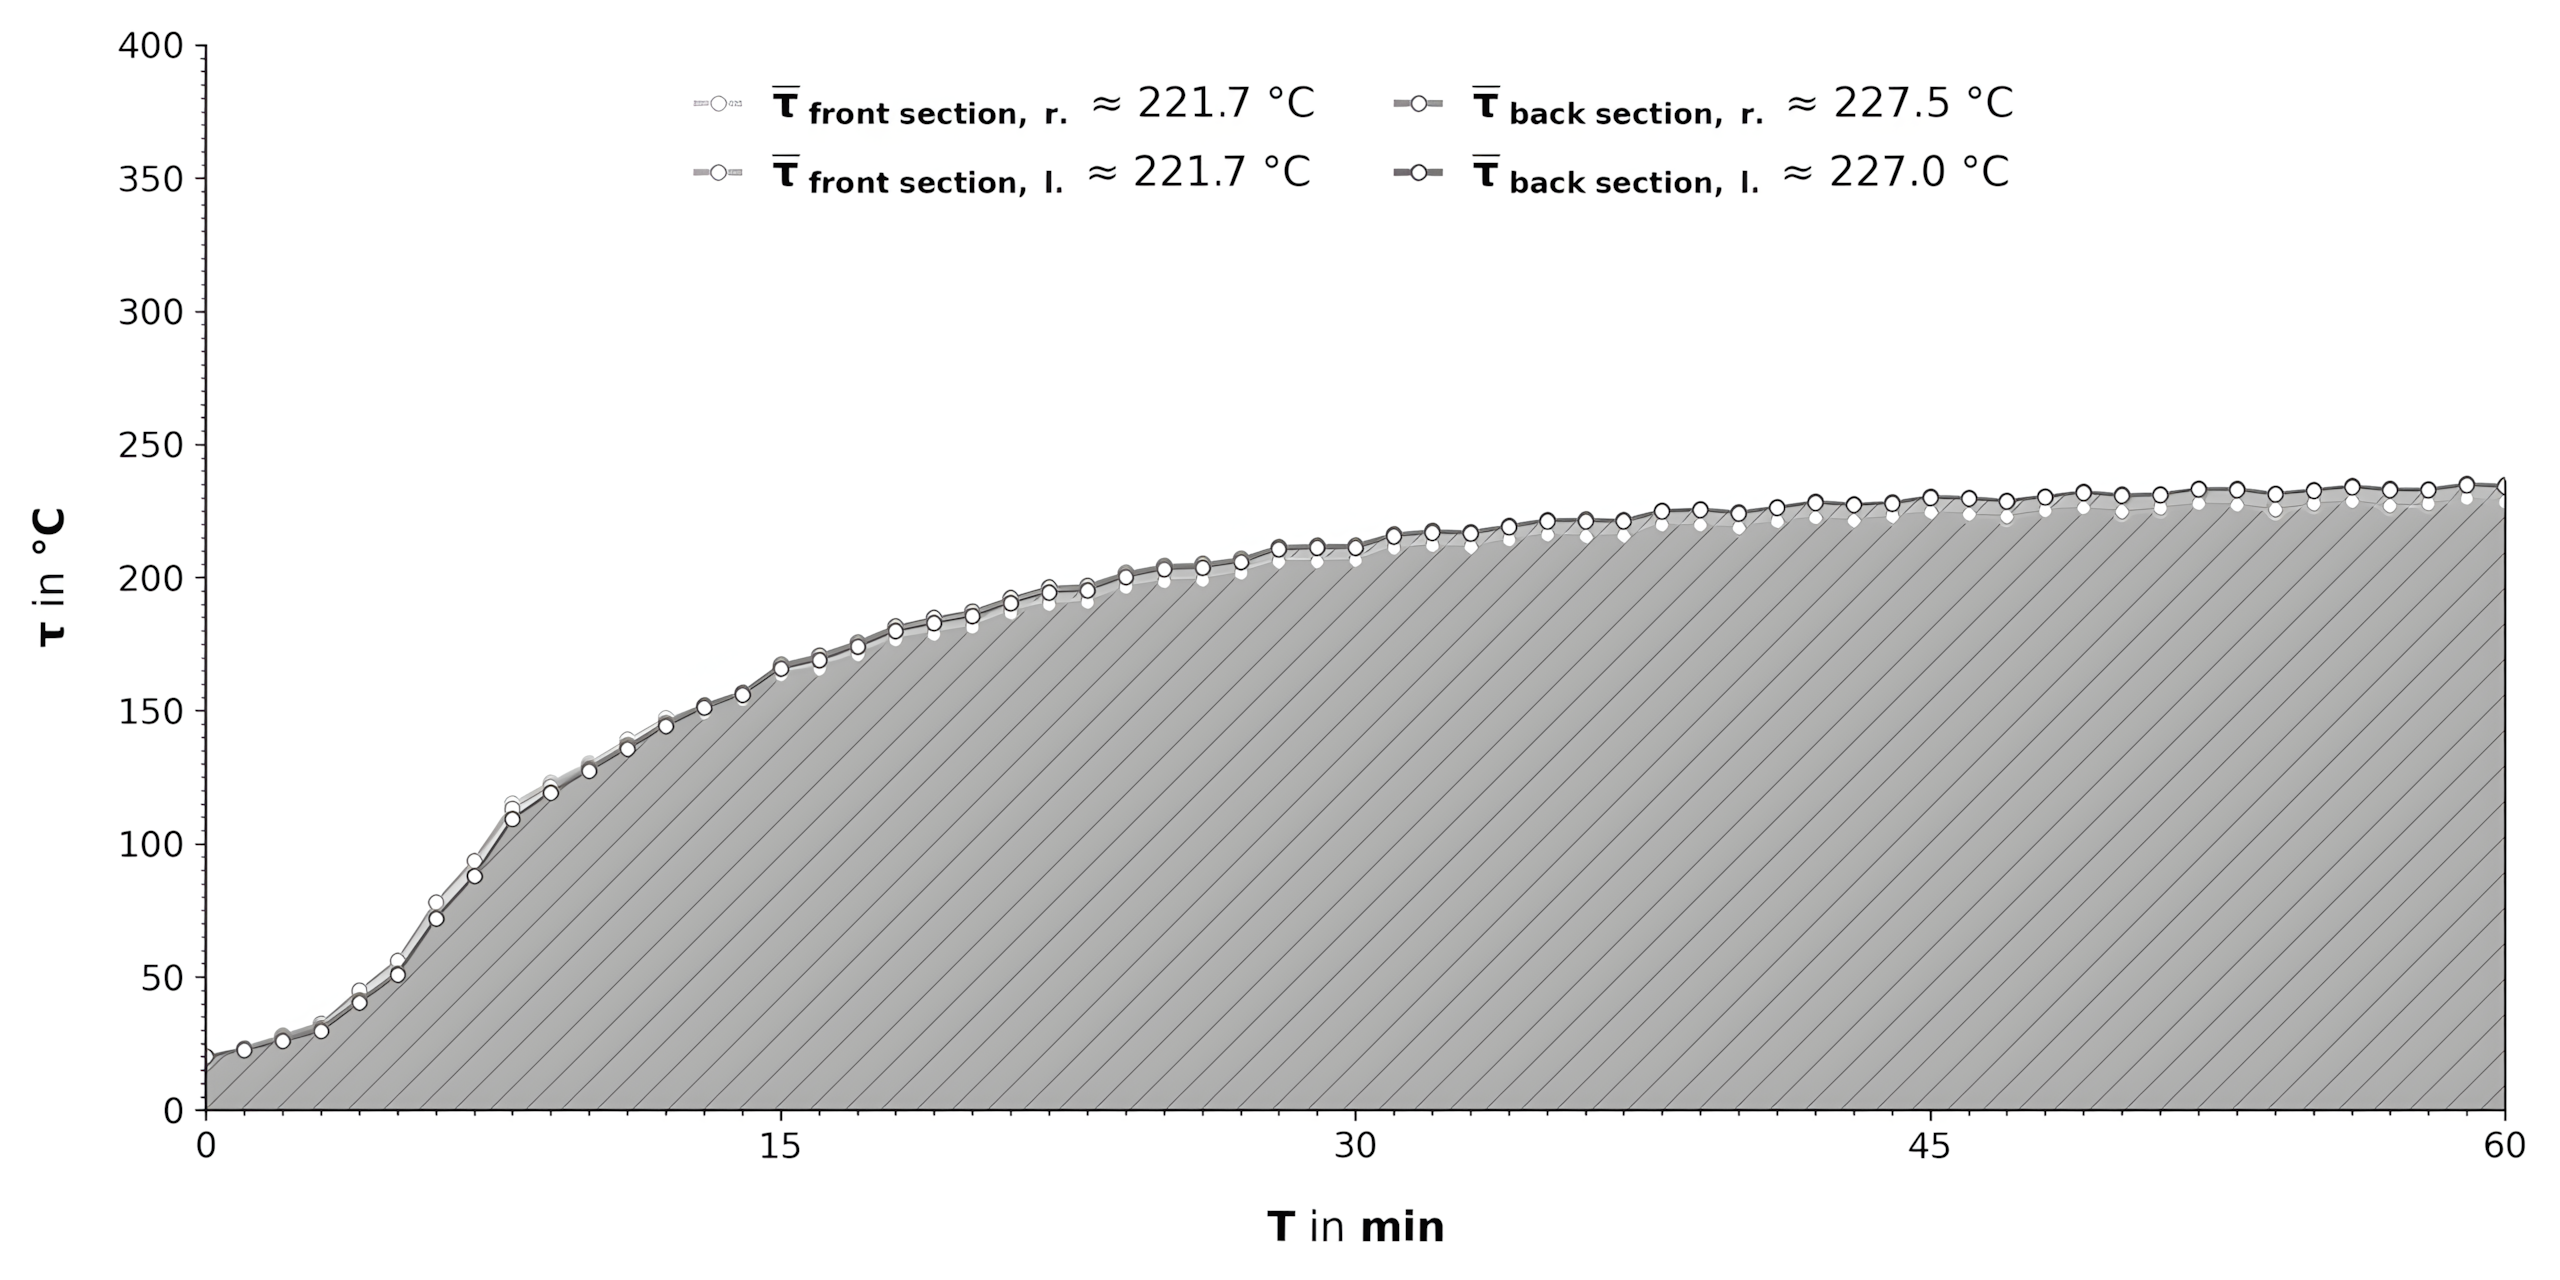 Temperature curves in the GRILL cooking program
The GRILL mode, in turn, is rather surprising because the temperatures continued to rise throughout the ≈ 1 h grilling process (max. ≈ 235.2 °C). This is a significant flaw because, for example, you would want to align the duration of the grilling process with the respective temperature, which is hard to do given the continuous temperature increase in this mode. Another point we have to criticize is that the temperatures are more moderate in the front part of the oven cavity than in the rear part. Here we measured a difference of max. ≈ 5.8 °C, which is greater than, for example, in the model from AEG, but in grilling practice will still be noticeable only to a very slight extent.
Baking performance
Unlike the other models we looked at this time, the BBI4S8HM1SK does not come with any special accessories that would make serving all-around excellent pizzas easier. Another surprising point is that the instruction manual mentions a special WPro pizza stone that could supposedly be purchased online – yet such an accessory is nowhere to be seen in the manufacturer’s online shop.
For that reason, at this point we now turn only to the pizzas we baked in the BBI4S8HM1SK. We had the model carry out all baking processes using the special pizza program with a maximum temperature of ≈ 315.1 °C. In the end, all pizzas remained in the oven cavity for a full ≈ 7:00 min, as the manufacturer recommends online; the instruction manual mentioned several times above, by contrast, gives a range of ≈ 5:00 – 8:00 min without making it clear when you should choose the lower end of the range (≈ 5:00 min) and when the upper end (≈ 8:00 min).
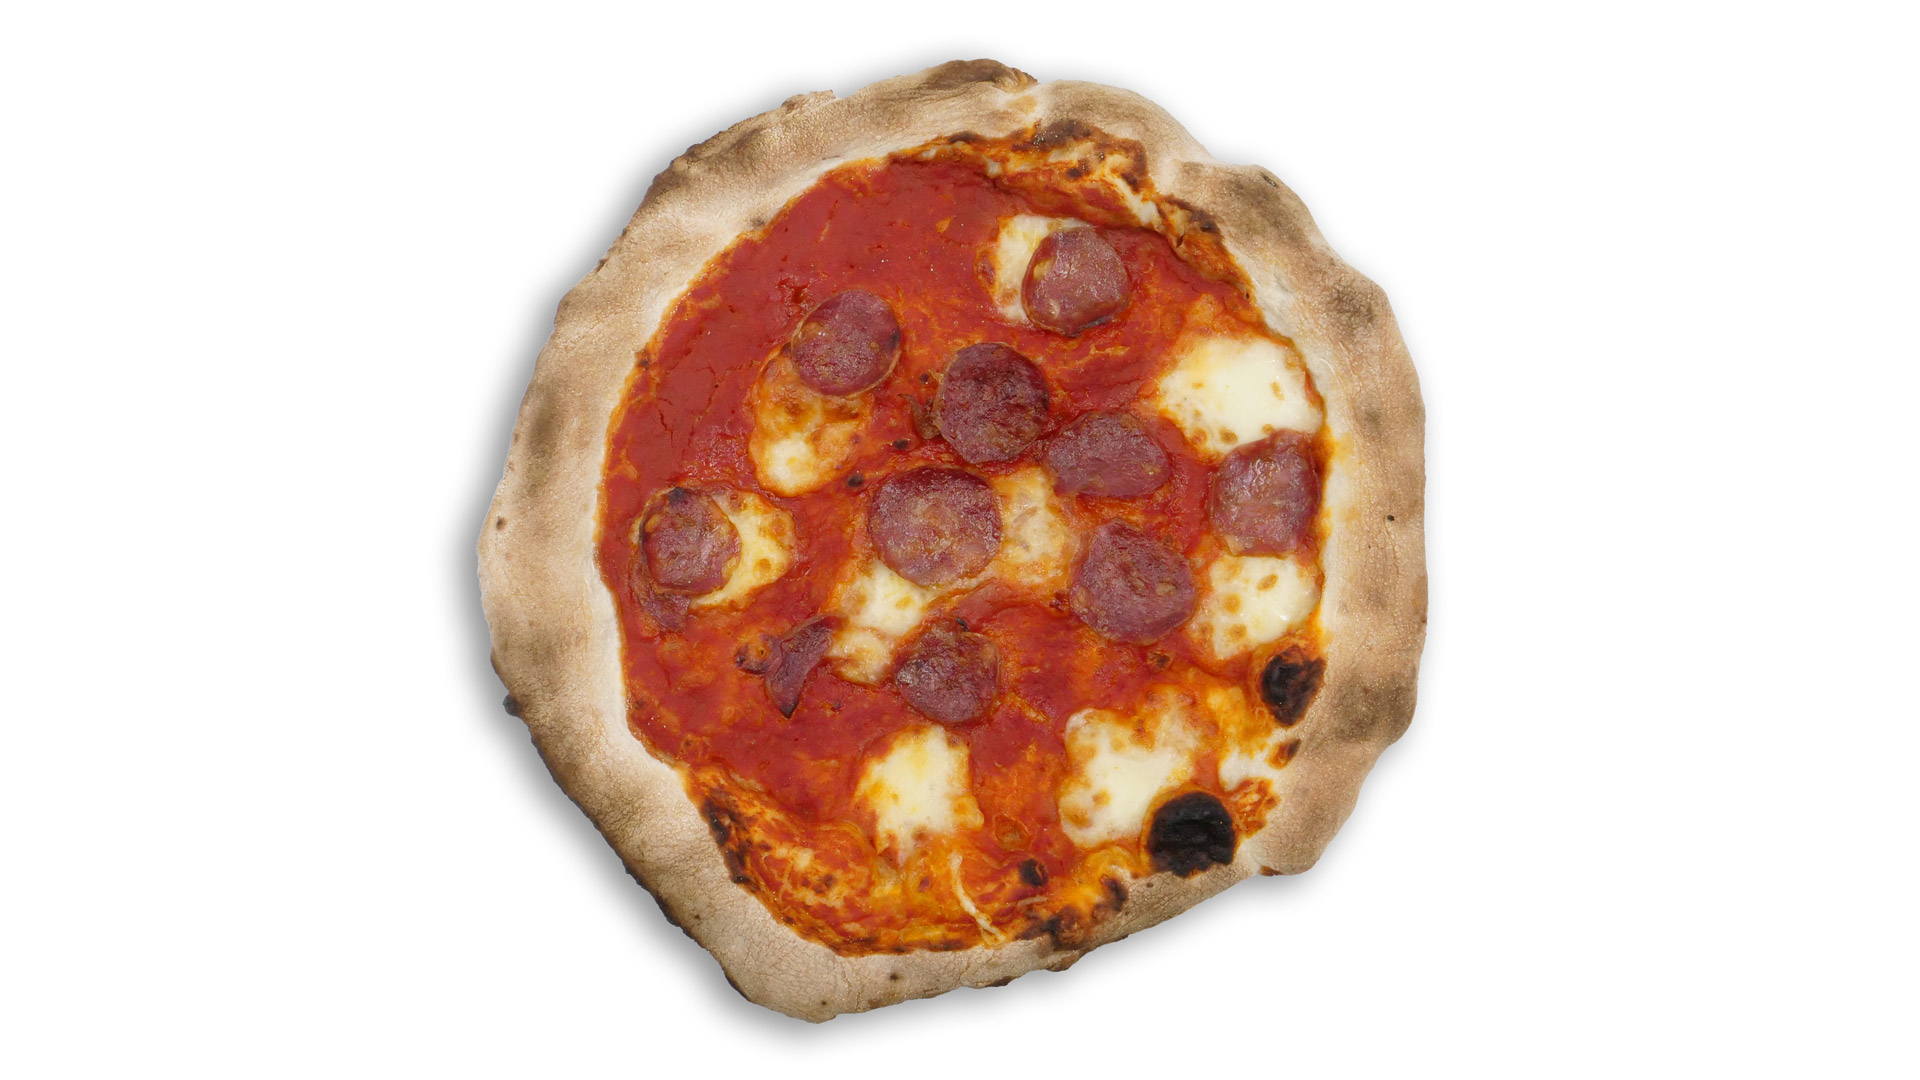 Pizza Salame | initial temperature of ≈ -18 °C
While the base of the pizza was truly crisp and crunchy at the end of the pizza program, it still lacked a nice golden-brown color; the model’s browning performance in the pizza program is anything but impressive. We got the same impression from the cheese: it melted completely and also spread sufficiently over the pizza, but in the end still showed a very pale tone; only a few elements of the pizza, such as the higher parts of the salami, became dark. Even so, the pizza was of really solid quality: it could only still be improved in some respects, above all in texture.
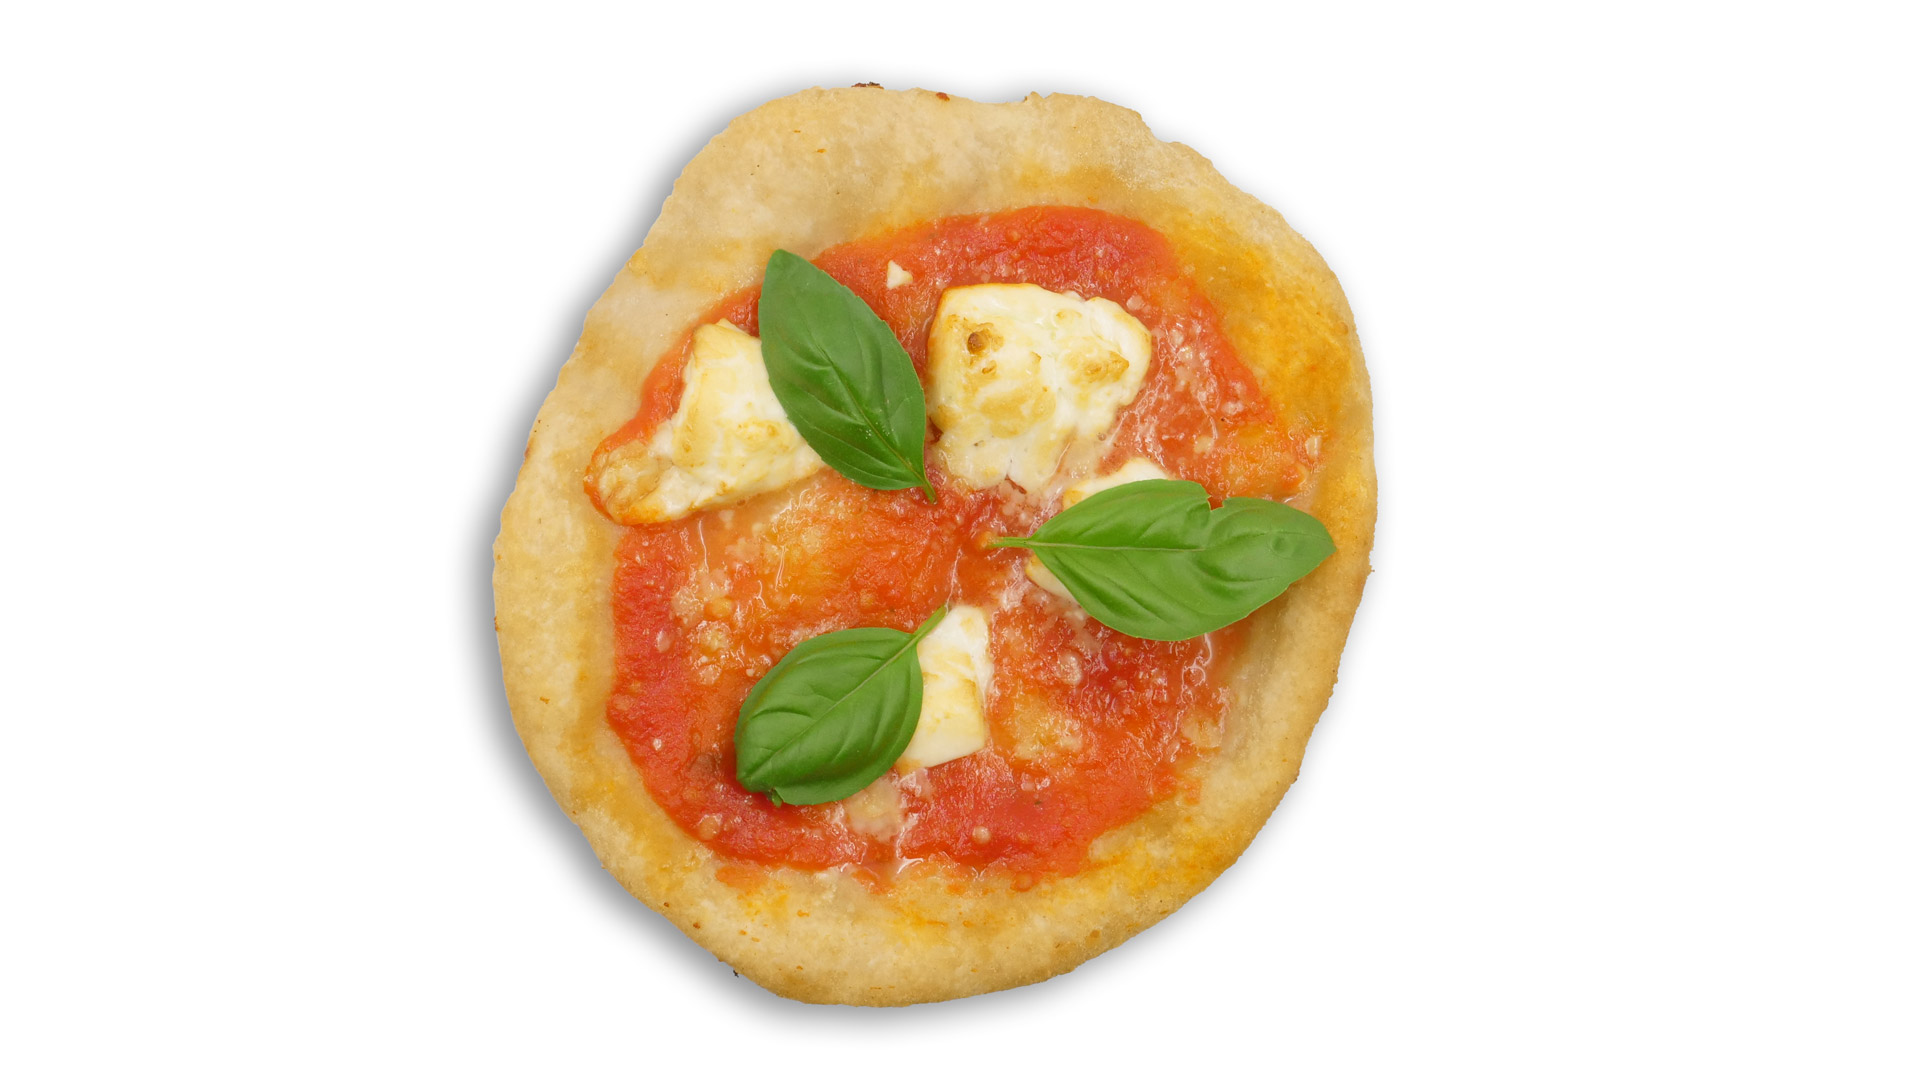 Fresh Pizza Margherita | initial temperature of ≈ 20 °C
The originally ≈ 20 °C warm fresh pizza in Neapolitan style turned out solid. Even though the pizza lacked a nicely golden-brown finish throughout, the texture in all parts was much more appealing. The pizza rim in particular proved wonderfully voluminous, though unfortunately crisp only to a minimal degree. We got a very similar picture from the pizza base: it was softer than in the models from AEG and Gorenje, probably also because this model has to do without a metal plate, but it was still of very appealing quality. After ≈ 7:00 min in the oven cavity, the mozzarella had spread only very weakly and was still very white in the end. The temperatures in the oven cavity are more or less stable, but it can certainly happen that the rim in the front part of the pizza, toward the model’s door, is still much paler in the end.
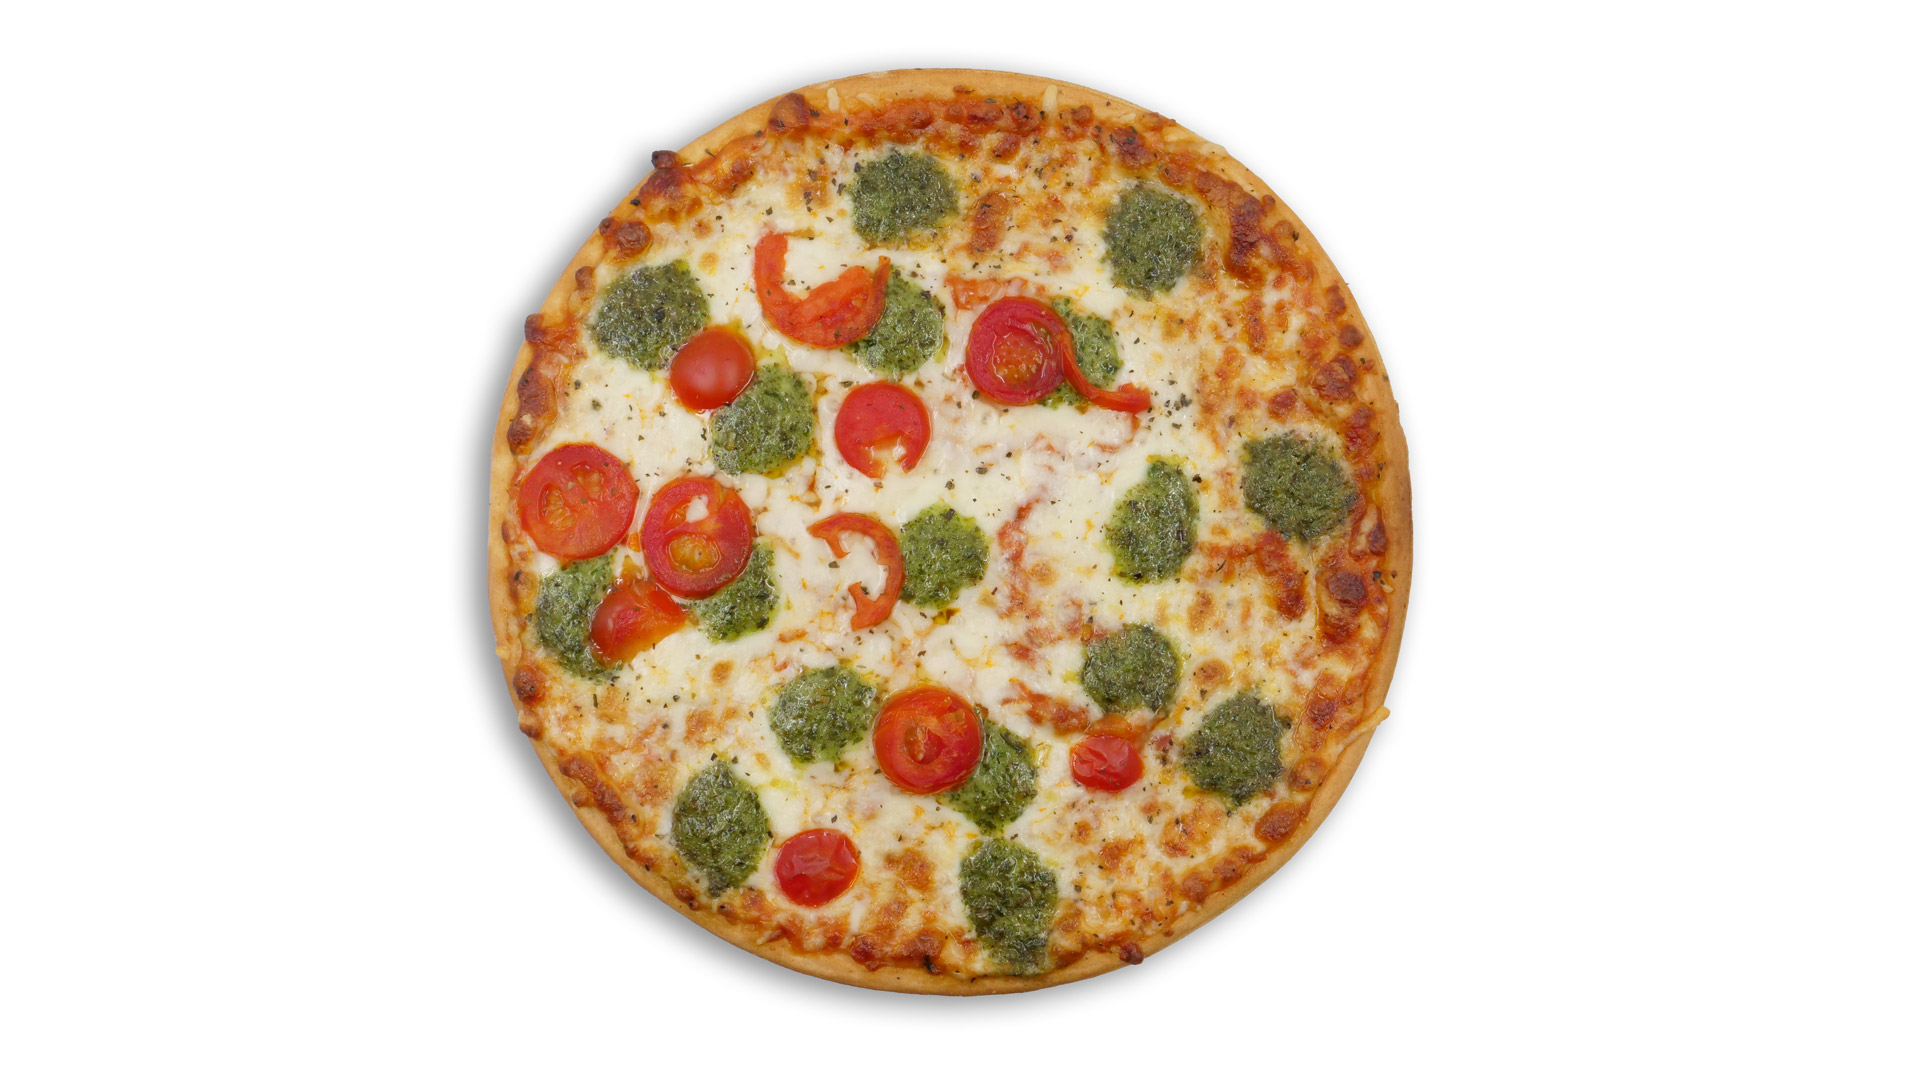 Pizza Margherita without gluten & more | initial temperature of ≈ -18 °C
Here again, a very decent quality could be achieved, but it did not leave a huge impression on anyone because the base of the pizza was unfortunately already much more brittle in some parts than it appeared from the outside. Finally, the pizza rim & more were already quite dark in places. The mozzarella melted and also took on a nice golden-white to golden-brown color. The tomatoes raised a few millimeters upward, in turn, showed no black traces at all. The flavor experience was wonderful all around, even if the texture of the pizza could still be improved in some respects.
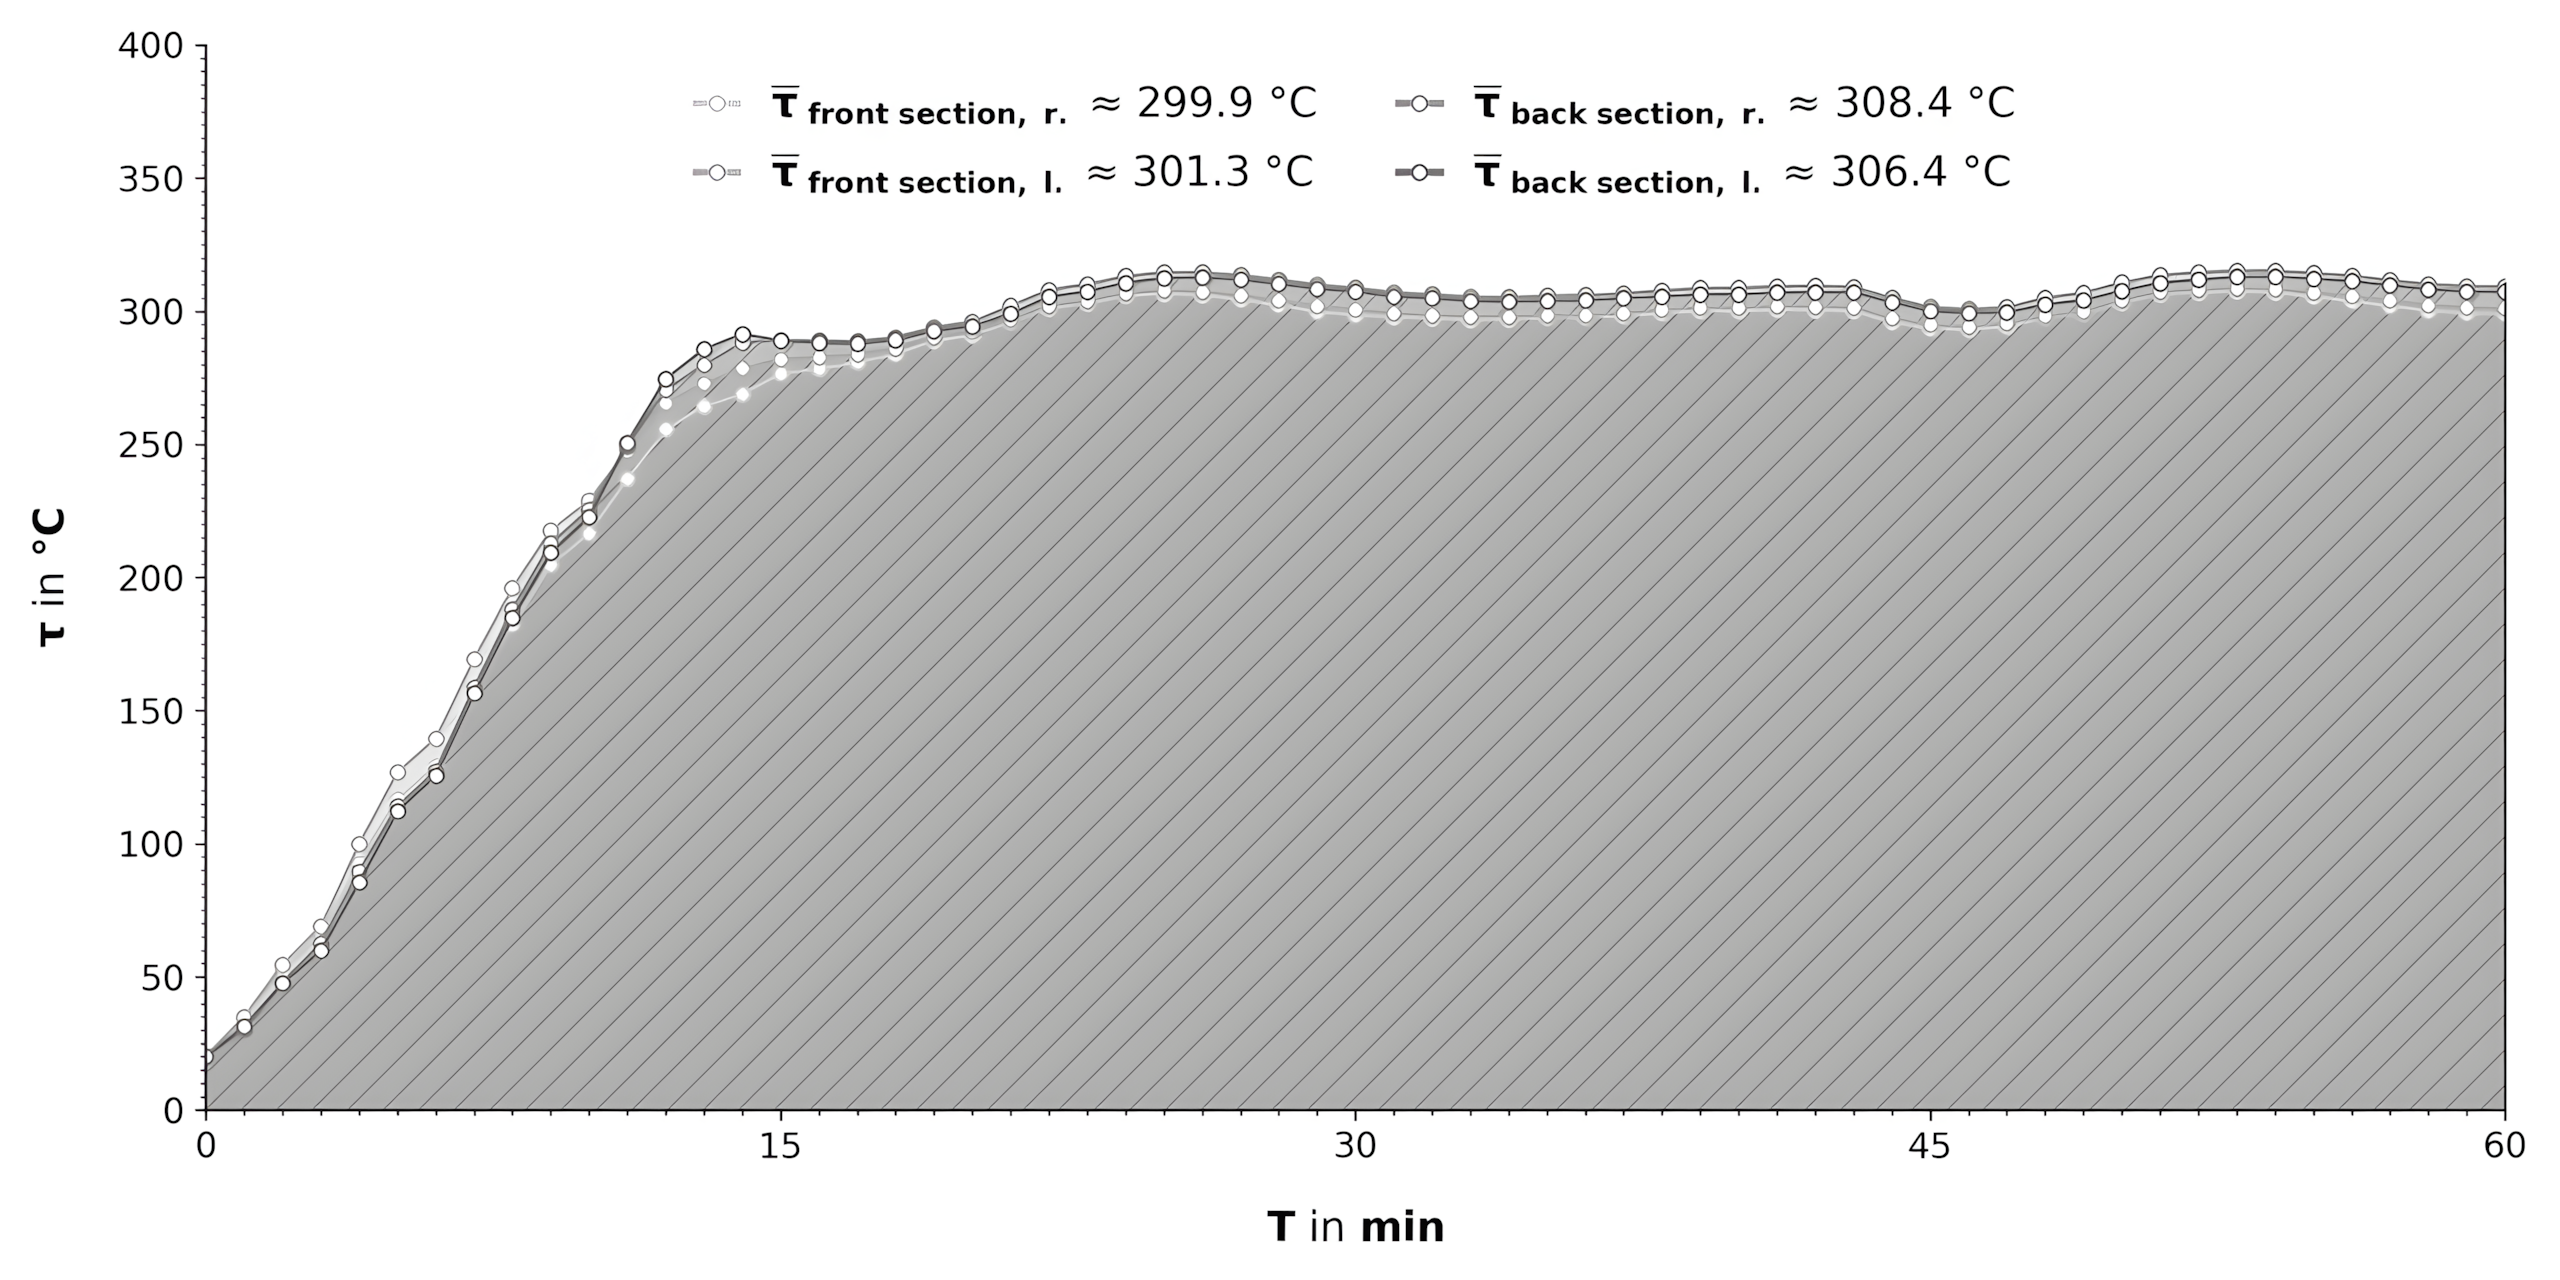 Temperature curves in the special PIZZA program
This graph shows very clearly that the temperature levels in the oven cavity of the BBI4S8HM1SK are never completely stable: they are indeed fairly uniform in all areas of the cavity, but fluctuate considerably during the cooking program. We illustrate this here using the model’s special pizza program, in which temperature peaks of max. ≈ 315.1 °C are reached. That the temperatures become so enormous is surprising because, as we already indicated in our impressions, the browning performance was unfortunately only mixed.
Technical data
| Manufacturer model | AEG TX7PB63FSB |
Gorenje GO66E PIZZA350C |
Bauknecht BBI4S8HM1SK |
|---|---|---|---|
| Size, weight & more | |||
| Model size (Hmax × Wmax × Dmax) |
59.4 × 59.6 × 56.9 cm | 59.5 × 59.5 × 56.4 cm | 59.7 × 59.5 × 56.4 cm |
| Model weight (mmax) |
38.0 kg | 36.6 kg | 36.9 kg |
| Oven cavity size (Hmax × Wmax × Dmax) |
35.4 × 47.8 × 42.5 cm | 38.6 × 47.2 × 42.2 cm | 36.6 × 46.8 × 42.6 cm |
| Oven cavity volume | 72.0 l | 77.0 l | 73.0 l |
| Oven cavity levels | 5 | 5 | 5 |
| Accessories | Baking tray (1 ×); Combination rack (1 ×); Pizza tray (1 ×, cast iron); Pizza peel (1 ×); Telescopic rails (2 ×, FlexiRunnersTM); Drip tray (1 ×) |
Baking tray (1 ×); Wire rack (1 ×); Pizza tray (1 ×); Pizza peel (1 ×); Telescopic rails (2 ×); Drip tray (1 ×) |
Air-fry cooking basket (1 ×); Baking tray (1 ×); Telescopic rails (2 ×); Drip tray (1 ×) |
| Functionality | |||
| Temperatures | 30 – 340 °C (in 5 °C steps) |
30 – 350 °C (in 1, 5, or 10 °C steps) |
30 – 310 °C (in 5 °C steps) |
| Cooking programs | 18 (DEFROST; BAKE BREAD; DEHYDRATE; PRESERVE; MOIST FAN; PROOFING; GRILL; HOT AIR; HOT-AIR GRILLING; HOT AIR & BOTTOM HEAT; LOW-TEMPERATURE COOKING; TOP/BOTTOM HEAT; PIZZAEXPERT; WARM PLATES; FROZEN DISHES; GRATINATE; BOTTOM HEAT; KEEP WARM) |
16 (BAKING FROZEN FOOD; HOT AIR; AIR FRYER (AIR FRY); AIR FRYER (AIR FRY) WITH STEAM; GRILL WITH HOT AIR; GRILL WITH BOTTOM HEAT AND FAN; LARGE-AREA GRILL; LARGE-AREA GRILL WITH FAN; LARGE-AREA GRILL AND BOTTOM HEAT; INTENSIVE BAKING; SLOW BAKING; TOP AND BOTTOM HEAT; TOP AND BOTTOM HEAT WITH FAN; PIZZA SYSTEM; GENTLE BAKING; TURBO BAKE) |
8 (AIR FRY; ECO; GRILL; HOT AIR; TOP & BOTTOM HEAT; RISING/PROOFING; TURBO GRILL; CONVECTION) |
| Automatic cooking programs | 97 (SWEET CASSEROLE; BAGUETTE, FRESH; BAGUETTE, FROZEN) etc. |
22 (APPLE CAKE; APPLE STRUDEL; RISE AND PROVE; SPONGE CAKE; PUFF PASTRY; BREAD; CUPCAKES; MEAT – SLOW COOKING; BAKED/GRILLED FISH; POULTRY – WHOLE; POULTRY – SMALLER PIECES; VEGETABLE SOUFFLÉ; ROAST BEEF; MEATLOAF; YEAST PASTRY; OVEN-BAKED BEEF STEAK; LASAGNA; BAKED POTATOES – POTATO WEDGES; PIZZA; CHOCOLATE SOUFFLÉ; PORK ROAST; SPRITZ COOKIES) |
6 (CASSEROLE; PASTRIES/CAKES; BREAD; STEAM+; MEAT; PIZZA) |
| Cleaning programs | 1 (PYROLYTIC CLEANING, 3 variants) |
1 (PYROLYSIS) |
1 (SMART CLEAN) |
| End-time preset | yes | yes | yes |
| Timer | Selection of start or end time (max. 23:59 h); Alarm clock (max. 23:59 h) |
Selection of start or end time (max. 23:59 h); Alarm clock (max. 23:59 h) |
Selection of start or end time (max. 23:59 h) |
| Power & noise | |||
| Power consumption (PØ or Pmax, measured) |
TOP/BOTTOM HEAT 200 °C: 918.0 or 3,121.3 W GRILL 300 °C: 1,467.2 or 2,152.9 W PIZZAEXPERT 340 °C: 1,662.9 or 3,005.9 W |
TOP AND BOTTOM HEAT 200 °C: 750.1 or 2,258.1 W GRILL 300 °C: 1,663.0 or 2,120.6 W PIZZAPLUS 350 °C: 1,780.6 or 2,086.8 W |
TOP & BOTTOM HEAT 200 °C: 889.8 or 2,875.0 W GRILL 3: 971.4 or 2,188.4 W PIZZA 310 °C: 1,615.5 or 2,948.2 W |
| Sound pressure level (LP max at d: 1.0 m, measured) |
TOP/BOTTOM HEAT 200 °C: 35.7 or 36.5 dB GRILL 300 °C: 35.9 or 36.5 dB PIZZAEXPERT 340 °C: 36.0 or 36.7 dB |
TOP AND BOTTOM HEAT 200 °C: 39.4 or 40.0 dB GRILL 300 °C: 40.8 or 47.2 dB PIZZAPLUS 350 °C: 41.0 or 47.4 dB |
TOP & BOTTOM HEAT 200 °C: 38.3 or 39.0 dB GRILL 3: 40.7 or 47.1 dB PIZZA 310 °C: 40.9 or 47.5 dB |
Evaluation
| Manufacturer model | % | AEG TX7PB63FSB |
Gorenje GO66E PIZZA350C |
Bauknecht BBI4S8HM1SK |
|---|---|---|---|---|
| Performance | 60 | 95.4 | 94.3 | 92.3 |
| Baking pizza | 40 | 97.5 | 94.3 | 91.3 |
| Temperature uniformity | 20 | 95.0 | 92.8 | 93.3 |
| Cooking, grilling, etc. Meat, fish, and vegetable dishes |
20 | 93.5 | 93.0 | 91.3 |
| Preheating | 20 | 93.5 | 97.3 | 94.3 |
| Handling | 15 | 94.4 | 93.1 | 91.7 |
| Operation | 50 | 94.3 | 92.0 | 91.3 |
| Cleaning | 35 | 95.0 | 95.0 | 92.0 |
| Instruction manual | 15 | 93.5 | 92.0 | 92.0 |
| Features | 10 | 95.0 | 92.7 | 89.3 |
| Operation | 10 | 96.3 | 93.1 | 93.5 |
| Power consumption | 80 | 95.9 | 92.9 | 93.4 |
| Noise emission | 20 | 98.0 | 93.7 | 94.1 |
| Safety | 5 | 98.0 | 98.0 | 98.0 |
| Bonus | – | – | – | |
| Malus | – | – | – | |
| Manufacturer’s RRP | 1,698.00 € | 699.00 € | 1,698.00 € | |
| Average market price As of 23.04.2026 |
882.00 € | 562.90 € | 501.81 € | |
| Value-for-money index | 9.24 | 5.99 | 5.44 | |
| Overall rating | 95.4 % (“excellent”) |
94.0 % (“excellent”) |
92.3 % (“excellent”) |
|
How did we test?
Here, the testers assessed what the model can actually do in practice: for example, they determined the model’s speed, i.e. which temperatures could be achieved in the oven cavity within which periods of time. Furthermore, preinstalled temperature sensors in the model were used to determine how stable the temperature levels are in the different parts of the oven cavity, that is, to what extent these temperatures differ from one another. Essential, however, is the quality of the cooking results achievable with the model. We therefore had the testers prepare various vegetable, meat, fish, etc. dishes in all of the model’s essential cooking programs and then evaluate them on the basis of an organoleptic scale (appearance, smell, taste, etc.).
Here, the way the model can be used was determined: the testers examined all the essential features surrounding the operating process. Important points included, for example, the type, dimensions, position, and response behavior of the buttons present, the type, dimensions, position, and readability of the display, and finally how cooking parameters, cooking programs, etc. can be selected by means of all these parts. But the quality of the model’s mechanics was also significant: we checked how the door can be lowered and raised again, whether the door can close on its own again, et cetera. In addition, it was assessed how all the parts of the model’s oven cavity can be cleaned after a cooking process has been completed. Finally, the testers also examined the quality of the German-language part of the instruction manual: it should cover all truly essential topics regarding the model, such as tips & tricks for the individual cooking programs, in an understandable way and thus enable all consumers to use the model properly, including its full range of functions.
Finally, the testers also assessed the accessories included with the model from the factory: during this, what mattered was not only the quantity of the accessories, but also and above all their quality during use, i.e. the actual value that the various parts of the accessory pack provide from the perspective of consumers. In addition, it was determined how many cooking programs, cooking parameters, etc. are available from the outset, how many different foods can be prepared using cooking programs devoted exclusively to individual foods, and which of the cooking parameters associated with a program can be changed and how.
The testers determined and subsequently evaluated the model’s power consumption both in the TOP & BOTTOM HEAT mode (with a temperature setting of 200 °C) and in the GRILL mode (with a temperature setting of 300 °C); we also included the power consumption in the respective pizza program. At the same time, the model’s A-weighted sound pressure level was measured in a sound-level measuring chamber insulated with melamine resin foam at a distance of one meter from the front of the model.
What mattered here above all was how warm the externally reachable parts of the model, that is the control panel, the door, etc., became during cooking. The testers therefore measured the temperature on all these parts of the model body after ≈ 30 min of cooking at the maximum temperature setting and thus determined whether any real risks existed.


Tested products
- AEG TX7PB63FSB
- Gorenje GO66E PIZZA350C
- Bauknecht BBI4S8HM1SK